


Assessments - 3, GPA: 4.3
(

 )
)
|
Fotos e especificações Sony NAS-E35HD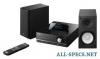 |


por este dispositivo também tem outras instruções :
Facilidade de uso
Do one of the following. . To erase the entire contents of the HDD Jukebox: Select “All Erase”. . To erase an album: Select the artist whose album you want to erase, select the album, and then select “All Track”. . To erase a track: Select the artist whose track you want to erase, select the album that contains the track, and then select the track. 3 Press ./. to select “OK?”, and then press ENTER. Entering text You can enter text using the supplied remote control, as you would with your mobile phone. . CLEAR button Press this button to erase a letter that was just entered. . Numeric/text buttons Press the button with the desired letter (ABC, DEF, etc.). Press repeatedly until the desired letter appears. . a/A button Press this button to switch between lowercase and uppercase letters. . button Press this button to go to the previous character. . ./././. buttons . ./. buttons Press the . button to move the cursor to the beginning of the text string and then the . button to move the cursor to the end of the text string. . ./. buttons Use these buttons to move the cursor. Entering text 1 Press the corresponding numeric/ text buttons to enter the desired characters. 2 Press . to move the cursor to the next letter. 3 Repeat steps 1 and 2 to input the text string. Other operations To Do the following Move the cursor Press ./.. Enter uppercase/ lowercase letters (“A” or “a”) Press a/A, or press the corresponding numeric/text button repeatedly. Switch the characters (uppercase letters and lowercase letters) Press a/A. Note On the unit, an underscore (“_”) will replace a space or a period (“ . ”) at the beginning of a track title, artist name, or album title, and a space or a period (“ . ”) at the end of an artist name or album title. 50GB Other settings Using the Sleep Timer You can set the Sleep Timer to turn off the unit after a certain period on time in 10-minute units. This function is convenient when you want to fall asleep to music or when going out. Press SLEEP. Each time you press the button, the duration display changes cyclically in 10-minute unit. If you select “AUTO”, the unit automatically turns off in 100 minutes. If during the next 100 minutes the playback of the disc, HDD Jukebox, or USB device ends, then the unit will automatically turn off at the same time. The pop-up menu for the Sleep Timer appears. AUTO . 90min . 80min . 70min . ... . 10min . OFF . AUTO… The Sleep Timer setting is completed simply by displaying the desired duration. The “SLEEP” indicator flashes when the Sleep Timer is active. 51GB Using the Play Timer You can set the timer to automatically turn the unit on and off at a specified time. The unit starts playing the HDD Jukebox, CD, tuner, DAB*, or USB device automatically when it turns on. Make sure the clock is correctly set beforehand (page 21). * For the UK model only 1 Prepare the sound source. Prepare the sound source and press VOLUME +/– to adjust the volume. To start from a specific track, create your own program (page 39). 2 Press CLOCK/TIMER SET repeatedly until “PLAY SET?” appears, and then press ENTER. “ON” appears and the hour indication flashes. 3 Set the time to start playing. Press ./. to select the hour, and then press . so that the minute indication flashes. Do the same to set the minute. To go back to the hour indication, press .. When you press ENTER after setting the minute, “OFF” appears and the hour indication flashes. 4 Set the time to stop playing. Repeat step 3. 5 Press ./. to select the desired sound source, and then press ENTER. 6 Press ... to turn off the unit. When the HDD Jukebox, CD, or USB device is set as the sound source About 60 seconds before the preset time, the unit will automatically turn on, and about 10 seconds before, the Play Timer will activate. If the unit is already on at about 60 seconds before, the Play Timer will not activate. When a radio broadcast or DAB service is set as the sound source About 15 seconds before the preset time the unit will automatically turn on and the Play Timer will activate. If the unit is already on at this time, the Play Timer will not activate. To continue playback after the Play Timer’s stop time You can cancel the Play Timer setting while the timer is operating. When you do this, the stop time is cancelled and playback continues. To cancel the setting, press CLOCK/TIMER SELECT repeatedly to select “TIMER OFF” while the Play Timer operation is in progress. To activate or check the timer again Press CLOCK/TIMER SELECT repeatedly to select “PLAY SELECT?”, and then press ENTER. To cancel the timer Press CLOCK/TIMER SELECT repeatedly to select “TIMER OFF”, and then press ENTER. To change the setting Start over from step 1. Tip The Play Timer setting remains as long as the setting is not cancelled manually. Using the Recording Timer You can set the timer to automatically turn the unit on and off at a specified time. The unit starts recording a radio program or a DAB service* automatically when it turns on. Ma...