


Assessments - 2, GPA: 5
(
 )
)
)
|
Fotos e especificações Alpine CDA-9815RB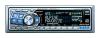 |


Facilidade de uso
The contents of the received message can only be read from the portable phone's display. 2 Press any one of the buttons on the unit to cancel the display.The buttons that are pressed will enter the mode or will be activated. Changer (Optional) Changer (Optional) SOURCE/ POWER -/J BAND/TEL. Select buttons (1 through 6) Controlling CD Changer (Optional) An optional 6-disc or 12-disc CD Changer may be connected to this unit if it is Ai-NET compatible. With a CD Changer connected to the Ai-NET input of this unit, the CD Changer will be controllable from this unit. Using the KCA-400C (Multi-Changer Switching device) or the KCA410C (Versatile Link Terminal) multiple changers can be controlled by this unit. See “Multi-Changer Selection” on this page for selecting the CD Changers. • The controls on this unit for CD Changer operation are operative only when a CD Changer is connected. • The DVD changer (optional) is controllable from this unit as well as the CD changer. 1 Press SOURCE/POWER to activate the CHANGER mode. The display shows the disc number and track number. • The source indicator varies depending on the connected source. • Press BAND/TEL. to switch the Disc mode in the CD/Changer mode. 2 Press the disc select buttons (1 through 6) corresponding to one of the discs loaded in the CD Changer. The selected disc number appears in the display and CD playback starts. • After selecting the desired disc, you can operate in the same way as for the CD player of this unit. For details, please see the CD/MP3/WMA section. • If the “FUNC” indicator (the underlined portion of the “FUNC” indicator for CDA-9811R) is illuminated, the disc select buttons become nonfunctional. When a 12-disc CD Changer is connected: To select discs numbered from 1 to 6, the procedure is the same as for the 6-disc CD Changer. To select discs numbered from 7 to 12, first press F/SETUP. This changes the “D” indicator to “d.” Then press the desired preset button. With F/SETUP activated, the preset buttons 1 to 6 will represent discs 7 to 12 respectively. Playing MP3 Files with the CD Changer (Optional) If you connect a changer compatible with MP3, you can play CD- ROMs, CD-Rs, and CD-RWs containing MP3 files on this unit. 1 Press SOURCE/POWER to switch to the MP3 Changer mode. 2 Press any one of the disc select buttons (1 through 6) corresponding to one of the discs loaded in the CD Changer. 3 To pause playback, press -/J. Pressing -/J again will resume playback. • The unit can play discs containing both audio data and MP3 data. • For operating MP3 with an MP3 compatible CD Changer, refer to “CD/MP3/WMA” pages 13 to 16. Multi-Changer Selection (Optional) Alpine's Ai-NET system will support up to 6 CD Changers. When operating two or more changers, the KCA-400C (Multi-Changer Switching device) must be used. If you use 1 Switching device, you can connect up to 4 CD Changers. If you use 2 Switching devices, you can connect up to 6 CD Changers. When using KCA-410C (Versatile Link Terminal), you can connect two changers and two external outputs (AUX). 1 Press SOURCE/POWER on this unit to activate the CD Changer mode. Alternatively, press SOURCE on the remote control (CDA9815RB/ CDA-9813R/CDA-9812RX only) to activate the CD Changer mode. BAND SOURCE 2 Press BAND/TEL. on this unit or the RUE-4187 to activate the CD Changer Selection mode. The CD Changer Selection mode remains active for 8 seconds. 3 Press BAND/TEL. until the desired CD Changer indicator appears on the display. Alternatively press BAND/TEL. on the Remote Control (CDA-9815RB/CDA-9813R/CDA-9812RX only) until the desired changer indicator appears on the display. • If the selected CD Changer is not connected, the display will show “NO CHGR” (“NO CHANGER” for CDA-9815RB). • To operate the selected changer, see “CD/MP3/WMA” (page 13). • For further details about the external input (AUX) when using KCA-410C, see “Setting the AUX Mode (V-Link)” on page 28. 35-EN Remote Control Remote Control 9 f UP Button Radio mode: SEEK (UP) button CD mode: Press this button to advance to the beginning of the next track. ! 9 Button 1Radio mode: Pressing this button will select, in descending order, stations programmed into the radio's 25 presets as shown below. 6 7 6 > 5 ... 1 > 6 8 CD Changer mode: DISC Select (DN) button 9 Press this button to select a disc in descending order. ! MP3/WMA mode: Press the Folder Select (DN) button to 3 select the folder. " 4 " Mute Button # Press this button to lower the volume by 20 dB instantly. Press this button again to cancel. # Audio Processor Button*1 CDA-9815RB/CDA-9813R onlyControls on Remote Control (CDA-9815RB/ Each press the button to switch the audio processor mode.CDA-9813R/CDA-9812RX only) For details, refer to “Operating the Audio Processor” as shown below. 1 Power Button CDA-9815RB/CDA-9813R/CDA-9812RX Press this button to turn the power on/off. Press the button to call the external audio processor mode when the external audio processor is connected.*2 2 Sour...
Este manual também é adequado para os modelos :Unidade - CDA-9813R (924.86 kb)
Unidade - CDA-9812RR (924.86 kb)
Unidade - CDA-9812RB (924.86 kb)
Unidade - CDA-9811R (924.86 kb)