


Assessments - 30, GPA: 4.6
(
 )
)
)
|
Fotos e especificações Pioneer DEH-1400UB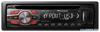 |


Facilidade de uso
Use in other areas may result in poor reception. The RDS (radio data system) function only operates in areas with broadcasting RDS signals for FM stations. CAUTIONThisproductisaclass1laserproductclassifiedundertheSafetyoflaserproducts, IEC60825-1:2007, andcontainsaclass1Mlasermodule. Toensurecontinuedsafety, donotremoveanycoversorattempttogainaccesstotheinsideoftheproduct. Referallservicingtoqualifiedpersonnel.CAUTION—CLASS 1M INVISIBLE LASER RADIATION WHEN OPEN, DO NOT VIEW DIRECTLY WITH OPTICAL INSTRUMENTS. CAUTION ! Do not allow this unit to come into contact with liquids. Electrical shock could result. Also, damage to this unit, smoke, and overheating could result from contact with liquids. ! The Pioneer CarStereo- Pass is for use only in Germany. ! Always keep the volume low enough to hear outside sounds. ! Avoid exposure to moisture. ! If the battery is disconnected or discharged, any preset memory will be erased. Note Function setting operations are completed even if the menu is cancelled before the operations are confirmed. About this manual In the following instructions, USB memories and USB audio players are collectively referred to as “ USB storage device” . Demo mode Important ! Failure to connect the red lead (ACC) of this unit to a terminal coupled with ignition switch on/off operations may lead to battery drain. ! Remember that if the feature demo continues operating when the car engine is turned off, it may drain battery power. The demo starts automatically if you do not operate this unit within about 30 seconds since the unit was last operated or if the ignition switch is set to ACC or ON while the unit is turned off. To cancel the demo mode, you need to display the initial settings. Select DEMO (demo display setting) and turn off the demo display. For details, refer to Initial settings on page 7. In case of trouble Should this unit fail to operate properly, please contact your dealer or nearest authorized PIONEER Service Station. Thank you for purchasing this PIONEER product To ensure proper use, please read through this manual before using this product. It is especially important that you read and observe WARN- INGs and CAUTIONs in this manual. Please keep the manual in a safe and accessible place for future reference. Ifyouwanttodisposethisproduct, donotmixitwithgeneralhouseholdwaste. Thereisaseparatecollectionsystemforusedelectronicproductsinaccordancewithlegislationthatrequirespropertreatment, recoveryandrecycling. Private households in the member states of the EU, in Switzerland and Norway may return their used electronic products free of charge to designated collection facilities or to a retailer (if you purchase a similar new one) . For countries not mentioned above, please contact your local authorities for the correct method of disposal. By doing so you will ensure that your disposed product undergoes the necessary treatment, recovery and recycling and thus prevent potential negative effects on the environment and human health. 2 En Operating this unit Head unit 12345 6 789a b cde PartPart1h(eject) 8(back/display) 2(list) 9c/d3MULTI-CONTROL( M.C. ) aBAND4SRC/ OFFb1to65DiscloadingslotcPTY6USBportdAUXinputjack(3.5mmstereojack) e Detach button CAUTION ! Use an optional Pioneer USB cable (CDU50E) to connect the USB audio player/USB memory as any device connected directly to the unit will protrude out from the unit and may be dangerous. ! Do not use unauthorized products. Display indication 1 3 5 78 2 46 IndicatorState ! Tuner: band and frequency Main dis! RDS: program service name, PTY information and 1 play secother literal information tion ! Built-in CD player and USB: elapsed playback time and text information 2(list) Thelistfunctionisbeingoperated. 3LOCLocalseektuningison. 4(TA) TAfunctionison. 5(TP) ATPstationistunedin. 6(repeat) Trackorfolderrepeatison. 7(random) Randomplayison. 8(soundre- Thesoundretrieverfunctionison. triever) Set up menu When you turn the ignition switch to ON after installation, set up menu appears on the display. You can set up the menu options below. Section Operating this unit 1 After installation of this unit, turn the ignition switch to ON. SET UP appears. 2 Turn M.C. to switch to YES. Press M.C. to select. # If you do not operate for 30 seconds, the set up menu will not be displayed. # If you prefer not to set up at this time, turn M.C. to switch to NO. Press to select. If you select NO, you cannot set up in the set up menu. 3 Perform the following procedures to set the menu. To proceed to the next menu option, you need to confirm your selection. CLOCK SET (setting the clock) 1 Turn M.C. to adjust hour. 2 Press M.C. to select minute. 3 Turn M.C. to adjust minute. 4 Press M.C. to confirm the selection. FM STEP (FM tuning step) Normally, the FM tuning step employed by seek tuning is 50 kHz. When AF or TA is on, the tuning step automatically changes to 100 kHz. It may be preferable to set the tuning step to 50 kHz when AF is on. ! The tuning step remains ...
Este manual também é adequado para os modelos :Unidade - DEH-1420UB (3.21 mb)
Unidade - DEH-1410UB (3.21 mb)
Unidade - DEH-1400UBB (3.21 mb)