


Assessments - 5, GPA: 4.6
(
 )
)
)
|
Fotos e especificações Pioneer DEH-1500UB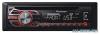 |


Facilidade de uso
to display the setting mode. 2 Press M.C. to select the segment of the clock display you wish to set. Hour— Minute 3 Turn M.C. to adjust the clock. 12H/24H (time notation) 1 Press M.C. to select the desired setting. 12H (12-hour clock) — 24H (24-hour clock) AUTO PI (auto PI seek) The unit can automatically search for a different station with the same programming, even during preset recall. 1 Press M.C. to turn Auto PI seek on or off. AUX (auxiliary input) Activate this setting when using an auxiliary device connected to this unit. 1 Press M.C. to turn AUX on or off. MUTE MODE (mute mode) 8 En Operating this unit Sound from this system is automatically muted or attenuated when a signal from equipment with a mute function is received. 1 Press M.C. to display the setting mode. 2 Turn M.C. to select the desired setting. You can select any one of the options in the following list: ! MUTE – Muting ! 20dB ATT – Attenuation ( 20dB ATT has a stronger effect than 10dB ATT) ! 10dB ATT – Attenuation PW SAVE (power saving) Switching this function on enables you to reduce the consumption of battery power. ! Turning on the source is the only operation al lowed when this function is on. 1 Press M.C. to turn the power save on or off. Switching the dimmer setting You can adjust the brightness of illumination. 1 Press M.C. to display the main menu. 2 Turn M.C. to display ILLUMI and press to select. 3 Press M.C. to select the desired setting. OFF (off) —ON (on) ! You can also change the dimmer setting by pressing and holding / DIMMER. Initial menu 1 Press and hold SRC/OFF until the unit turns off. 2 Press and hold SRC/OFF until the main menu appears in the display. 3 Turn M.C. to change the menu option and press to select INITIAL. 4 Turn M.C. to select the initial menu function. Once selected, the following initial menu functions can be adjusted. FM STEP (FM tuning step) Normally, the FM tuning step employed by seek tuning is 50 kHz. When AF or TA is on, the tuning step automatically changes to 100 kHz. It may be preferable to set the tuning step to 50 kHz when AF is on. ! The tuning step remains at 50 kHz during man ual tuning. 1 Press M.C. to select the FM tuning step. 50 (50 kHz) — 100 (100 kHz) SP-P/ O MODE (rear output and preout setting) The rear speaker leads output and the RCA output of this unit can be used to connect a full-range speaker or subwoofer. Select a suitable option for your connection. 1 Press M.C. to display the setting mode. 2 Turn M.C. to select the desired setting. You can select any one of the options in the following list: ! REAR/SUB. W – Select when there is a full- range speaker connected to the rear speaker leads output and there is a subwoofer connected to the RCA output. ! SUB.W/SUB. W – Select when there is a subwoofer connected directly to the rear speaker leads output without any auxiliary amp and there is a subwoofer connected to the RCA output. ! REAR/REAR – Select when there is a full- range speaker connected to the rear speaker leads output and the RCA output. If there is a full-range speaker connected to the rear speaker leads output and the RCA output is not used, you may select either REAR/SUB. W or REAR/REAR. System menu 1 Press and hold SRC/OFF until the unit turns off. 2 Press and hold SRC/OFF until the main menu appears in the display. 3 Turn M.C. to change the menu option and press to select SYSTEM. 4 Turn M.C. to select the system menu function. Once selected, the following system menu functions can be adjusted. Section 0203 Operating this unit For details, refer to System menu on page 7. Using an AUX source 1 Insert the stereo mini plug into the AUX input jack. 2 Press SRC/OFF to select AUX as the source. Installation Connections Important ! When installing this unit in a vehicle without an ACC (accessory) position on the ignition switch, failure to connect the red cable to the terminal that detects operation of the ignition key may result in battery drain. — Never wire the negative speaker cable directly to ground. — Never band together negative cables of multiple speakers. ! When this unit is on, control signals are sent through the blue/white cable. Connect this cable to the system remote control of an external power amp or the vehicle’s auto-antenna relay control terminal (max. 300 mA English ON START OFF 12 V DC) . If the vehicle is equipped with a glass antenna, connect it to the antenna booster power supply terminal. Note AUX cannot be selected unless the auxiliary set ting is turned on. For more details, refer to AUX (auxiliar y input) on the previous page. Switching the display Selecting the desired text information 1 Press DISP to cycle between the following: ! Source name ! Source name and clock If an unwanted display appears Turn off the unwanted display using the procedures listed below. 1 Press M.C. to display the main menu. 2 Turn M.C. to change the menu option and press to select SYSTEM. 3 Turn M.C. to display DEMO OFF and press to select. 4 Turn M.C. to switch t...
Este manual também é adequado para os modelos :Unidade - DEH-1500UBA (3.32 mb)
Unidade - DEH-1500UBB (3.32 mb)
Unidade - DEH-1500UBG (3.32 mb)