


Assessments - 5, GPA: 4.6
(
 )
)
)
|
Fotos e especificações Sony CDX-S2050EE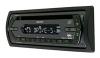 |


por este dispositivo também tem outras instruções :
Facilidade de uso
Attempting to do so may damage the unit. Do not use such discs. • You cannot play 8 cm CDs. 8 • Before playing, clean the discs with a commercially available cleaning cloth. Wipe each disc from the centre out. Do not use solvents such as benzine, thinner, commercially available cleaners, or antistatic spray intended for analogue discs. Notes on CD-R/CD-RW discs • Some CD-Rs/CD-RWs (depending on the equipment used for its recording or the condition of the disc) may not play on this unit. • You cannot play a CD-R/a CD-RW that is not finalized. If you have any questions or problems concerning your unit that are not covered in this manual, consult your nearest Sony dealer. Maintenance Fuse replacement When replacing the fuse, be sure to use one matching the amperage rating stated on the original fuse. If the fuse blows, check the power connection and replace the fuse. If the fuse blows again after replacement, there may be an internal malfunction. In such a case, consult your Fuse (10A) nearest Sony dealer. Cleaning the connectors The unit may not function properly if the connectors between the unit and the front panel are not clean. In order to prevent this, detach the front panel (page 4) and clean the connectors with a cotton swab dipped in alcohol. Do not apply too much force. Otherwise, the connectors may be damaged. Removing the unit 1 Remove the protection collar. o Detach the front panel (page 4). 2 Engage the release keys together with the protection collar. © Pull out the release keys to remove the protection collar. o Insert both release keys simultaneously until they click. © Slide the unit out of the mounting. Main unit Back of the front panel Notes • For safety, turn off the ignition before cleaning the connectors, and remove the key from the ignition switch. • Never touch the connectors directly with your fingers or with any metal device. 9 Specifications CD Player section Signal-to-noise ratio: 120 dB Frequency response: 10 - 20,000 Hz Wow and flutter: Below measurable limit Tuner section FM Tuning range: FM1/FM2: 87.5 - 108.0 MHz (at 50 kHz step) FM3: 65 - 74 MHz (at 30 kHz step) Aerial terminal: External aerial connector Intermediate frequency: 10.7 MHz/450 kHz Usable sensitivity: 9 dBf Selectivity: 75 dB at 400 kHz Signal-to-noise ratio: 67 dB (stereo), 69 dB (mono) Harmonic distortion at 1 kHz: 0.5 % (stereo), 0.3 % (mono) Separation: 35 dB at 1 kHz Frequency response: 30 - 15,000 Hz AM Tuning range: 531 - 1,602 kHz Aerial terminal: External aerial connector Intermediate frequency: 10.7 MHz/450 kHz Sensitivity: 30 ^V Power amplifier section Outputs: Speaker outputs (sure seal connectors) Speaker impedance: 4 - 8 ohms Maximum power output: 50 W x 4 (at 4 ohms) General Outputs: Audio outputs terminal (sub/rear switchable) Power aerial relay control terminal Power amplifier control terminal Input: Aerial input terminal Tone controls: Low: ±10 dB at 60 Hz (XPLOD) Mid: ±10 dB at 1 kHz (XPLOD) High: ±10 dB at 10 kHz (XPLOD) Power requirements: 12 V DC car battery (negative earth) Dimensions: Approx. 178 x 50 x 178 mm (w/h/d) Mounting dimensions: Approx. 182 x 53 x 161 mm (w/h/d) Mass: Approx. 1.2 kg Supplied accessories: Parts for installation and connections (1 set) Front panel case (1) Optional accessory: Card remote commander: RM-X114 Design and specifications are subject to change without notice. • Lead-free solder is used for soldering certain parts. (more than 80 %) • Halogenated flame retardants are not used in the certain printed wiring boards. • Halogenated flame retardants are not used in cabinets. • Packaging cushions do not use polystyrene foam. Troubleshooting The following checklist will help you remedy problems you may encounter with your unit. Before going through the checklist below, check the connection and operating procedures. General No power is being supplied to the unit. • Check the connection. If everything is in order, check the fuse. • If the unit is turned off and the display disappears, it cannot be operated with the remote commander. t Turn on the unit. The power aerial does not extend. The power aerial does not have a relay box. No sound. • The volume is too low. • The ATT function is activated, or the Telephone ATT function (when the interface cable of a car telephone is connected to the ATT lead) is activated. • The position of the fader control (FAD) is not set for a 2-speaker system. No beep sound. • The beep sound is cancelled (page 7). • An optional power amplifier is connected and you are not using the built-in amplifier. The contents of the memory have been erased. • The RESET button has been pressed. —► Store again into the memory. • The power connecting lead or battery has been disconnected. • The power connecting lead is not connected properly. Stored stations and correct time are erased. The fuse has blown. Makes noise when the position of the ignition key is switched. The...