


Assessments - 5, GPA: 4.6
(
 )
)
)
|
Fotos e especificações Hyundai H-CDM8057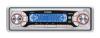 |


Facilidade de uso
Consult the dealer or an experienced technician for help. • Make sure you disconnect the power supply and aerial if you will not be using the system for a long period or during a thunderstorm. • Make sure you disconnect the power supply if the system appears to be working incorrectly, is making an unusual sound, has a strange smell, has smoke emitting from it or liquids have got inside it. Have a qualified technician check the system. • DO NOT raise the volume level too much, as this will block outside sounds, making driving dangerous. • Stop the car before performing any complicated operation. 3 Installation/Connections First complete the electrical connections, and then check them for correctness. Installation opening This unit can be install in any dashboard having an opening as shown below. The dashboard should be 4.75 - 5.56 mm thick in order to be able to support the unit. 1. Insert mounting collar into the dashboard, and bend the mounting tabs out with a screwdriver. Make sure that lock lever (^) is flush with the mounting collar (not projecting outward). 2. Secure the rear of the unit. After fixing mounting bolt and power connector, fix the rear of the unit to the car body by rubber cushion. 3. Insert trim plate. When you prepare to insert trim plate, please check it’s direction. Once it was up side down, it cannot be fixed. 4 Electrical connections Fuse 15A Antenna 3 1Q *W sQ 7| = 2Û 4Û eO »I 5Û 7| V- r 4 N - Connector ISO connector A Rear Line-out Rear / Gray ' Front Line-out Front Brown R(Red) L(Wtiite) R(Red) L(Whita) FUNCTION A B 1 Rear Right (+) - Purple 2 Rear Right {-} - Purple / Bledc Stripe 3 Front Right (+) - Gray 4 ACC+/red Front Right (-) - Gray / Black Stripe S Auto Antenna/blue Front Left (+)- White 6 Front Left (-) - White / Black Stipe 7 Battery 12Vi»/yellow Rear Left (+) - Green e Groun d/black Rear Left (-} - Green / Black Stripe Do not interchange the connection of the wiring!!! For some car models you may need to modify wiring of the supplied power cord as illustrated (modified wiring), or else the memory of the unit may be lost after you power off. Contact your authorized car dealer before installing this unit. 5 Panel controls 1. Multi-Control. Press to select VOL/BAS/TRE/BAL/FAD, rotate the Multi-Control to adjust level. Press more than 2 seconds to Menu mode. MP3 track / file search. ESP 12s/45s 2. Radio/Disc play (when disc is in)/AUX-in (optional). 3. Power on: press any button on the panel except A to turn on the unit. Press more than 2 seconds to power off. 4. Radio preset. Press to tune in a preset station. Hold for more than 2 seconds to store station. 5. LCD screen. 6. Mute: press again to cancel. 7. Radio preset scan (10 seconds). 6 8. Panel release. 9. AF (Alternative Frequencies) button. 10. Radio tune/ Track seek. 11. TA (Traffic Announcement) button. 12. PTY (Program Type) button. 13. Band switch: FM1 □ FM2 □ FM3 □ FM(OIRT) □ AM1 □ AM2. 14. MP3 track +10 up. 15. MP3 track -10 down. 16. Track random play. 17. Track repeat play. 18. Intro play (10 seconds). 19. Play/pause. Top play (press more than 2 seconds). 20. AMS: Radio preset scan/Radio Audio scan SEARCH: MP3 track/ file search. 21. Time display/Adjust. 22. Disc eject/LOAD. 23. Slot for disc. 24. RESET Button. Press the Reset button with a pointed object to reset the unit to the original status. Press the RESET button will erase the clock setting and stored stations. 25. Panel status indication: When the panel slide down it will light up. When the panel detached from body it will flash. 7 Button tips AMS: Auto Memory Store ~i Press briefly to scan the preset station 1-6 for 5 seconds each. Hold more than 2 seconds, the 6 strongest available station - will be automatically saved in the memory of preset button 1-6. Radio Radio tune by step: press less than 0.5 seconds. Radio seek automatic: press more than 0.5 seconds. Disc playback Track skip: press less than 0.5 seconds to go to the next or previous track. Track seek: press more than 0.5 seconds and hold it to forward or reverse back the track. Set clock Press DISP button, time displays. Press again more than 2 seconds, time display blinks. Rotate the Multi-Control clockwise to set hours. Rotate the Multi-Control anticlockwise to set minutes. 8 Menu Function Press the button more than 2 seconds to enter menu mode, then each press changes the mode as follows: TA mode - MASK mode - ESP mode — DSP mode — LOUD ON / OFF mode - BEEP ON / OFF— SEEK1/2 mode (only in tuner mode) — ST / MO mode (only in tuner mode) - LOCAL / DX mode (only in tuner mode) - VOL mode. TA mode Rotate the Multi-Control to choose TA ALARM or TA SEEK mode, When TA is turned on and no traffic program identification code has been received during the specified time, no TA/TP is displayed and according to the MENU SELECT, alarm is set off, or TA SEEK is activated. TA ALARM mode ...