


Assessments - 0, GPA: 0
(
 )
)
|
Fotos e especificações Olympus DS-7000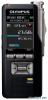 |


por este dispositivo também tem outras instruções :
Facilidade de uso
When [Sound] is selected: [On]: Activate the playback sound of Cue and Review. [Off]: Disables this function. When [Speed] is selected: You can adjust the Cue and Review speed level from [Speed 1] to [ Speed 5]. • Cue and Review speed level becomes faster as the numerical value becomes larger. Power Save: By default, the recorder will enter into Power Save mode if not used for more than 10 minutes. [5minutes ] [ 10minutes ] [ 30minutes] [1hour]: Set the length of time before the recorder will enter into Power Save mode. [Off]: Disables this function. • If any button is pressed, time count will restart. Time & Date: Setting the time and date beforehand enables easier file management. For details, see “ Setting time and date [Time & Date]”. USB Class: You can set the USB class of this recorder with a USB connection to [Composite ] or [ Storage Class]. [Composite]: In the 3 classes of Storage, USB audio and human interface device, USB connection is possible. While connected via USB in [ Composite], the recorder can be used as the USB speaker and the USB microphone in addition to storage class. [Storage Class]: USB connection is possible in only storage class. Reset Settings: To reset the menu settings to their default values use [Reset Settings] under [Device Menu], or use the ODMS and DSS Player software. Format: Cards that have been used in non- Olympus devices, or cards that are not recognized by the recorder, must be formatted before they can be used with the recorder. • Formatting the card will erase all the stored data, including locked files. For details, see “ Formatting the card [Format]”. Card Information: Memory card capacity and remaining card space for the cards in use will be displayed on the recorder. System Information: System information about the recorder like the [ Model ], [ Version] and [Serial No.] can be displayed. • For further details, a complete advanced version of the manual * (PDF format) is available for download at the OLYMPUS website. * Available in English, French or German. Formatting the card [Format] Cards that have been used in non- Olympus devices, or cards that are not recognized by the recorder, must be formatted before they can be used with the recorder. 1 Select [ Format] at the [ Device Menu] screen, then press the OK/MENU button. 2 Press the + or – button to select [SD Card] or [microSD Card], then press the OK/MENU button. 3 Press the + or – button to select [Start ] option. 4 Press the OK/MENU button to confirm [Start ] selection. 5 Press the + or – button again to select [ Start ] option. 6 Press the OK/MENU button again to initiate the formatting process. • [Format Done] displays when formatting ends. Notes: • The time required to format a card varies according to the capacity of the card to be formatted. Do not interrupt the formatting process with the following actions. Doing so may damage the data or the card. - Remove the card. - Remove the battery. • Formatting the card will erase all the stored data, including locked files. • When an unformatted card is inserted, the format menu will be displayed automatically. 14 • Locked SD cards cannot be initialized. • Memory cards will be formatted using quick format. Formatting the card will reset the information in file management, but the data inside the card may not be deleted completely. Be careful of data leakage when disposing or handing of the card. We recommend that you physically destroy the card when disposing of it. Customizing the recorder You can customize various settings of the recorder using the ODMS software. For more details, refer to the online help for ODMS software. Common settings: You can set the default values for each of the recorder’s Menu items. Administrative settings: . General Accessibility: • You can customize / adjust / set / configure various settings related to user authorization, such as prohibiting both file erasure and Menu settings. Splash Message: • You can set the contents that appear in the message which is displayed during start-up. Slide Switch Guide: • You can set the Slide Switch Guide, which indicates the position of the Slide Switch on the display, to either enabled or disabled. Alarm: • You can set occasions for the recorder’s alarm or beep noise to sound. . Display • You can select a default pattern for display from 4 patterns. • The way information is displayed on the LCD display can be customized for three different areas. – The upper part of the screen displays the recorder's basic functions. . The lower part of the screen can be used to display information on the file actually selected, like Author ID, Work Type and Option Item. . The right part of the screen can be used to display the Slide Switch Guide indicators. . Device Security You can customize / adjust / set / configure various settings related to the recorder’s device lock function. PIN code: • Password setting. Device Lock: • Device lock function On/Off. • Settings related to the timing for setting the devi...
Este manual também é adequado para os modelos :Ditado - DS‑7000 (2.84 mb)