


Assessments - 3, GPA: 4
(

 )
)
|
Fotos e especificações Sony ICD-PX312F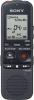 |


Facilidade de uso
To continue recording, first erase some of the files. Basic Operations 23 23 GB The remaining time The remaining time Flashing To record according to each recording situation (scene selection) According to various recording scene, you can change the recording items, such as REC Mode (page 94), Mic Sensitivity (page 94), etc., to the recommended settings in bulk. For details on scene selection, see page 32. 24 24 GB Listening Listening 1 Slide the HOLD•POWER ON/OFF switch towards the center to release the IC recorder from the HOLD status (page 11). The stop mode window appears. 2 Select the file you want to play (page 26). 3 Press N PLAY/STOP•ENTER. Operation indicator Playback will start soon, and the operation indicator will light in green. (When “LED” is set to “OFF” in the menu (page 96), the indicator does not light.) N PLAY/ STOP•ENTER 4 Press VOL –/+ to adjust the volume. VOL –/+ P Note When “AVLS” is set to “ON” in the menu (page 90) and the “AVLS” indicator lights, you cannot adjust the volume to a level that exceeds the AVLS-specified level. If you want to turn off the function and play back files at the original volume, use the menu to set “AVLS” to “OFF.” Basic Operations 25 25 GB To stop playback 1 Press x (stop). x To select a folder and file 1 Press (folder) to display the folder selection window. Current folder Current file number/the total number of files in the folder 2 Press –. or >+ to select a folder. When you purchase the IC recorder, there are 5 folders –., >+ already available ( FOLDER01-05). 26 26 GB 3 3 N PLAY/ STOP•ENTER 4Press –. or >+ to select a file. –., >+ Press >+ to select a file with a larger number. Press –. to select a file with a smaller number. Basic Operations 27 27 GB Other operations Other operations go back to the beginning of Press –. once.*1*2 the current file go back to previous files Press –. repeatedly. (During the stop mode, keep the button pressed to go back the files continuously.*3) skip to the next file Press >+ once.*1*2 skip to the succeeding files Press >+ repeatedly. (During the stop mode, keep the button pressed to skip the files continuously.*3) *1 When a track mark is set, the IC recorder goes backward or forward to the track mark before or after the current point (page 65). *2 These operations are for when “Easy Search” is set to “OFF” (page 50). *3 In the continuous searching mode, the IC recorder does not locate track marks. 28 28 GB About the display About the display File information Press DISP/MENU briefly to switch and check the file information. A file recorded using the IC recorder is displayed as follows. Elapsed time: The elapsed playback time of one file Remaining time: The maximum recording time during recording The remaining playback time of one file (in the stop mode or playback mode) Recording date/time: Date/time recorded : File name (in the stop mode or playback mode): Date_file number (e.g. 110101_001 or FM_110101_001) : Title (in the stop mode or playback mode): Date_file number (e.g. 110101_001 or FM_110101_001) : Artist name (in the playback mode): Artist name (e.g. My Recording) Basic Operations 29 29 GB Erasing Erasing Once a recording has been erased, you cannot retrieve it. Selecting a file and erasing it 1 Slide the HOLD•POWER ON/OFF switch towards the center to release the IC recorder from the HOLD status (page 11). The stop mode window appears. 2 Select the file you want to erase when the IC recorder is in the stop or playback mode (page 26). 3 Press ERASE. “Erase?” is displayed and the specified file is played back for confirmation. ERASE 4 Press –. or >+ to select “YES.” –., >+ 30 30 GB 5 5 N PLAY/ The “Erasing...” animation appears in the display STOP•ENTER window and the selected file will be erased. When a file is erased, the remaining files will advance so that there will be no space between files. The 1st file has been erased and the following files have had their numbers reduced by 1. The total number of files in the folder is reduced from 05 to 04. To cancel erasing 1 Select “NO” in step 4 of “Selecting a file and erasing it,” and then press N PLAY/STOP•ENTER. N PLAY/ STOP•ENTER To erase another file Proceed with steps 2 through 5 in “Selecting a file and erasing it.” To erase a part of a file Divide the file into two files first (page 69), and then proceed with steps 3 through 5 in “Selecting a file and erasing it” after selecting the file you want to erase. Basic Operations 31 31 GB Other Recording Operations Other Recording Operations Selecting a recording scene for each situation SCENE N PLAY/ STOP•ENTER –., >+ According to various recording scene, you can change the items for recording, such as REC Mode (page 94), Mic Sensitivity (page 94), etc., to the recommended settings in bulk. 1 Press SCENE in the stop mode. The Scene Select window will be displayed. 2 Press –. or >+ to select a scene you want, and then press N PLAY/ STOP•ENTER. The indicator corresponding to the selected scene is displayed. Meeting (...
Este manual também é adequado para os modelos :Ditado - ICD-PX312 (1.45 mb)
Ditado - ICD-PX312M (1.45 mb)