


Assessments - 1, GPA: 4
(

 )
)
|
Fotos e especificações Makita 6906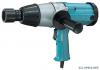 |


Facilidade de uso
If you use this tool unsafely or incorrectly, you can suffer serious personal injury. 1. Hold tool by insulated gripping surfaces 4. Hold the tool firmly. when performing an operation where the 5. Always be sure you have a firm footing. cutting tool may contact hidden wiring or Be sure no one is below when using the its own cord. Contact with a “live” wire will tool in high locations. make exposed metal parts of tool “live” and 6. The proper fastening torque may differ shock the operator. depending upon the kind or size of the 2. Wear ear protectors. bolt. Check the torque with a torque 3. Check the socket carefully for wear, wrench. cracks or damage before installation. SAVE THESE INSTRUCTIONS WARNING: MISUSE or failure to follow the safety rules stated in this instruction manual may cause serious personal injury. FUNCTIONAL DESCRIPTION FUNCTIONAL DESCRIPTION 1. Switch trigger ASSEMBLY 002332 1 1. Side grip CAUTION: • Always be sure that the tool is switched off and unplugged before adjusting or checking function on the tool. Switch action CAUTION: • Before plugging in the tool, always check to see that the switch trigger actuates properly and returns to the “OFF” position when released. • Change the direction of rotation only when the tool comes to a complete stop. Changing it before the tool stops may damage the tool. The switch is reversible, providing either clockwise or counterclockwise rotation. To start the tool, simply pull the lower part of the switch trigger for clockwise or the upper part for counterclockwise. Release the switch trigger to stop. CAUTION: • Always be sure that the tool is switched off and unplugged before carrying out any work on the tool. Installing side grip (auxiliary handle) Fit the side grip into the groove on the middle of the hammer case and fasten securely. Selecting correct socket Always use the correct size socket for bolts and nuts. An incorrect size socket will result in inaccurate and inconsistent fastening torque and/or damage to the bolt or nut. 1 2 1 2 Installing or removing socket To install the socket, push it onto the anvil of the tool until it locks into place. To remove the socket, simply pull it off. 1. Socket 2. Anvil The proper fastening torque may differ depending upon the OPERATION kind or size of the bolt, the material of the workpiece to be fastened, etc. The relation between fastening torque and fastening time is shown in the figure. N.m (ft.lbs) 700 (505) 600 (433) 500 (361) 400 (288) 300 (216) 200 (144) 100 (72) Rated voltage 90% of rated voltage 0 12345678 (S) Fastening torque Fastening time Hold the tool firmly and place the socket over the bolt or nut. Turn the tool on and fasten for the proper fastening time. NOTE: • Hold the tool pointed straight at the bolt or nut. • Excessive fastening torque may damage the bolt/nut or socket. Before starting your job, always perform a test operation to determine the proper fastening time for your bolt or nut. The fastening torque is affected by a wide variety of factors including the following. After fastening, always check the torque with a torque wrench. The fastening torque is affected by a wide variety of factors including the following. After fastening, always check the torque with a torque wrench. . Voltage Voltage drop will cause a reduction in the fastening torque. 2. Socket • Failure to use the correct size socket will cause a reduction in the fastening torque. • A worn socket ( wear on the hex end or square end ) will cause a reduction in the fastening torque. 3. Bolt • Even though the torque coefficient and the class of bolt are the same, the proper fastening torque will differ according to the diameter of bolt. • Even though the diameters of bolts are the same, the proper fastening torque will differ according to the torque coefficient, the class of bolt and the bolt length. 4. The use of the universal joint or the extension bar somewhat reduces the fastening force of the impact wrench. Compensate by fastening for a longer period of time. 5. The manner of holding the tool or the material of driving position to be fastened will affect the torque. MAINTENANCE CAUTION: • Always be sure that the tool is switched off and unplugged before attempting to perform inspection or maintenance. 001145 Replacing carbon brushes Remove and check the carbon brushes regularly. Replace when they wear down to the limit mark. Keep the carbon brushes clean and free to slip in the holders. Both carbon brushes should be replaced at the same time. Use only identical carbon brushes. 1 1. Limit mark 1 2 1 2 Brush holder cap 2. Screwdriver 002373 Use a screwdriver to remove the brush holder caps. Take out the worn carbon brushes, insert the new ones and secure the brush holder caps. To maintain product SAFETY and RELIABILITY, repairs, any other maintenance or adjustment should be performed by Makita Authorized or Factory Service Centers, always using Makita replacement parts. ACCESSORIES CAUTION: • These accessories or attac...