


Assessments - 2, GPA: 4
(

 )
)
|
Fotos e especificações Canon PowerShot A200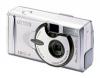 |


Facilidade de uso
• Please refer to the "Software Starter Guide" for information on installing the software and downloading images. • Please read the "Quick Start" section on the following page for a simple explanation of shooting, replaying and erasing. • Please also read the "Printer User Guide" included with your Canon printer. ENGLISH CDI-E039-010 ©2002 CANON INC. PRINTED IN MALAYSIA Camera User Guide This guide covers both the PowerShot A200 and PowerShot A100 digital cameras. • Please read the "Read this First" section (p.11). • Please refer to the "Software Starter Guide" for information on installing the software and downloading images. • Please read the "Quick Start" section on the following page for a simple explanation of shooting, replaying and erasing. • Please also read the "Printer User Guide" included with your Canon printer. ENGLISH CDI-E039-010 ©2002 CANON INC. PRINTED IN MALAYSIA Quick Start Install the batteries and CF card (p. 19) Open the CF card slot / battery cover and insert a CF card and batteries. 1 Open the lens cover to turn the power on (p. 27) 2 tion (p. 59) for viewing other images already shot. The green indicator next to the optical viewfinder starts To erase flashing green. • When the date / time set up menu are displayed, refer to page 24. • For information about how to change 3 Press the button Confirm that [Erase] is the language, see “Setting the while the image is selected and press Language” (p. 25). displayed. the SET button. Set the focus (p. 34) Installing the software Software Starter Guide When you have finished Aim the camera at the subject, and lightly press Connecting the camera to a computer This guide shooting photos the shutter button half way. The camera beeps Downloading images to a computer Software Starter Guide twice when it is focused. 2 3 Shoot the image (p. 34) Press the shutter button all the way down. The camera beeps once when the image is shot. View the image The recorded image will be displayed for approxi- mately 3 seconds (p. 35). Refer to [Replaying] sec- 4 5 . Components Guide .Components Guide . Components Guide .Components Guide Front View Shutter Button (p. 34) Optical Viewfinder Window (p. 33) AF-assist Beam (p. 34) Red-Eye Reduction Lamp (p. 43) Self-Timer Lamp (p. 46) Flash (p. 43) Date Battery Holder (p. 95) Terminal Cover (p. 85) DIGITAL Terminal* (p. 85) DC IN Terminal (p. 99) Lens Lens Cover (p. 27) * For connecting your camera to a computer via a USB Interface Cable IFC-300PCU (supplied with camera) (p.85) or connecting to a Direct Print Function compliant printer via Direct Interface Cable DIF-100 (supplied with printer) (p. 69). (For a list of printers that work with this camera, please refer to the System Map.) Back View Viewfinder (p. 33) LCD Monitor (p. 29) Tripod Socket Strap Eyelet* CF Card Slot / Battery Cover (p. 19) * Be careful when carrying the camera by the strap. Don’t swing the camera on the strap, and keep the strap and camera body clear of obstacles. About this Camera User Guide. Components Guide .About this Camera User Guide. Components Guide . Operation Panel DISP WB MENU SET ON Indicators MENU Button (p. 36) DISP (Display) Button (p. 29) (Single Image Erase) Button (p. 65) Zoom Button (p. 35) Power / Replay Button (p. 27) (Exposure) / WB (White Balance) / (Photo Effects) / (Up) Button (pp. 52, 53, 54) Flash / (Right) Button (p. 43) (Continuous) / (Self-Timer) / (Down) Button (p. 46) (Macro) / (Infinity) / (Left) Button (p. 45) SET Button Indicators The upper indicator comes on when you open the lens cover or whenever you press the shutter button. Flashing Orange: Ready to shoot, (camera shake warning) / charging the flash (at LCD ON). Lower Indicator Yellow: Macro / Infinity modes Flashing Yellow: Focusing difficulty (Although you can press the shutter button, it is recommended to use the focus lock to shoot (p. 50)). Symbols Used Icons on the right end of title bars show the operations mode. As in the example below, the shooting mode should be set to , , or . Shooting Adjusting the Exposure How do I navigate the menus? Selecting Menus and Settings (p. 36) What settings are available under each function? Functions Available in Each Shooting and Mode (p. 57) Will my settings remain in effect even after I've turned the Question? Look here first. This mark denotes issues that may affect the camera’s operation. This mark denotes additional topics that complement the basic operating procedures. Upper Indicator Green: Ready to shoot, or ready to communicate with your computer. Flashing Green: Camera is starting up, reading the CF card, erasing data on the CF card, or transmitting data to your computer. Orange: Ready to shoot, using the flash. camera off? How do I go about printing? What functions are available through the menus? About Printing (p. 67) Rec. Menu (p. 87) Play Menu (p. 89) Set up Menu (p. 90) . Table of Contents .Table of Contents. Table of Contents .Table of Contents Quick Start 2 Components Guide 4 Front View ..........