


Assessments - 3, GPA: 4.3
(

 )
)
|
Fotos e especificações Canon PowerShot D20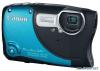 |


por este dispositivo também tem outras instruções :


Facilidade de uso
Choose an image to erase. • Press the qr buttons to choose an image. Erase the image. • Press the m button, and then choose ain the menu (p. 41). • After [Erase?] is displayed, press the qr buttons to choose [Erase], and then press the m button. • The current image is now erased. • To cancel erasure, press the qr buttons to choose [Cancel], and then press the m button. Erasing All Images You can erase all images at once. Be careful when erasing images, because they cannot be recovered. Protected images (p. 134) cannot be erased. Choosing a Selection Method Access the setting screen. • Press the n button, and then choose [Erase] on the 1 tab (p. 42). Choose a selection method. • Choose a menu item and a setting as desired (p. 42). • Press the opbuttons to choose a selection method, and then press the m button. • To return to the menu screen, press the n button. Erasing Images Choosing Images Individually Selecting a Range Choose [Select]. • Following step 2 on p. 138, choose [Select] and press the m button. Choose an image. • Once you follow step 2 on p. 135 to choose an image, is displayed. • To cancel erasure, press the m button again. is no longer displayed. • Repeat this process to specify other images. Erase the image. • Press the n button. A confirmation message is displayed. • Press the qr buttons to choose [OK], and then press the m button. Choose [Select Range]. • Following step 2 on p. 138, choose [Select Range] and press the m button. Choose images. • Follow steps 2 – 3 on p. 136 to specify images. Erase the images. • Press the p button to choose [Erase], and then press the m button. Rotating Images Specifying All Images at Once Choose [Select All Images]. • Following step 2 on p. 138, choose [Select All Images] and press the m button. Erase the images. • Press the qr buttons to choose [OK], and then press the m button. Still Images Movies Rotating Images Change the orientation of images and save them as follows. Choose \. • Press the m button, and then choose \in the menu (p. 41). Rotate the image. • Press the qor r button, depending on the desired direction. Each time you press the button, the image is rotated 90°. Press the m button to complete the setting. Rotating Images Using the Menu Choose [Rotate]. • Press the n button, and then choose [Rotate] on the 1 tab (p. 42). Rotate the image. • Press the qr buttons to choose an image. • The image is rotated 90° each time you press the m button. • To return to the menu screen, press the n button. • Movies with an image quality of or cannot be rotated. • Rotation is not possible when [Auto Rotate] is set to [Off] (p. 141). Deactivating Auto Rotation Follow these steps to deactivate automatic rotation by the camera, which rotates images shot in vertical orientation so they are displayed vertically on the camera. • Press the n button, choose [Auto Rotate] on the 1 tab, and then choose [Off] (p. 42). • Images cannot be rotated (p. 140) when you set [Auto Rotate] to [Off]. Additionally, images already rotated will be displayed in the original orientation. • In Smart Shuffle (p. 133) mode, even if [Auto Rotate] is set to [Off], images shot vertically will be displayed vertically, and rotated images will be displayed in the rotated orientation. Image Categories Still Images Movies You can tag images as favorites or assign them to My Category (p. 143) groups. By choosing a category in image search, you can restrict the following operations to all of those images. • Viewing (p.122), Viewing Slideshows (p.132), Protecting Images (p.134), Erasing Images (p.138), Adding Images to the Print List (DPOF) (p.184), Adding Images to a Photobook (p.188) Tagging Images as Favorites Using the Menu • Press the m button, and then choose in the menu (p. 41). • [Tagged as Favorite] is displayed. • To untag the image, repeat this process and choose again, and then press the m button. Choose [Favorites]. • Press the n button, and then choose [Favorites] on the 1 tab (p. 42). Choose an image. • Press the qr buttons to choose an image, and then press the m button. is displayed. • To untag the image, press the m button again. is no longer displayed. • Repeat this process to choose additional images. Image Categories Finish the setup process. • Press the n button. A confirmation message is displayed. • Press the qr buttons to choose [OK], and then press the m button. • Images will not be tagged as favorites if you switch to Shooting mode or turn the camera off before finishing the setup process in step 3. • Favorite images will have a three-star rating ( ) when transferred to computers running Windows 7 or Windows Vista. (Does not apply to movies.) Organizing Images by Category (My Category) You can organize images into categories. Note that images are automatically categorized at the time of shooting, according to shooting conditions. : Images with detected faces, or images shot in Imode. : Images detected as , , or in A mode, or images shot in mode. : Images shot in S, , P, or...