


Assessments - 0, GPA: 0
(
 )
)
|
Fotos e especificações Olympus FE-3000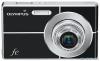 |


por este dispositivo também tem outras instruções :


Facilidade de uso
1 Press the K button a few times to set s. PORTRAIT SET OKMENUEXIT .An explanation of the selected mode is displayed while the Ebutton is pressed and held. 2 Use klto select the best shooting mode for the scene, and press the Bbutton. 10M4INNORM Icon indicating the scene mode that is set In smodes, the optimum shooting settings are pre-programmed for specific shooting scenes. For this reason, settings may not be changed in some modes. *1 When the subject is dark, noise reduction is automatically activated. This approximately doubles the shooting time during which no other pictures can be taken. *2 Available in the FE-3010/X-895 only. Be sure to use an underwater case. *3 When set to [l UNDERWATER WIDE2], the focus distance is automatically fixed to approx. 5.0 m (16.4 ft.). Shooting with automatic settings (Gmode) According to the scene, the camera automatically selects the ideal shooting mode from [PORTRAIT]/[LANDSCAPE]/ [NIGHT+PORTRAIT]/[SPORT]/[MACRO]. This is a fully automatic mode that allows the user to take pictures using the best mode for the shooting scene simply by pressing the shutter button. The shooting menu options cannot be specifi ed in G mode. 1 Press the K button a few times to set G. The icon changes depending on the scene that the camera automatically selects. 10M4INNORM iAUTO EN 17 .Press the shutter button halfway down or press the gbutton to check which shooting mode the camera has automatically selected. In some cases, the camera may not select the desired shooting mode. When the camera cannot identify which is the optimal mode, P mode will be selected. Using the digital image stabilization mode (hmode) This mode enables the user to reduce blur that is caused by camera shake and subject movement. 1 Press the K button a few times to set h. h mode indicator 4INNORM 10M By switching to any of other shooting modes, most function settings in h mode will change to the default settings of the newly selected mode. Shooting movies (nmode) 1 Press the K button a few times to set n. A mode indicator 00:3400:34IN QVGAQVGA1515 2 Press the shutter button halfway down to focus on the subject, and gently press the button all the way down to start recording. Lights up red when recording Press fully 00:3400:34 RECREC Remaining recording time (p. 47) Press halfway 3 Gently press the shutter button all the way down to stop recording. Audio is recorded simultaneously with the movie. During audio recording, only the digital zoom can be used. To record a movie with optical zoom, set [R] (movies) (p. 25) to [OFF]. 18 EN Using Shooting Functions Using thezoom Using theflash Pressing the zoom buttons adjusts the shooting The flash functions can be selected to best range. match the shooting conditions. Pressing the wide Pressing the telephoto 1 Press the # button. (W) button (T) button 10MP 4INNORM 10MP 4INNORM P AUTO OK OKOK SET SETSET FLASH FLASHFLASH AUT AUTAUT O OO AUTO ! # $ Optical zoom: 3x, digital zoom: 4x2 Use mntand presZoom bar o select the setting option, s the Bbutton to set. Use of h mode (p. 18) is recommended when shooting with the telephoto zoom. Option Description The zoom bar appearance identifies the status of the digital zoom. FLASH AUTO The flash fires automatically in low-light or backlight conditions. When using REDEYE optical zoom and Pre-flashes are emitted to reduce the occurrence of red eye in your photos. Digital zoomOptical zoom FILL IN digital zoom The flash fires regardless of the available light. rangerange FLASH OFF The flash does not fire. EN 19 Adjusting the brightness (Exposure compensation) The standard brightness (appropriate exposure) set by the camera based on the shooting mode (except for G) can be adjusted brighter or darker to obtain a desired shot. 1 Press the F button. Shooting closeups (Macro shooting) This function enables the camera to focus and shoot subjects at close distances. 1 Press the & button. P OFF OK OKOK SET SETSET OFF OFFOFF OFF% & 0.00.0+0.3+0.3+0.7+0.7+1.0+1.0EXPOSURECOMP. 2 Use mnto select the setting option, Exposure compensation value and press the Bbutton to set. 2 Use klmnto select the desired brightness, and press the Bbutton. OFF Macro mode is deactivated. This enables shooting as close as MACRO 10 cm/3.9 in.*1 (60 cm/23.6 in.*2) to the subject. This enables shooting as close as SUPER MACRO*3 5 cm/2.0 in. to the subject. Option Description *1 When the zoom is at the widest (W) position. *2 When the zoom is at the most telephoto (T) position. *3 The zoom is automatically fixed. The flash (p. 19) and zoom (p. 19) cannot be set during super macro shooting. 20 EN Using the self-timer Increasing the brightness ofthe monitor (Backlight boost) After the shutter button is pressed all the way down, the picture is taken after a short delay. Press .in shooting mode. The monitor becomes brighter. If there is no operation for 101 Press the Y button. seconds, the previous brightness resumes. P Y OK OKOK SET OFF ON SELFTIMER 10M OFF NORM 2 Use klto select ...
Este manual também é adequado para os modelos :Câmaras - FE-3010 (1.49 mb)