


Assessments - 0, GPA: 0
(
 )
)
|
Fotos e especificações Olympus VR-325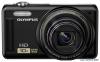 |


Facilidade de uso
............47 HRVATSKI .............52 MAGYAR ...............57 ITALIANO ..............62 LIETUVIU ...............67 LATVIESU .............72 NEDERLANDS ......77 NORSK ..................82 POLSKI ..................87 PORTUGUES ........92 ROMANIA ..............97 РУССКИЙ ............102 SVENSKA ............107 SLOVENSCINA ...112 SLOVENCINA......117 СРПСКИ ..............122 TURKCE ..............127 УКРАЇНСЬКА ......132 ..................141 ..................146 VR-330/D-730 VR-320/D-725 VR-310/D-720 VR-325 DIGITAL CAMERA 2 EN . Thank you for purchasing an Olympus digital camera. Please read these instructions carefully. . Please take test shots to get accustomed to your camera before taking important photographs. . Olympus reserves the right to update or modify information contained in this manual. . The screen and camera illustrations shown in this manual may differ from the actual product. Unless otherwise specifi ed, the explanation about these illustrations is provided for VR-330/D-730. . VR-320/VR-325: Operations for the two models are identical. The camera you purchased is provided with the CD-ROM Instruction Manual. For detailed information on all features and Provisions of warranty, please refer to the CD-ROM. Adobe Reader is required to view the Instruction Manual. Inserting the battery and the SD/SDHC memory card (sold separately) Always use SD/SDHC memory cards with this camera. Do not insert any other types of memory card. 1 2 1 Battery/card compartment cover 2 Write-protect switch Battery lock knob Insert the battery with the B symbol on the same side as the battery lock knob. Damage to the battery exterior (scratches, etc.) may produce heat or an explosion. Insert the battery while sliding the battery lock knob in the direction of the arrow. Slide the battery lock knob in the direction of the arrow to unlock, and then remove the battery. Turn off the camera before opening the battery/card compartment cover. When using the camera, be sure to close the battery/ card compartment cover. Insert the card straight until it clicks into place. Do not touch the contact area directly. 3 1 2 Charging the battery and setting up using the supplied CD Connect the camera to the computer to charge the battery and use the supplied CD for setup. User registration using the supplied CD and installation of [ib] computer software is available on Windows computers only. The camera battery can be charged while the camera is connected to a computer. Windows We recommend that you use a computer equipped with Windows XP (Service Pack 2 or later), Windows Vista, or Windows 7. 1 Insert the supplied CD in a CD-ROM drive. EN 3 Windows XP A “Setup” dialog will be displayed. Windows Vista/Windows 7 An Autorun dialog will be displayed. Click “OLYMPUS Setup” to display the “Setup” dialog. If the “Setup” dialog is not displayed, select “My Computer” (Windows XP) or “Computer” (Windows Vista/Windows 7) from the start menu. Double-click the CD-ROM (OLYMPUS Setup) icon to open the “OLYMPUS Setup” window and then double-click “Launcher.exe”. If a “User Account Control” dialog is displayed, click “Yes” or “Continue”. 2 Follow the on-screen instructions on your computer. If nothing is displayed on the camera screen even after connecting the camera to the computer, the battery may be exhausted. Leave the camera connected to the computer until the battery has charged, then disconnect and reconnect the camera. Connecting the camera Indicator lamp USB cable (supplied) Computer (on and running) Multi-connector 3 Register your Olympus product. Click the “Registration” button and follow the onscreen instructions. . . . 4 Install the camera manual. Click the “Camera Instruction Manual” button and follow the on-screen instructions. Macintosh Mac OS X v10.4.11–v10.6 1 Insert the supplied CD in a CD-ROM drive. Double-click the CD (OLYMPUS Setup) icon on the desktop. 2 Copy the camera manual. Click the “Camera Instruction Manual” button to open the folder containing the camera manuals. Copy the manual for your language to the computer. Charging the battery with the supplied USB-AC adapter The included F-2AC USB-AC adapter (hereafter referred to as USB-AC adapter) differs depending on the region where you purchased the camera. 1 AC outlet AC outlet 2 USB cable (supplied) USB cable (supplied) USB connector USB connector . . . 4 EN 3 Multi-connector The battery is not fully charged at the time of purchase. Before use, be sure to charge the battery until the indicator lamp turns off (up to 3 hours). If the indicator lamp does not light, the camera is not correctly connected or the battery, camera, or USBAC adapter may not be functioning as expected. Date, time, time zone, and language 1 Press the n button to turn on the camera. The date and time setting screen is displayed when the date and time are not set. 2 Use FG to select the year for [Y]. 3 Press I to save the setting for [Y]. 4 As in Steps 2 and 3, use FGHI and the Q button to set [M] (month),...
Este manual também é adequado para os modelos :Câmaras - VR‑325 (4.36 mb)