


Assessments - 4, GPA: 4.3
(

 )
)
|
Fotos e especificações Sony PMW-EX3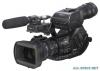 |


Facilidade de uso
T120min S&Q REC A: 25min B: 50min Z99 Icon Remaining 100% to 91% 90% to 71% Power Supply Icon Remaining 70% to 51% 50% to 31% 30% to 11% 10% to 0% If the battery charge remaining becomes low If the battery charge remaining decreases to a certain level during operation (Low BATT status), a low-battery message, flashing of the tally lamps, and a beep sound will warn you. The camcorder indicates the remaining usage time in minutes by calculating the available time with the battery pack if operation is continued at the current rate of power consumption. Note The operating time on a battery pack depends on the condition (new or old) of the battery pack and the ambient temperature. To check in power-off status Information on the mounted battery pack (BATTERY INFO) is displayed in the viewfinder when you hold the DISPLAY/BATT INFO button pressed even if the camcorder is off. The BATTERY INFO display goes off after 5 seconds. DISPLAY/BATT INFO button BATTERY I NFO 0% 50% 100% Remaining Ti me : 20m in MIRROR IMAGE OFF ON DISPLAY/BATT INFO ZEBRA PEAKING CONTRAST BRIGHT BATTERY RELEASE COMPONENTOU T DCIN MONITOR OUT SVIDEO AUDIO OUT CH-1 CH-2 A SHOT TRANSITION B TC/U-BIT/DURATION THUMNAIL FREV PREV SEL/SET PLAY/PAUSE CANCEL R L FFWD lsjG/SJMONITORVOL HL OFF EXPANDED FOCUS REC REVIEW RELEASE START/ STOP AUDIO IN CH-1 MICLINE MIC+48V MICLINE MIC+48V CH-2 MIRROR IMAGE OFF ON DISPLAY/BATT INFOZEBRA PEAKING CONTRAST BRIGHT DISPLAY/BATT INFO If the remaining further decreases to a level at which operation cannot be continued (BATT Empty status), a battery-empty message appears. Temporarily set the power switch to OFF and connect a power source via the DC IN connector or replace the battery pack with one that is fully charged. To change the message levels The Low BATT level is set to 10% of full charge, and the BATT Empty level is set to 3% of full charge at the factory. These settings can be changed with “Battery Alarm” (page 129) of the OTHERS menu. Using AC Power (DC IN Power) You can connect an AC power source to this camcorder by using the supplied BC-U1 or an optional BC-U2 Battery Charger for BP-U30/ U60 as an AC adaptor, as shown below: Connection example: BC-U1 1 Connect the DC power output cable of the BC-U1/U2 to the DC IN connector of the camcorder. B A T T E R Y R E L E A S E C O M P O N E N TO U T DC IN MONITOR OUT S VIDEO AU D IO OUT C H -1 C H -2 A SHOT TRANSITION B TC/U-BIT/DURATION H LOFF EXPANDEDFOCUS RECREVIEW RELEASE START/ STOP C H -1 L IN E DC O UT C H A RGE BAT TERY CH A R GER BC -U1 0 % 80 1 00 1 DC IN 2 3 BC-U1 Power Supply Preparations Preparations 2 Connect the power cord supplied with the BC-U1/U2 to the AC input connector of the BC-U1/U2 then to an AC power source. 3 Set the mode switch of the BC-U1/U2 to the DC OUT position. For details, refer to the Operating Instructions of the BC-U1/U2. When recording or playback is in progress on power from the DC IN connector, the input voltage is displayed in the viewfinder. DC IN 12.0V S&Q REC A: 25min B: 50min Z99 Turning Power Off Set the power switch to the OFF position. Notes • This camcorder uses a little standby power even when the power switch is set to OFF. Remove the battery pack if the camcorder will not be used for a prolonged period. • When removing the battery pack or the DC IN power, be sure to set the switch to OFF in advance. Removing the battery pack and the DC IN power without first setting the power switch to OFF may cause damage to the camcorder or SxS memory cards. Note The battery pack mounted on the camcorder is not charged even if you set the mode switch of the BC-U1/U2 to the CHARGE position. To charge the battery pack, remove it from the camcorder and mount it on the BC-U1/U2. Turning Power On This camcorder has Camera mode for recording and Media mode for playback. The mode is selected when you turn the power on. 1 5 2 5 40 10 3 1 0 m m 5 1 0 3 0 ft 1 5 5 . 88 5 . 6 4 2 . 8 1 . 9 16C M A N U A U T O MANU AUTOPUSH AF FOCUS I R I S M A C R O O F F O N SDI OUT GENLOCK IN REMOTE TC OUT TC IN HDV O F F 2 1 N DFILTE R - + F R A M E G A IN S T A T U S M E N U S E L / S E T C A N C E L P I C T U R EP R O F I L E C A M E R A O F F M E D I A BAP R S T L A T WMH W H I T E B A L B A R S / C A M F U L L A U T O PMW-EX3 CH-1 AUTO MANUAL IN EXT AUTO MANUAL IN EXT CH-2 AUDIO LEVEL SLOTSELECT AUDIO SELECT AUDIO INA B OPEN ACCESS 1 2 3 ASSIGN LEN S I NF O B RT D ISP H ISTO G RAM B TC/U-BIT/DURATION THUMNAIL F REV PREV SEL/SET PLAY/PAUSE STOP CANCEL F FWD NEXT REC START/STOP HOLDlsLjG/SJMONITOR VOL L R HLOFF 1 6 : 9 W I D E S C R E E N CAMERA OFF MEDIAPower switch To operate in Camera mode, turn the power on by setting the power switch to the CAMERA position. To operate in Media mode, turn the power on by setting the power switch to the MEDIA position. Power Supply Setting the Clock Setting the Clock Time Zone: UTC +09:00 TOKYO Date/Time: Fi nish INITIAL SETTING 2008/01/01 00:00:00 SET When you turn the camcorder on for the first time after purch...