


Assessments - 2, GPA: 4
(

 )
)
|
Fotos e especificações Sony SMP-N200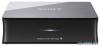 |


por este dispositivo também tem outras instruções :

Facilidade de uso
. . . . . . . . . . . . . . . . . . . . . . . .24 Index . . . . . . . . . . . . . . . . . . . . . . . . . . . . . . . . . . . . . . . . . . . . . . . . . . . . . . .27 Guide to Parts and Controls Front panel A Remote sensor B Indicator Lights up when the player is turned on. Rear panel A DC IN 12V (AC adapter input) jack B COMPONENT VIDEO OUT (Y, PB,PR) jacks C LINE OUT (R-AUDIO-L/VIDEO) jacks D HDMI OUT jack E DIGITAL OUT (OPTICAL) jack F LAN (100) terminal Right panel A (USB) jack Remote Remote z The N button has a tactile dot. Use the tactile dot as a reference when operating the player. A [/1 (on/standby) Turns on the player, or sets to standby mode. B Colour buttons (RED/GREEN/ YELLOW/BLUE) Shortcut keys for interactive functions. C DISPLAY (page 13) Displays the playback and web browsing information on the screen. SEN Accesses the SEN (Sony Entertainment Network) online service. OPTIONS (page 15) The options menu that can be selected appears on the screen. HOME Enters the player’s home menu. Displays the wallpaper when pressed on the category icon of the home menu. RETURN Returns to the previous display. (previous/next) Skips to the previous/next chapter, track, or file. N (play) Starts or re-starts playback. m/M (fast/slow/freeze frame) • Fast reverses/fast forwards when pressed during playback. Each time you press the button during playback of videos, the search speed changes. • Plays in slow motion, when pressed for more than one second in pause mode. • Plays one frame at a time, when pressed briefly in pause mode. x (stop) Stops playback and remembers the stop point (resume point). The resume point for a title/track is the last point you played or the last photo for a photo folder. X (pause) Pauses or re-starts playback. ,continued Home menu display Home menu display Item Category (Setup): Adjusts the player settings. (Photo): Displays photos. (Music): Plays music. (Video): Plays videos. (Network): Displays network items. Hookups and Settings Hookups and Settings Do not connect the mains lead until you have made all the connections. For supplied accessories, see “Supplied accessories” (page 24). Connecting to your TV Select one of the following connection methods according to the input jacks on your TV. Match the colour of the plug to that of the jack when connecting. High quality Standard quality HDMI cable (not supplied) Audio/video cable (not supplied) Component video cable (not supplied) Audio/video cable (not supplied) Hookups and Settings z To enjoy 3D content, connect the player to your 3D-compatible TV using a high-speed HDMI cable. ,continued b b Connecting to your AV amplifier (receiver) Select one of the following connection methods according to the input jacks on your AV amplifier (receiver). When you select A or B, make the appropriate settings in the “Audio Settings” setup (page 19). HDMI cable (not supplied) HDMI cable (not supplied) t Set “Dolby Digital*1” (page 19) and “DTS*2” (page 19). Optical digital cable (not supplied) Audio/video cable (not supplied) *1 *2 Before setting the network settings Before setting the network settings Wired Setup Use a LAN cable to connect to the LAN (100) terminal on the player. LAN cable (not supplied) Broadband ADSL modem/ Internet router Cable modem z Using a shielded interface cable (LAN cable) is recommended. Wireless Setup Use the wireless LAN that is built into the player. When your wireless LAN router (access point) is Wi-Fi Protected Setup (WPS)compatible, you can easily set the network settings with the WPS button. If not, check the following information in advance, and record it in the space provided below. • The network name (SSID*1) that identifies your network*2. • If security is set on your wireless network, the security key (WEP key, WPA key)*2. *1 SSID (Service Set Identifier) is a name that identifies a particular wireless network. *2 You need to check the setting of your wireless LAN router to get the information about SSID and security key. For details: – visit the following website: – refer to the instruction manual supplied with the wireless LAN router – consult the manufacturer of the wireless LAN router Hookups and Settings LAN cable (not supplied) Wireless LAN ADSL modem/ Internet router Cable modem z Use a wireless LAN router supporting 802.11b/g or 802.11b/g/n. 5 5 Step 2: Easy Setup When turned on for the first time Wait for a short while before the player turns on and starts “Easy Setup.” 1 Remove the insulation film from the remote. 2 Connect the supplied AC adapter and mains lead in the numeric order shown below. When removing them, do so in reverse order. to DC IN 12V AC adapter (supplied) Mains lead (supplied) to mains After connecting, wait for about 30 seconds until the player enters standby. 3 Press [/1 on the remote to turn on the player. 4 Turn on the TV, then switch the ...