


Assessments - 3, GPA: 3.7
(

 )
)
|
Fotos e especificações Sony MHC-GT111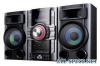 |


por este dispositivo também tem outras instruções :
Facilidade de uso
N (play) (pages 16, 21, 35) Press to start playback. DISC SKIP (pages 16, 27, 29) Press to select a disc. X (pause) (pages 16, 22) Press to pause playback. x (stop) (pages 16, 17, 19, 22) Press to stop playback. 10GB H HN +/– (pages 16, 17, 21, 23, 24) Press to select a function. I VOLUME +/–* (pages 16, 17, 21, 23, 24) Press to adjust the volume. * The VOLUME + button has a tactile dot. Use the tactile dot as a reference when operating the system. J O RETURN (pages 16, 22) Press to return to the parent folder. Press to exit search mode. K TUNER MEMORY (page 28) Press to preset the radio station. L PLAY MODE/TUNING MODE (pages 17, 22, 27, 28, 33) Press to select the play mode of an AUDIO CD, MP3 disc or an optional USB device. Press to select the tuning mode. M REPEAT/FM MODE (pages 16, 17, 22) Press to listen to a disc, an USB device, a single track or file repeatedly. Press to select the FM reception mode (monaural or stereo). N SLEEP (page 31) Press to set the Sleep Timer. O DISPLAY (pages 15, 28, 33) Press to change the information on the display. Remote RM-AMU006 (Other models) 1 "/1 (on/standby) (pages 15, 32) Press to turn on the system. B CLOCK/TIMER SELECT (pages 32, 37) CLOCK/TIMER SET (pages 15, 31) Press to set the clock and the timers. C REPEAT/FM MODE (pages 16, 17, 22) Press to listen to a disc, an USB device, a single track or file repeatedly. Press to select the FM reception mode (monaural or stereo). Continued l Guide to parts and controls qg qf qd qs qa q; 8 1 2 3 4 5 6 7 8 9 11GB D D Press to select the USB function. CD (pages 16, 29) Press to select the CD function. TUNER/BAND (page 17) Press to select the TUNER function. Press to select the FM or AM band. FUNCTION (pages 23, 24) Press to select a function. E ./> (go back/go forward) (pages 15, 16, 22, 27, 31) Press to select a track or file. m/M (rewind/fast forward) (pages 16, 22) Press to find a point in a track or file. +/– (tuning) (page 17) Press to tune in the station you want. N (play) (pages 16, 21, 35) Press to start playback. X (pause) (pages 16, 22) Press to pause playback. x (stop) (pages 16, 17, 19, 22) Press to stop playback. F ENTER (pages 15, 27, 31) Press to enter the settings. G DISC SKIP (pages 16, 27, 29) Press to select a disc. H +/– (select folder) (pages 16, 22, 27) Press to select a folder. I VOLUME +/–* (pages 16, 17, 21, 23) Press to adjust the volume. * The VOLUME + button has a tactile dot. Use the tactile dot as a reference when operating the system. J EQ (page 25) Press to select a sound effect. K CLEAR (page 27) Press to delete the last step from the program list. L TUNER MEMORY (page 28) Press to preset the radio station. M PLAY MODE/TUNING MODE (pages 17, 22, 27, 28, 33) Press to select the play mode of an AUDIO CD, MP3 disc or an optional USB device. Press to select the tuning mode. N DISPLAY (pages 15, 28, 33) Press to change the information on the display. O SLEEP (page 31) Press to set the Sleep Timer. 12GB Getting Started Getting Started Hooking up the system securely Getting ANTENNA DMPORT SUBWOOFER FRONT SPEAKER BCEFDA564321d) a) c) b) VOLTAGE SELECTOR 1 To FM lead antenna a) The FM 75 . COAXIAL jack varies according to 2 To AM loop antenna models. 3 To DIGITAL MEDIA PORT adapter b) LBT-ZT4 only. 4 To subwoofer c) MHC-GT555, MHC-GT444 and LBT-ZT4 only. 5 To front speaker (left) d) The VOLTAGE SELECTOR varies according to 6 To front speaker (right) models. Continued l 13GB A A Find a location and an orientation that provide good reception, and then set up the antennas. AM loop antenna Extend the FM lead antenna horizontally Keep the antennas away from the speaker cords, the power cord and the USB cable to avoid picking up noise. B DMPORT (DIGITAL MEDIA PORT) (LBT-ZT4 only) Connect the DIGITAL MEDIA PORT adapter. You need to connect the DIGITAL MEDIA PORT adapter to an optional audio device (portable audio player, etc.). Notes • The DIGITAL MEDIA PORT adapters are available for purchase depending on the area. • Do not connect an adapter other than the DIGITAL MEDIA PORT adapter. • When connecting the DIGITAL MEDIA PORT adapter, be sure the connector is inserted with the arrow mark facing towards the arrow mark on the DMPORT jack. • Do not connect or disconnect the DIGITAL MEDIA PORT adapter to/from the DMPORT jack while the system is turned on. • When using a DIGITAL MEDIA PORT adapter that has video output function, connect the video output of the adapter directly to the TV. C Subwoofer (MHC-GT555, MHC-GT444 and LBT-ZT4 only) Be sure to insert the connector straight into the terminals. SUBWOOFER Purple D Front speakers Be sure to insert the connector straight into the terminals. IMPEDA USE 6.R L FRONT SPEAKER White E VOLTAGE SELECTOR For models with a voltage selector, set VOLTAGE SELECTOR to the local power line voltage. F Power Connect the power cord to a wall socket. The demonstration appears in the display. If the plug does not fit the wall socket, detach the supplied plug adaptor (only for mo...
Este manual também é adequado para os modelos :Stereo - MHC-GT222 (1.55 mb)
Stereo - MHC-GT444 (1.55 mb)
Stereo - LBT-ZT4 (1.55 mb)
Stereo - MHC-GT555 (1.55 mb)