


Assessments - 2, GPA: 4
(

 )
)
|
Fotos e especificações Sony CMT-M373NT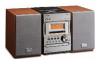 |


Facilidade de uso
61 System limitations of MDs................... 63 Specifications ....................................... 64 List of button locations and reference pages............................................... 66 4GB Getting Started Hooking up the system Getting Started Perform the following procedures 1 to 3 to hook up your system using the supplied cords and accessories. 123AM loop aerial Right speaker Left speaker FM lead aerial 1 Connect the speakers. Jack type A Connect the right and left speaker cords to AM loop aerial the SPEAKER terminals as shown below. Left speaker code Right speaker code 2 Connect the FM and AM aerials. Extend the FM lead aerial horizontally Set up the AM loop aerial, then connect it. continued 5GB Jack type B AM loop aerial Extend the FM lead aerial horizontally Note Keep the aerials away from the speaker cords. 3 Connect the mains lead to mains. If the plug does not fit the wall socket, detach the supplied plug adaptor (only for models equipped with an adaptor). To turn on the system, press ?/1. Inserting two R6 (size AA) batteries into the remote eEeE Note If you do not use the remote for a long period of time, remove the batteries to avoid possible damage from battery leakage and corrosion. Tip When the remote no longer operates the system, replace both batteries with new ones. Setting the clock 1 Press ?/1 to turn on. 2 Press CLOCK/TIMER SET. 3 Press . or > repeatedly to set the day. 4 Press ENTER/YES or CURSORt. 5 Press . or > repeatedly to set the hour. 6 Press ENTER/YES or CURSORt. 7 Press . or > repeatedly to set the minute. 8 Press ENTER/YES. The clock starts working. To adjust the clock 1 Press CLOCK/TIMER SET. 2 Press . or > to select “CLOCK SET”, then press ENTER/YES. 3 Do the same procedures as step 3 to 8 above. Note You cannot set the clock in power save mode. 6GB CD – Play Loading a disc 1 Press Z CD on the unit. 2 Place a disc with the label side up on the disc tray. When you play a 8 cm disc, place it on the inner circle of the tray. 3 Press Z CD again to close the disc tray. Notes • Do not use a disc with tape, seals or paste on it as this may cause malfunction. • Do not forcibly press the disc tray closed with your finger, as this may cause malfunction. Playing a disc — Normal Play/Shuffle Play/Repeat Play This system lets you play the CD in different play modes. Track number Playing time 1 Press FUNCTION repeatedly to switch the function to CD. 2 Press PLAY MODE in stop mode repeatedly until the mode you want appears. Select To play No display The tracks on the disc in (Normal Play) original order. SHUF All tracks on the disc in (Shuffle Play) random order. PGM The tracks on the disc in the (Program Play) order you want them to be played (see “Creating your own program” on page 8). 3 Press CD NX. Notes • You cannot change the play mode during playback. • If you press Z CD to open or close the disc tray while listening to another sound source, the CD icon lights up even if there is no CD in the tray. To turn off the CD icon, press FUNCTION repeatedly to switch the function to CD. Other operations To Do this Stop play Press x. Pause Press CD NX. Press again to resume play. Select a track Press . or > repeatedly. Find a point in a Keep pressing m or M during track (Search) playback and release it at the desired point. Remove a disc Press Z CD on the unit. CD – Play continued 7GB Playing a track by entering the track number You can also select the desired track you want using the number buttons during Normal Play. To enter a track number 10 or higher, press >10 followed by the number button for the one’s digit. To enter 0, press 10/0. Playing repeatedly — Repeat Play You can play all the tracks or a single track on a disc. Press REPEAT repeatedly until “REP” or “REP1” appears. REP: For all the tracks on the CD up to five times. REP1: For a single track only. To cancel Repeat Play Press REPEAT repeatedly until both “REP” and “REP1” disappear. Creating your own program — Program Play You can make a program of up to 25 steps. You can synchro record the programmed tracks onto an MD or a cassette tape (pages 15 and 40). 1 Press FUNCTION repeatedly to switch the function to CD. 2 Press PLAY MODE in stop mode repeatedly until “PGM” appears. 3 Press . or > repeatedly until the desired track number appears. Selected track Total playing number time PGM 4 Press ENTER/YES. The track is programmed. The step number appears, followed by the track number in the programmed sequence and the total playing time of the program. Last programmed Total playing track number time DISC PGM 5 To program additional tracks, repeat steps 3 and 4. 6 Press CD NX. Program Play starts. 8GB Other operations To Do this Cancel Program Press PLAY MODE in stop Play mode repeatedly until both “PGM” and “SHUF” disappear. Check the program Press . or > repeatedly order during Program Play. Check the total Press DISPLAY in stop mode. number of The total number of programmed programmed tracks steps appears. Add a t...
Este manual também é adequado para os modelos :Stereo - CMT-M333NT (707.79 kb)