


Assessments - 4, GPA: 3
(

 )
)
|
Fotos e especificações Yamaha NS-M225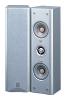 |


Facilidade de uso
• Secure placement or installation is the owner’s responsibility. Yamaha shall not be liable for any accident caused by improper placement or installation of speakers. • Any time you note distortion, reduce the volume of your amplifier immediately. Make sure the input power does not exceed the specified maximum input power, otherwise the speakers will be damaged. • Do not attempt to clean the speakers with chemical solvents as this might damage the finish. Use a clean, dry cloth. • Do not attempt to modify or fix the speakers. Contact qualified Yamaha service personnel when any service is needed. The cabinet should never be opened for any reasons. Note: This speaker is magnetically shielded, but placing them too close to a TV may impair the TV picture. If this happens, move the speaker away from the TV. DeutschFrancais EspanolEnglish E-1 Setting Up the Speakers Place the speakers on a sturdy, vibration-free surface, such as a well-built stand. ¦ Using the NS-M225 as Normal ¦ Using the NS-M225 as surround Stereo Speakers speakers in a surround sound To get the best stereo performance, angle the system speakers inward so as to create a triangle, with the The speakers can be mounted on a wall by using listener at the apex. the bracket attached to the speakers’ back panels. ¦ Using the NS-M225 as Front Speakers in a Surround Sound System Position the speakers both side of your TV. The positioning of these speakers is important because they provide a solid anchor for the sound image. They should be positioned facing the listener at about ear level, and equidistant from the TV. Subwoofer Center NS-M225 Surround L Surround R Holes Make sure that the screws are caught by a narrow part of the holes securely. 26 mm (1”) Fasten screws into a firm wall or wall support as shown in the figure below, and hang the holes on the protruding screws. NS-M225 Wall or wall support Tapping screw (commercially available) Diam. 3.5 to 4 mm (1/8”) 3 mm (1/8”) Min. 20 mm (3/4”) Fasten screws into a firm wall or wall support as shown in the figure below, and hang the holes on the protruding screws. NS-M225 Wall or wall support Tapping screw (commercially available) Diam. 3.5 to 4 mm (1/8”) 3 mm (1/8”) Min. 20 mm (3/4”) WARNING: • Each speaker weights 2.4 kg (5.3 lbs). Do not mount them on thin plywood or soft wall surface material, as the screws may come out of the flimsy surface, causing the speakers to fall down and be damaged, or result in personal injury. • Do not fasten the speakers to wall with nails, adhesives, or other unsound hardware. Long term use and vibrations may cause them to fall down. • To avoid accidents resulting from tripping over loose speaker cords, fix them to the wall. Note: You can also use the screw holes on the bottom of the NS-M225 for installing the speakers on commercially available speaker stands. • Before installing, please refer to the instruction manual of the speaker stand. A screw with a diameter of 4 mm (1/8”) can be used (Hole depth: 13 mm, 1/2”) 60 mm (2- 3/8”) English E-3 s Always turn off your amplifier or receiver before making any connections. ¦ Preparing Your Speaker Cables Carefully remove 10 mm (3/8”)of insulation from both ends of your speaker cables and twist the bare wires tightly, as shown. 10 mm (3/8”) Good No Good ¦ Hookup FRONT OR SURROUND R L + – NS-M225 Amplifier or receiver + – Loosen Tighten Notes: • Make sure that the bare wires are not touching each other as this could damage the speaker and amplifier. • Connect one speaker to the left terminals of your amplifier, and another speaker to the right terminals, making sure not to reverse the polarity (+, –). If one speaker is connected with reversed polarity, the sound will be unnatural and lack bass. ¦ Using a Banana Plug 1. Remove the speaker terminal cover by gently pulling it toward you. 2. Tighten the terminal knob. 3. Simply insert the banana plug into the terminal. Banana Plug 1 3 2 Removing the front cover Removing the front cover The front cover is fixed by magnets. Hold the speaker with one hand, and pull the front cover gently with the other to remove it. Notes: • When removing the cover, be careful that you don’t touch the drive units, and don’t exert excessive force with any tools. • There are magnets on the reverse side of the front cover. Do not place the front cover close to objects that might be affected by magnets, such as TVs, clocks, magnetic cards, diskettes etc. after removing it. Specifications Type .......... 2-way acoustic suspension speaker system magnetic shielding type Driver......................8 cm (3.1 ”) cone woofer x 2 3 cm (1 ”) balanced dome tweeter Impedance ......................................................6 . Frequency Response...................65 Hz to 50 kHz Rated Input Power.......................................40 W Maximum Input Power.............................. 120 W Sensitivity...................................86 dB/2.83 V/m Crossover Frequency.................................. ...