


Assessments - 3, GPA: 3.7
(

 )
)
|
Fotos e especificações Casio PX-330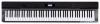 |


por este dispositivo também tem outras instruções :
Facilidade de uso
¦ To adjust the tempo using q and w buttons 1. Use the bk (TEMPO w, q) buttons to adjust the tempo setting. Each press of a button increases or decreases the beats per minute value by one. • Holding down either button changes the value at high speed. • You can specify a tempo value in the range of 20 to 255. Tempo value ¦ To adjust the tempo by tapping a beat 1. While holding down the bs (FUNCTION) button, tap the q bk (TEMPO) button four times in time with the beat you want to specify. • The tempo setting will change in accordance with the timing of your tapping. • After you use this method to specify the approximate tempo, you can then use the procedure under “To adjust the tempo using q and w buttons” to adjust the setting to a more exact value. Tap four times E-14 Adjusting the Metronome Volume You can use the following procedure to adjust the volume level of the metronome, without affecting the volume of Digital Piano output. 1. While holding down the bs (FUNCTION) button, press the 8 (METRONOME) button. This displays the metronome volume screen. Metronome volume 2. Use the bt (w, q) buttons to adjust the metronome volume. 3. Press the bs (FUNCTION) button. This will exit the metronome volume screen and cause the FUNCTION lamp to go out. NOTE • You also can use the procedure under “Metronome Volume” (page E-41) to adjust the metronome volume. Using the Pitch Bend Wheel You can use the pitch bend wheel to slide the pitch of notes smoothly upwards and downwards. This capability makes it possible to reproduce saxophone and electric guitar choking effects. Adding a Pitch Bend Effect 1. While playing a note on the keyboard, rotate the pitch bend wheel on the left of the keyboard upwards or downwards. The amount the note bends depends on how much you rotate the pitch bend wheel. • Do not have the pitch bend wheel rotated as you turn on the Digital Piano. NOTE • You also can configure pitch bend wheel operation by specifying the amount of pitch change at maximum rotation in either direction. See “Pitch Bend Range” (page E-43) for more information. Using Built-in Tones Playing a Duet You can use the Duet Mode to split the Digital Piano’s keyboard in the center so two people can play a duet. This makes it possible to configure the keyboard so, for example, the teacher can play on the left and the student can follow along on the right. Or one person can play the left hand part on the left, while another plays the right hand part on the right. C3 C4 C5 C6 C3 C4 C5 C6 Right keyboard Left keyboard (Middle C) (Middle C) Pedal Operation when Playing a Duet • Optional SP-32 Pedal Unit Right side damper pedal Left keyboard (Half-pedal operation damper pedal supported) Left and right side damper pedal • Optional SP-3 Pedal Unit To use the SP-3 Pedal Unit as the right keyboard damper pedal, connect it to the dr (DAMPER PEDAL) terminal. • Half-pedal operation is not supported in this case. To use the SP-3 Pedal Unit as the left keyboard (initial default setting) or right keyboard damper pedal (selectable), connect it to the dr (SOFT/SOSTENUTO PEDAL) terminal. • For information about how to select left or right keyboard control with the SP-3 Pedal Unit, see “Soft/Sostenuto Pedal Jack Setting” (page E-43). English E-15 Using Built-in Tones Configuring the Digital Piano for Duet Play 1. Press the bl (USER SONGS) button so its lower lamp is lit. Lit • To practice with songs stored on a memory card, press the dl (CARD/INTERNAL) button so its lamp is lit in place of the bl (USER SONGS) button. 2. While holding down the bs (FUNCTION) button, press the dk (SPLIT) button. This causes the Duet Mode on/off screen to appear. • The keyboard keys are disabled while this screen is displayed. 3. Press the bt (q) button to turn on the Duet Mode. This will cause the dk (SPLIT) button lamp to flash. 4. Press the bs (FUNCTION) button. This exits the Duet mode on/off screen and configures the Digital Piano’s keyboard for duet play. 5. To turn off the Duet Mode, press the dk (SPLIT) button so the SPLIT lamp goes out. NOTE • You also can use the procedure under “Duet Mode” (page E-41) to turn the Duet Mode on or off. Changing the Octave of a Duet Mode Keyboard You can use the following procedure to change the octave of the left and right Duet Mode keyboards. 1. While holding down the bs (FUNCTION) button, press the dk (SPLIT) button. This displays the Duet Mode on/off screen shown in step 2 under “Configuring the Digital Piano for Duet Play” (page E-16). If the Duet Mode is currently turned off, press the bt (q) button to turn it on. 2. Of the four C keys in the left keyboard, press the one that you want to have located at middle C. • This will sound the note assigned to C4 and change the octave of the left keyboard. Example: To change the configuration so the leftmost C key is middle C as shown below. Leftmost C key (Pressed key) C4 C5 C6 C7 C3 C4 C5 C6 1 octave higher than initial setting Unchanged 3. You can use the same procedure as step 2 ...