


Assessments - 4, GPA: 3.8
(

 )
)
|
Fotos e especificações Canon LV-7290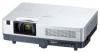 |


Facilidade de uso
This projector utilizes built-in multimedia features, a palette of 16.77 million colors, and matrix liquid crystal display (LCD) technology. ¦ Compact Design This projector is designed compact in size and weight. It is easy to carry and installed anywhere you wish to use. ¦ Simple Computer System Setting The projector has the Multi-scan system to conform to almost all computer output signals quickly (p.31). Up to WUXGA resolution can be accepted. ¦ Useful Functions for Presentations - The digital zoom function allows you to focus on the crucial information during a presentation (pp.38,40) - The MIC function and 10W audio output allows you to make a presentation without any external audio equipment (p.27). ¦ Lamp mode Brightness of the projection lamp can be selected (pp.28, 59). ¦ Direct Power Off Function With the Direct Power Off function, you can disconnect the power cord from the wall outlet or turn off the breaker even during projection (p.23). ¦ Logo Function The Logo function allows you to customize the screen logo (pp.53-55). You can capture an image for the screen logo and use it for the starting-up display or between presentations. ¦ Multilanguage Menu Display Operation menu is available in 20 languages: English, German, French, Italian, Spanish, Portuguese, Dutch, Swedish, Finnish, Polish, Hungarian, Romanian, Russian, Turkish, Kazakh, Vietnamese, Chinese, Korean, Japanese and Thai (p.51). ¦ Security Function The Security function helps you to ensure security of the projector. With the Key lock function, you can lock the operation on the top control or remote control unit (p.60). PIN code lock function prevents unauthorized use of the projector (pp.22, 60-61). ¦ Helpful Maintenance Functions Lamp and filter maintenance functions provide for better and proper maintenance of the projector. ¦ LAN Network Function This projector is loaded with the Wired LAN network function. You can operate and manage the projector via network. For details, refer to the user’s manual of “Network Set-up and Operation.” ¦ Auto Setup Function This function enables Auto input, Auto Keystone correction and Auto PC adjustment by simple pressing the AUTO SET button on the top control (p.52). ¦ Colorboard Function At the time of simple projection on the colored wall, you can get the close color image to the color image projected on a white screen by selecting the similar color to the wall color from the preset four colors. ¦ Switchable Interface Terminal The projector provides a switchable interface terminal. You can use the terminal as computer input or monitor output conveniently (p.56). ¦ Power Management Mode The Power management mode function reduces power consumption and maintains the lamp life (p.56). ¦ Closed Caption This is a printed version of the program sound or other information displayed on the screen. You can turn on the feature and switch the channels. (p.58) Table of Contents Features and Design . 2 Table of Contents 3 To the Owner 4 Safety Instructions 5 Air Circulation 8 Installing the Projector in Proper Position 8 Moving the Projector 8 Compliance 9 Part Names and Functions . 10 Front 10 Back 10 Bottom 10 Rear Terminal 11 Top Control 12 Remote Control Unit 13 Remote Control Unit Battery Installation 14 Remote Control Unit Operating Range 14 Remote Control Code 14 Installation 15 Positioning the Projector 15 Adjustable Foot 16 Connecting to a Computer 17 Connecting to VIDEO Equipment 18 Connecting to COMPONENT VIDEO and SCART Equipment 19 Using the ferrite core 20 Connecting the AC Power Cord 20 Basic Operation . 21 Turning On the Projector 21 Turning Off the Projector 23 How to Operate the On-Screen Menu 24 Main Menu 25 Zoom and Focus Adjustment 26 Auto Setup Function 26 Keystone Correction 26 Sound Adjustment 27 Remote control unit Operation 28 Computer Input . 30 Input Source Selection (ANALOG PC: COMPUTER 1/COMPUTER 2) 30 Computer System Selection 31 Auto PC Adjustment 32 Manual PC Adjustment 33 Image Mode Selection 35 Image Adjustment 36 Aspect Setting (for LV-7290, LV-7295, LV-7390) 37 Aspect Setting (For LV-8225) 39 VIDEO Input 41 Input Source Selection (VIDEO, S-VIDEO) 41 Input Source Selection (COMPONENT, SCART) 42 VIDEO System Selection 43 Image Mode Selection 44 Image Adjustment 45 Aspect Setting (for LV-7290, LV-7295, LV-7390) 47 Aspect Setting (for LV-8225) 49 Setting 51 Setting 51 Information . 64 Input Source Information Display 64 Maintenance and Cleaning . 65 WARNING indicator 65 Replacing the Filter 66 Resetting the Filter Counter 66 Attaching the Lens Cap 67 Cleaning the Projection Lens 67 Cleaning the Projector Cabinet 67 Lamp Replacement 68 Appendix 70 Troubleshooting 70 Menu Tree 73 Indicators and Projector Condition 75 Compatible Computer Specifications 76 Technical Specifications 77 Optional Parts 78 PJ Link Notice 79 Attaching the Filter Cover to the Projector 79 Configurations of Terminals 80 PIN Code Protection 81 Dimensions 82 Trademarks Each name of corporations or products in...
Este manual também é adequado para os modelos :Projetores - LV-7295 (5.53 mb)
Projetores - LV-7390 (5.53 mb)
Projetores - LV-8225 (5.53 mb)