


Assessments - 5, GPA: 3.8
(

 )
)
|
Fotos e especificações Casio XJ-S43W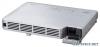 |


Facilidade de uso
3 3 Press the [ENTER] key. 4 4 Use the [..] key to select “Restore Menu Defaults”. 5 5 Press the [ENTER] key. • This will display a confirmation screen like the screen shown below. 6 6 Use the [..] key to select “Yes”. 7 7 To restore the settings of the main menu to their initial defaults, press the [ENTER] key. • To exit the operation without doing anything, press [ESC] instead of [ENTER]. 8 8 After you are finished, press the [MENU] key to exit the setup menu. Note • The language setting and the password are not returned to their initial factory defaults if you select Option Settings 1 in step 2. • For details about how the above procedure initializes settings, see the explanations of the settings under “Setup Menu Contents” on page 23. 22 To restore all settings on the setup menu to their initial factory defaults 1 1 Press the [MENU] key to display the setup menu. 2 2 Use the [..] key to select “Restore All Defaults”, and then press the [ENTER] key. 3 3 Use the [..] key to select “Restore All Defaults” sub-menu, and then press the [ENTER] key. • This displays a confirmation message asking if you want to initialize all settings. 4 4 Use the [..] key to select “Yes”. 5 5 To restore all settings on the setup menu to their initial defaults, press the [ENTER] key. • This will restore all of the settings to their initial factory defaults, except for the Language, Lamp Time, and password settings. • To exit the operation without doing anything, press [ESC] instead of [ENTER]. 6 6 After you are finished, press the [MENU] key to exit the setup menu. Setup Menu Contents This section contains tables that provide detailed explanations of all of the items included on the setup menu. The following describes the type of information that appears in each of the columns of the tables. Setting Name This column shows the names of the settings as they appear on the sub-menu. Input This column shows the input source for which each setting is supported. Input source names are abbreviated as R (RGB input), C (component video input), V (video input), H (HDMI (PC) input), and D (HDMI (DTV) input). The letter N indicates that the setting can be configured while there is no input signal. Setting Unit The setting unit indicates how a setting is stored. “Source Specific” in this column indicates that separate settings can be stored for each individual input source. For example, you could store an “Image Adjustment 1 .. Brightness” setting of –1 for RGB input and a setting of +1 for VIDEO input. “Single” in this column indicates that a single setting is stored and applied, regardless of the input source. Description This column provides details about the setting item and how to select it. The initial default setting is indicated by an asterisk (*). 23 Image Adjustment 1 Main Menu Setting Name Input Setting Unit Description Brightness RCVHD Source Specific Use this sub-menu to adjust the brightness of the projected image. A larger value produces a brighter image. Contrast RCVHD Source Specific Use this sub-menu to adjust the contrast of the projected image. A larger value produces a stronger contrast. Sharpness V Source Specific Use this sub-menu to adjust the sharpness of the outlines in the projected image. A larger value makes the image sharper, while a smaller value makes it softer. Saturation V Source Specific Use this sub-menu to adjust the color saturation of the projected image. A larger value increases color saturation. Tint V Source Specific Use this sub-menu to adjust the tint of the projected image. A larger value makes the overall image more bluish, while a smaller value makes the overall image more reddish. This setting is supported only when the signal is NTSC or NTSC4.43. Color Mode RCVHD Source Specific You can select from among five different color mode settings to optimize the projected image in accordance with image contents and projection conditions. Presentation: Use this setting for standard presentations in a well-lit area. Standard: Use this setting when you want to highlight the colors of your presentation. Graphics: Use this setting when you want photographs and graphics to appear natural. Theater: Use this setting to bring out the dark portions of your images. Blackboard: Use this setting for easy viewing when projecting onto a blackboard. Color Balance RCVHD Source Specific This sub-menu lets you adjust the color balance of the projected image. Preset: You can select from among three preset color balance settings: Warm, Normal,* Cold. Color: You can adjust the intensity of red, green, and blue within the range of –50 to +50. The intensity of a color increases along with the setting value. Color settings can be adjusted individually only when “Normal” is selected as the “Preset” setting. 24 Setting Name Input Setting Unit Description Noise Filter V Source Specific This setting is valid when VIDEO is selected as the input source. Normal*: Select this setting when projecting a movie. High: Select this setting ...