


Assessments - 0, GPA: 0
(
 )
)
|
Fotos e especificações Leadtek XTP8886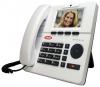 |


Facilidade de uso
Create a Contact Press . to select the field. Input the name, at least one phone number, and use Use to choose the default phone number. Set Up Speed Dial Use to choose a phone number. Press , and use to choose "Speed Dial". Press . Use number. Press phone number to Speed Dial. If the chosen number is already used, you will be asked if you would like to replace it. Press to choose the Speed Dial to add the when done. XTP8886 User's Manual 29 Choose an image for the new contact Press , and use to choose "Image". Press . Use to choose a picture stored in the unit and press . Press to save the contact. Edit a Contact In the Phone book menu, use to choose the contact you want to edit. Press , and use to choose "Edit". Press . Use to select the field and change the contents. Press to choose an image from the Capture menu for this contact if you want to change it. See the "Photo Frame" chapter for more detail. Press to update the contact. Set Up Speed Dial Use to choose a phone number. Press , and use to choose "Speed Dial". Press . Use number. Press phone number to Speed Dial. If the chosen number is already used, you will be asked if you would like to replace it. Press to choose the Speed Dial to add the when done. Delete a Contact In the Phone book menu, use to choose the contact you want to delete. Press , and use to choose "Delete". Press . Press to confirm the deletion, or press to cancel. XTP8886 User's Manual 31 Search a Contact In the Phone book menu, press any numeric keys. A search bar is displayed at the top of the contact list. The contact list will be updated according to the contents in the search bar. Use to select contact from the search result. Press to return the full contact list. Dial from Phonebook In the Phone book menu, use to choose the contact. Press to make the call out with the contact. 7Configuration Menu The configuration menu is the place where you set up the videophone to work in your network and to work with your service provider. It is also where you configure it according to your preferences. To enter the configuration menu, you can press at the Home screen. There are six icons corresponding to six sub-menus. To enter a sub-menu, use the cursor keys to highlight an icon, and then press or . You can press to enter the Quick Setting menu, where you can quickly configure the essential settings, including SIP Account Setting, Network Setting, and STUN Setting. Please refer to the related chapters for more details. Device Setting Call Setting Product Info Service Setting Network Setting Photo Setting To return to the previous menu, press . When you make a change and want to save it, press . The screen will prompt you for confirmation. Press to confirm, or to discard the change. XTP8886 User's Manual 33 Photo Setting The Photo Setting menu contains the settings for displaying photos in the photo browser. The settings here are common to the photos stored in the SD memory card and the USB device connected to the XTP8886. Play in style Choose the style the photos are displayed. The options are Normal and Effect. Speed Choose the speed at which the photos are displayed. The options are Slow, Medium, and Fast. Random Choose whether the photos are displayed in a random order. The options are ON and OFF. Press when you finish choosing the desired options. Device Setting The Device Setting menu contains the general settings for the videophone, including Display Setting, Sound Setting, Time Setting, and Change User Password functions. Display Setting The Display Setting menu contains Language and Screen Saving. Language This function can change the UI language. You can press the keys to change it. XTP8886 User's Manual 35 Screen Saving You can configure the screen saver here. There are two options: Photo Display and Screen Off. If you choose Photo Display and when the screen saver is triggered, the videophone will play the pictures in the SD memory card if it's present. If you choose Screen Off, the videophone will turn off LCD. You can also set the time for these two functions to be activated, and choose whether to enable Display Effect. Note: The Photo Display option will only play the pictures in the SD card. To enable this function, you have to create a "Photo" folder in the SD card and put the pictures you want to display in the folder. Sound Setting The Sound Setting menu contains Ringing Volume and Call Volume. Ringing Volume This function can increase or decrease an incoming call ringing volume. The range is from vol-0 to vol-9. You can press the keys to change it. Call Volume This function can increase or decrease a dialing out phone volume. The range is from vol-0 to vol-9. You can press the keys to change it. Time Setting You can input available NTP server address, and set the time zone according to where you are using the phone. Change Password The videophone provides a two level password: administrator and user. Administrator can change all of the settings, but user can only chang...