


Assessments - 2, GPA: 3.5
(


 )
)
|
Fotos e especificações Makita 9031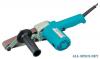 |


Facilidade de uso
If in doubt, DO NOT PLUG IN THE TOOL. Using a power source with voltage less than the nameplate rating is harmful to the motor. ADDITIONAL SAFETY RULES 1. Hold the tool firmly with both hands. 2. Make sure the belt is not contacting the workpiece before the switch is turned on. 3.Keep hands away from rotating parts. 4. Do not leave the tool running. Operate the tool only when hand-held. 5. This tool has not been waterproofed, so do not use water on the workpiece surface. SAVE THESE INSTRUCTIONS. Installing the side grip For your own safety, always use the side Side grip can pivoted grip. Install it by screwing it firmly on the grip holder. The side grip can be pivoted for easy operation. See the figure at right. -Side grip Grip holder Installing or removing the abrasive belt CAUTION : Always be sure that the tool is switched off and unplugged before installing or removing the belt. Loop the belt over the front pulley. Hold the tool as shown at right and press down to retract the front pulley so that you can slip the other end of the belt over the rear pulley. When pressing down the tool, be careful not to allow the front pulley to turn unexpectedly, causing you to lose control of the tool. NOTE : The arrow on the inside of the belt and that marked on the rear pulley must point in the same direction. Arrow -, Switch action CAUTION : Before plugging in the tool, always check to see that the switch trigger actuates properly and returns to the "OFF" position when released. If it does not operate properly, do not use the tool. Have it repaired immediately. To start the tool, simply pull the trigger. Release the trigger to stop. For continuous Lock button operation, pull the trigger and then push in the lock button. To stop the tool from the locked position, pull the trigger fully, then release it. Speed adjusting dial The belt running speed can be adjusted and Speed adjusting dial maintained between 200 m (656 ft.) and 1,000 m (3,280 ft.) per minute by turning the adjusting dial. The dial is marked 1 (lowest speed) to 6 (full speed). I CAUTION : Adjust the speed adjusting dial only within the range of numbers 1 through 6. Do not force the dial beyond this range or damage to the tool may result. Operation Hold the tool firmly with both hands. Turn the tool on and wait until it attains your de- sired speed. Gently apply the tool to the workpiece surface and move the tool forward and back. Press the belt only lightly on the workpiece. Excessive pressure may damage the belt and shorten tool life. CAUTION : 0 Secure the workpiece with clamps, etc. if there is any possibility of it moving during the work operations. 0 The tool should not already be in contact with the workpiece surface when you turn the tool on or off, Otherwise a poor sanding finish, damage to the belt of loss of control of the tool may result. 0 When working with the tool, be very careful to avoid any contact of the tool and belt with any part of your body or anyone or anything near you. Dust extraction Open the nozzle cap. Connect the hose of a vacuum cleaner/dust collector to the nozzle. Nozzle cap Vacuum cleaner CAUTION : Always close the nozzle cap when the hose of a vacuum cleaner/dust collector is not connected to the nozzle. Never insert your finger into the nozzle. MAINTENANCE CAUTION : Always be sure that the tool is switched off and unplugged before attempting to perform inspection or maintenance. Replacing carbon brushes 3 Remove and check the carbon brushes regularly. Replace when they wear down to the limit mark. Keep the carbon brushes clean and free to slip in the holders. Both carbon brushes should be replaced at the same time. Use only identical carbon brushes. Limit mark Use a screwdriver to remove the brush holder caps. Take out the worn carbon brushes, insert the new ones and secure the brush holder caps. \ Brush holder cap I L Screwdriver 'To maintain product SAFETY and RELIABILITY, repairs, nay other maintenance or adjustment should be performed by Makita Authorized or Factory Service Centers, always using Makita replacement parts. ACCESSORIES CAUTION : These accessories or attachments are recommended for use with your Makita tool specified in this manual. The use of any other accessories or attachments might present a risk of injury to persons. The accessories or attachments should be used only in the proper and intended manner. 0 Abrasive belt (10 per pkg) Part No. Grit 742301.7 I 40 742302-5 60 742303-3 80 742304-1 100 742305-9 I 120 742334-2 I 150 June-01 -'95 US BELT SANDER Model 9031 Note: The switch and other part configurations may differ from country to country. MODEL 9031 June-01-'95 US ':"OM ED $zD DESCRIPTION DESCRIPTION MACHINE MACHINE ~ 1 1 Grip 36 29 1 Strain Relief 2 1 Hex Bolt Max40 30 1 Cord 3 1 Cap 30 31 1 Cord Guard 4 1 Spring Pin 4-20 32 1 Sprmg PI" 4 20 5 3 Tapping Screw 4x25 33 1 Top Pulley Shaft 6 1 Flat Shoe 34 1 Pulley 30-25 7 1 Tapping Screw Bind CT 5x12 35 1 Ball Bearing 6880DW 8 1 Compression Spring...