


Assessments - 4, GPA: 3.3
(


 )
)
|
Fotos e especificações Yamaha AVANTGRAND N2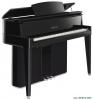 |


Facilidade de uso
What is SMF (Standard MIDI File)? The SMF (Standard MIDI File) format is one of the most common and widely compatible sequence formats used for storing sequence data. There are two variations: Format 0 and Format 1. A large number of MIDI devices are compatible with SMF Format 0, and most commercially available MIDI sequence data is provided in SMF Format 0. The user song is saved as SMF Format 0. 32 • N3/N2 Owner’s Manual Formatting USB Flash Memory Formatting USB Flash Memory CAUTION If you format a USB flash memory that already contains data, all of the data will be erased. Be careful not to erase important data when using the format function. 121 2 1 Engage the Format mode. After connecting the USB flash memory device to be formatted to the instrument, press the [RECORD] button while holding the [FUNCTION] button. v The message “For” (Format) appears on the display. For 2 Start Formatting. After pressing the [PLAY/STOP] button, a “n. Y” message appears on the display. Press the [+] button to execute the formatting operation. Press the [-] button to cancel formatting. v When the formatting is finished, “End” appears on the display for three seconds. CAUTION Do not turn off the power to the instrument or disconnect the USB flash memory device, while the instrument is formatting the USB device (while “---“ is displayed ). Doing so may damage the data or the USB flash memory itself. 3 Exit from the Format mode. Press any one of the buttons. ENGLISH N3/N2 Owner’s Manual • 33 Backing up Data and Initializing the Settings Backing up Data and Initializing the Settings Backup data in internal memory ENGLISH The following data will be saved to internal memory of the instrument. The data is maintained even when the power is turned off. • Metronome volume (page 21) • Fine-tuning of the pitch (page 25) • Character code (page 31) • User song data recorded to the instrument (page 27) Initializing the data When you initialize the data, all data, excluding the character code setting and the User song, will be initialized and reset to the factory default settings. While holding down the [METRONOME] button and the [REVERB] button, turn on the power to the instrument. v While the instrument is initializing the data, “CLr” appears on the display. CLr CAUTION Do not turn off the power to this instrument while it is initializing the data in its internal memory (while “CLr” is displayed). If this instrument somehow becomes disabled or malfunctions, turn off the power to the instrument, then perform the initialization procedure. 34 • N3/N2 Owner’s Manual Connections Connections s CAUTION Before connecting the instrument to other electronic components, turn off the power to all the components. Before turning the power on or off to all components, set all volume levels to minimum (0). Otherwise, electrical shock or damage to the components may result. wq e r t Refer to the “Panel Controls and Terminals” on page 8 for information on the location of the connectors. q [PHONES] jacks A set of standard stereo headphones can be plugged in here for private practice. Refer to “Using Headphones (option)” on page 14 for more information. w USB [TO DEVICE] terminal This terminal is for connection to USB storage devices. For more information, refer to “Precautions when using the USB [TO DEVICE] terminal” on page 30. e MIDI [IN] [OUT] connectors Use MIDI cables to connect external MIDI devices to these connectors. Refer to “About MIDI” on page 37 for more information. ENGLISH N3/N2 Owner’s Manual • 35 Connections Connections The stereo outputs from another instrument can be connected to these jacks, allowing the sound of an external instrument to be reproduced via the N3/N2’s speakers. Refer to the diagram below and use audio cables to make the connections. CAUTION When the instrument’s AUX IN jacks are connected to an external device, first turn on the power to the external device, then to the instrument. Reverse this order when you turn the power off. Instrument AUX OUT OUTPUT AUX IN AUX IN audio cable phone plug (standard) phone plug (standard) Tone Generator audio cable phone plug (standard) phone plug (standard) t AUX OUT [L/L+R] [R] jacks These jacks let you connect the instrument to external powered speaker systems, for playing in larger venues at higher volumes. Refer to the diagram below and use audio cables to make the connections. CAUTION When the instrument’s AUX OUT jacks are connected to an external audio system, first turn on the power to the instrument, then to the external audio system. Reverse this order when you turn the power off. Instrument ENGLISH Use only the AUX IN [L/L+R] jack for connection with a mono device. Use audio cables and adaptor plugs with no resistance. When the sound from the AUX OUT jacks is routed to the AUX IN jacks, the input sound will be output from the speaker of the instrument. The output sound may be excessively loud and may cause noise. Use only the AUX OUT [L/L+R] jacks for connection with a mo...
Este manual também é adequado para os modelos :Sintetizadores piano / - AVANTGRAND N3 (1022.73 kb)
Sintetizadores piano / - N2 (1022.73 kb)
Sintetizadores piano / - N3 (1022.73 kb)