


Assessments - 4, GPA: 4.3
(

 )
)
|
Fotos e especificações Sony KDL-32V4500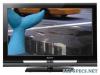 |


por este dispositivo também tem outras instruções :
TV - KDL-32V4500 (4.99 mb)
TV - KDL-32V4500 (39.78 mb)


Facilidade de uso
“Audio Language”: Selects the language used for a programme. Some digital channels may broadcast several audio languages for a programme. “Audio Description”: Provides audio description (narration) of visual information if TV channels broadcast such information. “Mixing Level”*: Adjusts the TV main audio and Audio Description output levels. “Dynamic Range”: Compensates for differences in the audio level between different channels. Note that this function may have no effect for some channels. “Optical Out”: Selects the audio signal that is output from the DIGITAL AUDIO OUT (OPTICAL) terminal on the rear of the TV. Set to “Auto” when equipment compatible with Dolby Digital is connected, and set to “PCM” when non- compatible equipment is connected. z *This option is only available when “Audio Description” is set to “On”. The screen wallpaper is displayed when listening to a radio broadcast after 20 seconds without pressing any button. You can select the screen wallpaper colour, display a random colour or view a slide show (page 32). To cancel the screen wallpaper display temporarily, press any button. Sets an age restriction for programmes. Any programme that exceeds the age restriction can only be watched after a PIN Code is entered correctly. 1 Press the number buttons to enter your existing PIN Code. If you have not previously set a PIN, a PIN Code entry screen appears. Follow the instructions of “PIN Code” below. 2 Press F/f to select the age restriction or “None” (for unrestricted watching), then press . 3 Press RETURN. To set your PIN for the first time 1 Press the number buttons to enter the new PIN Code. 2 Press RETURN. To change your PIN 1 Press the number buttons to enter your existing PIN Code. 2 Press the number buttons to enter the new PIN Code. 3 Press RETURN. z PIN Code 9999 is always accepted. Technical Set-up “Auto Service Update”: Enables the TV to detect and store new digital services as they become available. ~ For the service update to be able to take place the TV set should be left in stand-by mode from time to time. “Software Download”: Enables the TV to automatically receive software updates free through your existing aerial/cable (when issued). It is recommended that this option be set to “On” at all times. If you do not want your software to be updated, set this option to “Off”. ~ For the software upgrade to be able to take place the TV set should be left in stand-by mode from time to time. “System Information”: Displays the current software version and the signal level. ~ If signal bar is red (no signal) or amber (low signal), check the aerial/cable connection. “Time Zone”: Allows you to manually select the time zone you are in, if it is not the same as the default time zone setting for your country/region. “Auto DST”: Sets whether or not to automatically switch between summer time and winter time. • “On”: Automatically switches between summer time and winter time according to the calendar. • “Off”: The time is displayed according to the time difference set by “Time Zone”. CA Module Set-up Allows you to access a pay TV service once you obtain a Conditional Access Module (CAM) and a view card. See page 17 for the location of the (PCMCIA) socket. Using 31 GB Photo Picture Frame Displays a fixed photograph on the screen for a selected period of time. After that period, the TV automatically switches itself into standby mode. Using the Options menu Press OPTIONS to display the following options. Options Description Image selection Press F/f/G/g to select a photograph, then press to set. Duration Selects the desired period. ~ • If the photograph is selected from a USB device, it must remain connected to the TV. • If “Sleep Timer” is activated, the TV automatically will switch into standby mode. • Picture settings can be modified on the “USB Photo Viewer” Options menu. USB Photo Viewer You can view photographs (in JPEG format) stored in a Sony digital still camera, camcorder through a USB cable or USB storage media on your TV. 1 Connect a supported USB device to the TV. 2 Press HOME. 3 Press G/g to select “Photo”, then press F/ f to select “USB Photo Viewer” and press . The thumbnail screen appears. 4 Press F/f/G/g to select the photograph or folder you want to view, then press . 5 Press RETURN to go back to thumbnail screen. Additional operations Press G/f to select an option, then press . Options Description Device Selection Press G/g to select a device when multiple devices are connected. Bravia images are predefined device. Options Description Slide Show Displays the photographs one by one. Set-up You can make advanced settings for a slide show, and set the display sequence of the thumbnails. Using the Options menu Press OPTIONS to display the following options. Options Description Picture Mode See page 22. Sleep Timer See page 25. Power Saving See page 24. z Not available on thumbnail screen and “Slide Show” option. ~ • USB photo viewer supports DCF-compliant JPEG photographs only. • W...