


Assessments - 2, GPA: 3.5
(


 )
)
|
Fotos e especificações Sony KDL-20S4020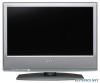 |


por este dispositivo também tem outras instruções :

TV - KDL-20S4020 (21.74 mb)
TV - KDL-20S4020 (21.82 mb)
TV - KDL-20S4020 (16.64 mb)

Facilidade de uso
25 GB Using MENU Digital Set-up menu You can change/set the digital settings using the Digital Set-up menu. To select options in “Settings”, see “Navigating through menus” (page 17). Set Up Select: Enter: Exit: MENU English - Back: Auto Start Up Language Country Auto Tuning Programme Sorting AV Preset Sound Offset Manual Programme Preset Digital Set Up Digital Tuning Displays the “Digital Tuning” menu. Digital Auto Tuning Tunes in all the available digital channels. Usually you do not need to do this operation because the channels are already tuned when the TV was first installed (page 5). However, this option allows you to repeat the process (e.g., to retune the TV after moving house, or to search for new channels that have been launched by broadcasters). Programme List Edit Removes any unwanted digital channels stored on the TV, and changes the order of the digital channels stored on the TV. 1 Press F/f to select the channel you want to remove or move to a new position. If you know the programme number (frequency) Press the number buttons to enter the three-digit programme number of the broadcast you want. 2 Remove or change the order of the digital channels as follows: To remove the digital channel Press . A message that confirms whether the selected digital channel is to be deleted appears. Press G to select “Yes”, then press . To change the order of the digital channels Press g, then press F/f to select the new position for the channel and press G. Repeat the procedure in steps 1 and 2 to move other channels if required. 3 Press RETURN. Digital Manual Tuning Tunes the digital channels manually. 1 Press the number button to select the channel number you want to manually tune, then press F/f to tune the channel. 2 When the available channels are found, press F/f to select the channel you want to store, then press . 3 Press F/f to select the programme number where you want to store the new channel, then press . Repeat the procedure above to tune other channels manually. 26 GB Digital Set-up Displays the “Digital Set-up” menu. Subtitle Setting Displays digital subtitles on the screen. When “For Hard Of Hearing” is selected, some visual aids may also be displayed with the subtitles (if TV channels broadcast such information). Subtitle Language Selects which language subtitles are displayed in. Audio Language Selects the language used for a programme. Some digital channels may broadcast several audio languages for a programme. Audio Type Increases the sound level when “For Hard Of Hearing” is selected. Parental Lock Sets an age restriction for programmes. Any programme that exceeds the age restriction can only be watched after a PIN Code is entered correctly. 1 Press the number buttons to enter your existing PIN code. If you have not previously set a PIN, a PIN code entry screen appears. Follow the instruction of “PIN Code” below. 2 Press F/f to select the age restriction or “None” (for unrestricted watching), then press . 3 Press RETURN. PIN Code Sets a PIN code for the first time, or allows you to change your PIN code. 1 Enter a PIN as follows: If you have previously set a PIN Press the number buttons to enter your existing PIN. If you have not set a PIN Press the number buttons to enter the factory setting PIN of 9999. 2 Press the number buttons to enter the new PIN code. A message appears to inform you that the new PIN has been accepted. 3 Press RETURN. Tip PIN code 9999 is always accepted. Technical Set-up Displays the Technical Set-up menu. “Auto Service Update”: Enables the TV to detect and store new digital services as they become available. “Software Download”: Enables the TV to automatically receive software updates, free through your existing aerial (when issued). Sony recommends that this option is set to “On” at all times. If you do not want your software to be updated, set this option to “Off”. “System Information”: Displays the current software version and the signal level. “Time Zone”: Allows you to select the correct time zone for your country. CA Module Set-up Allows you to access a Pay Per View service once you obtain a Conditional Access Module (CAM) and a view card. See page 28 for the location of the (PCMCIA) socket. Using MENU 27 GB Using Optional Equipment Connecting optional equipment You can connect a wide range of optional equipment to your TV. Connecting cables are not supplied. Connecting to the TV (side) Headphones S VHS/Hi8/DVC camcorder To connect Do this Conditional Access Module (CAM) A To use Pay Per View services. For details, refer to the instruction manual supplied with your CAM. To use the CAM, remove the rubber cover from the CAM slot. Switch off the TV when inserting your CAM into the CAM slot. When you do not use the CAM, we recommend that you replace the cover on the CAM slot. S VHS/Hi8/DVC camcorder B Connect to the S video socket 4 or the video socket 4, and the audio sockets 4. To avoid picture noise, do not connect the camcorder to the video socket 4 and the S v...
Este manual também é adequado para os modelos :TV - KDL-20S4000 (5.7 mb)