


Assessments - 5, GPA: 4.4
(

 )
)
|
Fotos e especificações Sony KDL-46NX713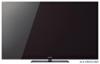 |


por este dispositivo também tem outras instruções :
TV - KDL-46NX713 (30.97 mb)
TV - KDL-46NX713 (10.54 mb)
TV - KDL-46NX713 (1.46 mb)
TV - KDL-46NX713 (6.12 mb)
Facilidade de uso
Refer to “To use i-Manual” for operation (page 11). • Before operating the TV, please read “Safety Information” (page 22). Retain this manual for future reference. 3 GB Checking the accessories Inserting batteries into the remote For all models Remote (1) Size AAA batteries (R3 type) (2) Table-Top Stand (1)* For KDL-52/40NX803, KDL-46/ 40NX703 models AC power cord (mains lead) (1) Cable holder (1) Stand rear cover (1) Black spacers (4) (KDL-52/40NX803 only) Fixing screws for Table-Top Stand (M5 . 16) (4) Assembling screws for Table-Top Stand (M5 . 16) (4) (KDL-40NX803 and KDL40NX703 only) For KDL-55NX813, KDL-46/40NX713 models Hexagon wrench (1) Assembling screws for Table-Top Stand (4) (KDL-55NX813, KDL-46NX713 only) Assembling screws for Table-Top Stand (2) (KDL-40NX713 only) SCART Adaptor (1) * Disassembled except for KDL-52NX803 and KDL-46NX703. Refer to the supplied Table-Top Stand leaflet to assemble the stand. 1Remove the protection sheet. 2Push and slide the cover upward. 4 GB Attaching the Table-Top Stand Attaching the Table-Top Stand ~ • For best picture quality, do not expose the screen to direct illumination or sunlight. • If the TV is brought directly from a cold to a warm location, or is placed in a very damp room, or is placed in a room in which heating has just been turned on, moisture may condense on the surface or inside the TV. Should this occur, turn off the TV and leave the TV off until the moisture evaporates, and then the TV can be used. If you notice moisture condensation between the glass panel and the LCD, turn on the TV and the condensation will evaporate after the TV has warmed up. For KDL-52/40NX803, KDL-46/ 40NX703 1 Place the TV set on the Table-Top Stand. 2 Fix the TV to the Table-Top Stand according to the arrow marks that guide the screw holes using the supplied screws. ~ • If using an electric screwdriver, set the tightening torque at approximately 1.5 N·m {15 kgf·cm}. 3 After all the screws are tightened, attach the supplied stand rear cover to the Table-Top Stand. For KDL-55NX813, KDL-46/40NX713 1 Align with the two dowels of the Table- Top Stand, and gently place the TV, checking the f mark is facing the front. 2 Attach the TV and Table-Top Stand with the supplied screw and hexagon wrench. ~ • Set the torque setting to approximately 3 N·m {30 kgf·cm}. Reattaching the Table-Top Stand to the TV Attach to the original position using the removed screws. See “Detaching the Table- Top Stand form the TV” (page 9). (Continued) 5 GB Setting For KDL-55NX813, KDL-46/40NX713 For KDL-55NX813, KDL-46/40NX713 the TV 0. 6. This TV can be adjusted within the angles shown below. ~ • To return to 0°, reverse the below procedure. For KDL-52/40NX803, KDL-46/ 40NX703 0. 6. 4 Remove screw as shown. Install screw into the top screw hole of the Table-Top Stand. 3 Slide in. Lift up and tilt. 6 GB Connecting an antenna (aerial)/Set Top Box/ recorder (e.g. DVD recorder) Connecting an antenna (aerial)/Set Top Box/ recorder (e.g. DVD recorder) (e.g. DVD recorder) with SCART For KDL-52/40NX803, KDL-46/40NX703 Set Top Box/recorder (e.g. DVD recorder) ~ • Right Angle Type Universal SCART Lead is recommended for this connection. For KDL-55NX813, KDL-46/40NX713 SCART adaptor Setting (supplied) Set Top Box/recorder (e.g. DVD recorder) Connecting a Set Top Box/recorder (e.g. DVD recorder) with HDMI Set Top Box/recorder (e.g. DVD recorder) ~ • For KDL-52/40NX803, after connecting cables, install the bottom cover and stand rear cover. 7 GB 8 GB Preventing the TV from toppling over 1 Install a wood screw (4 mm in diameter, not supplied) in the TV stand. 2 Install a machine screw (not supplied) into the screw hole of the TV. For KDL-52/40NX803, KDL-46/ 40NX703 Use M4 . 16 screw For KDL-55NX813, KDL-46/ 40NX713 Use M4 . 8 screw 3 Tie the wood screw and the machine screw with a strong cord (not supplied). Bundling the cables ~ • Do not bundle the AC power cord (mains lead) together with other cables. For KDL-52/40NX803, KDL-46/ 40NX703 For KDL-55NX813, KDL-46/40NX713 * *KDL-52/40NX803 only Performing the initial set-up Performing the initial set-up / KDL-46/40NX713 40NX803 40NX703 1 Connect the TV to your AC power outlet (mains socket). 2 Check the ENERGY SAVING SWITCH setting is on (z). 3 Press 1 on the TV. When you switch on the TV for the first time, the Language menu appears on the screen. 4 Follow the instructions on the screen. Digital Auto Tuning: When you select “Cable”, we recommend that you select “Quick Scan” for quick tuning. Set “Frequency” and “Network ID” according to the information supplied from your cable provider. If no channel is found using “Quick Scan”, try “Full Scan” (though it may take some time). For a list of compatible cable providers, refer to the support web site: DVBC/ Programme Sorting: Changes the order of analogue channels stored in the TV. 1 Press F/f to select the channel you want to move to a new position, then press . 2 Press F/f to select ...
Este manual também é adequado para os modelos :TV - KDL-40NX713 (2.52 mb)
TV - KDL-55NX813 (2.52 mb)
TV - KDL-40NX703 (2.52 mb)
TV - KDL-46NX703 (2.52 mb)