


Assessments - 1, GPA: 5
(
 )
)
)
|
Fotos e especificações Life Fitness 95Li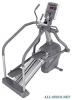 |


Facilidade de uso
Feed the remaining HEART RATE CABLE CONNECTOR (J) through the user right side hole of the MONOCOLUMN. Feed the COAXIAL CABLE (K) and POWER CORD (L) leading from the top of the MONOCOLUMN (A) through the top of the CONSOLE BRACKET as shown. Secure the CONSOLE BRACKET to the MONOCOLUMN using six SCREWS (8). Tighten the SCREWS securely. NOTE: If the entertainment option will not be used, carefully gather the COAXIAL CABLE (K) and POWER CORD (L) and insert them into the CONSOLE BRACKET. 15. Locate and insert the ACCESSORY TRAY (9) into the MONOCOLUMN (A) as shown. Secure the ACCESSORY TRAY to the CONSOLE BRACKET (7) using two SCREWS (10). Tighten the SCREWS securely. Do not over tighten the SCREWS. 16. Locate and position the DISPLAY CONSOLE (11) near the ACCESSORY TRAY (9). Connect all CONNECTORS (E & F) leading from the CONSOLE BRACKET (7) to the rear of the DISPLAY CONSOLE. Mount the DISPLAY CONSOLE using four SCREWS (12). Tighten the SCREWS securely. Do not over tighten the SCREWS. 17. Locate and attach the CONSOLE SUPPORT COVER (13) using two SCREWS (12). Tighten the SCREWS securely. Do not over tighten the SCREWS. 18. Locate and install the CONSOLE SUPPORT CAP (14) . Be sure the CONSOLE SUPPORT CAP snaps securely in place. 19. Locate and install one GROMMET (15) in each square hole between the yellow inserts in the BULLHORN MOUNTING BRACKETS (H). 20. Locate the HANDRAIL (16). Position the rear tubes of the HANDRAIL over the HANDRAIL UPRIGHTS (3) and lower the HANDRAIL onto the HANDRAIL UPRIGHTS. Carefully rest the front of the HANDRAIL against the MONOCOLUMN (A). Secure the HANDRAIL to the HANDRAIL UPRIGHTS using four SCREWS (17). Tighten the SCREWS securely. 21. Locate the LEFT and RIGHT BACK BULLHORN COVERS (18 & 19). Place the BACK BULLHORN COVERS between the HANDRAIL (16) and BULLHORN MOUNTING BRACKETS (H) as shown. Route the HEART RATE WIRES (M) from the HANDRAIL downward inside the BACK BULLHORN COVERS and to the front of the unit. Connect the HEART RATE WIRES to those leading from the front of the MONOCOLUMN. Be sure the CONNECTORS are fully seated. 22. Secure the front of the HANDRAIL (16) to the BULLHORN MOUNTING BRACKETS using four SCREWS (20). Tighten the SCREWS securely. K L 11 9 F E 7 14 12 13 8 10 A J H G 16 3 17 20 18 H 15 M 19 23. Tighten the three BOLTS of the REAR STEP (2) securely. 24. Tighten the two BOLTS of the HANDRAIL UPRIGHTS (3) securely. 25. Locate and install the USER ARMS (21 & 22) using three SCREWS (8) each. Tighten the SCREWS securely. NOTE: Orient the USER ARMS so the bends at the HANDGRIPS face the front of the unit as shown. 26. Locate one FRONT ROCKER COVER (23). Position the RIGHT BACK BULLHORN COVER (18) over the user side of the ROCKER ARM SHAFT (N) making sure that it seats fully over the BULLHORN MOUNTING BRACKET (H). Place the FRONT ROCKER COVER over the opposite side of the ROCKER ARM SHAFT in the same manner. Secure the COVERS using two PHILLIPS PAN HEAD SCREWS (12). Tighten the SCREWS securely. Do not over-tighten the SCREWS. 27. Locate and attach the RIGHT BULLHORN COVER (27) to the base of the BULLHORN using one SCREW (28). Tighten the SCREW securely. Do not over-tighten the SCREW. Slide the GASKET (O) down to the bullhorn base above the BULLHORN COVER. 12 28 26 23 18 O N 22 8 21 28. Locate one FRONT PIVOT ARM COVER (24) and one BACK PIVOT ARM COVER (25). Position the BACK PIVOT ARM COVER over the user side of the ROCKER ARM (P) making sure that it interlocks with the RIGHT BACK BULLHORN COVER (18). Place the FRONT PIVOT ARM COVER over the opposite side of the ROCKER ARM in the same manner. Secure the COVERS using two PHILLIPS PAN HEAD SCREWS (12). Tighten the SCREWS securely. Do not over-tighten the SCREWS. 29. Repeat steps 22 through 24 to install the LEFT ROCKER COVER (23), PIVOT ARM COVERS (24 & 25), and BULLHORN COVER (26). NOTE: The left PIVOT ARM COVERS are reversed front and back. The SCREWS will be installed from the rear. 30. Locate the two FOOT COVERS (29). Align the COVERS with the ends of the STABILIZER BARS (Q). Insert the post on the underside of the FOOT COVERS into the mounting holes on the top of each STABILIZER. Press the FOOT COVERS firmly into position. 31. Position the unit into the desired location for use. Properly level the unit according to the instructions in the Operation Manual. Physical Dimensions: 95Li Length 68 inches / 172.7 centimeters Width 33 inches / 83.8 centimeters Height 73 inches / 185.4 centimeters Weight 345 pounds / 156.5 kilograms 12 24 25 P 18 Q 29 PRE-OPERATION CHECKLIST .. Ensure that all fasteners are tight. .. Make sure the SUMMIT TRAINER is properly leveled and stable. (Refer to the Operation Manual) .. Ensure that the Leveler Jam Nuts are tight. (Refer to the Operation Manual) .. Read the entire Operation manual before using the Summit Trainer. LISTE DES VERIFICATIONS A EFFECTUER AVANT LA MISE EN MARCHE .. Verifiez si tous les dispositifs de fixation sont serres .. Verifiez si l'APPAREIL D'EXERCICE POLYVALEN...