


Assessments - 6, GPA: 4.2
(

 )
)
|
Fotos e especificações Smooth Fitness 9.45ST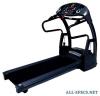 |


Facilidade de uso
Description Qty. Part No. 09 Elevation Support Tube 1 9.45ST-509 510 Elevation Support Tube Cover - LEFT 1 9.45ST-510 511 Motor Bottom Cover 1 9.45ST-511 512 Deck Frame Side Cover - LEFT 1 9.45ST-512 513 Plastic Clamp - TOP 2 9.45ST-513 514 Plastic Clamp - BOTTOM 2 9.45ST-514 515 Elevation Support 2 9.45ST-515 516 Deck Rubber Cushion 2 9.45ST-516 517 Rear Vent Cover 1 9.45ST-517 518 Elevation Support Tube Cover - RIGHT 1 9.45ST-518 519 Deck Frame Side Cover – RIGHT 1 9.45ST-519 9.45ST-600 Complete Running Deck Components 601 Running Belt 1 9.45ST-601 602 Side Rail 2 9.45ST-602 603 Running Deck 1 9.45ST-603 604 Side Rail End Cap - LEFT 1 9.45ST-604 605 Side Rail End Cap - RIGHT 1 9.45ST-605 9.45ST-700 Complete Deck Frame Components 701 Deck Frame 1 9.45ST-701 702 Front Roller Shaft 1 9.45ST-702 703 Front Roller Tube 1 9.45ST-703 704 Roller Bearing 6202 4 9.45ST-704 705 Rear Roller Shaft 1 9.45ST-705 706 Rear Roller Tube 1 9.45ST-706 707 Running Deck Support Tube 1 9.45ST-707 708 Deck Frame – Rear 1 9.45ST-708 709 Steady Frame 1 9.45ST-709 413 Rear Caster 2 9.45ST-413 9.45ST-800 Complete Hardware Pack 801 #6 . 12mm Screws 10 9.45ST-801 802 M4 . 6mm Screws 12 9.45ST-802 803 M8 . 12mm Screws 9.45ST-803 8 COMPLETE PARTS LIST Item No. Description Qty. Part No. 804 M8 . 15mm Bolt 3 9.45ST-804 805 M8 . 50mm Bolt 12 9.45ST-805 806 # 8 . 20mm Screw 20 9.45ST-806 807 4 . 15mm Thread Cutting Screw 19 9.45ST-807 808 M5 . 10mm Screws 2 9.45ST-808 809 M8 . 16 Screws 20 9.45ST-809 813 Washer 4 9.45ST-813 814 Nylon Nut 6 9.45ST-814 816 M14 . 90 Screws 3 9.45ST-816 817 Bearing 4 9.45ST-817 818 M10 . 35mm Screws 10 9.45ST-818 819 M8 . 10mm Screws 7 9.45ST-819 820 M8 . 50mm Screws 2 9.45ST-820 821 M10 . 63mm Bolts 1 9.45ST-821 822 Fixed Block 8 9.45ST-822 823 M8 . 120mm Bolts 1 9.45ST-823 824 Plate Washer 2 9.45ST-824 825 Spring 1 9.45ST-825 826 M8 Nylon Nut 2 9.45ST-826 827 M8 . 20mm Screws 6 9.45ST-827 828 Spring Washer 12 9.45ST-828 829 Washer 2 9.45ST-829 830 M10 . 136mm Screws 1 9.45ST-830 832 M8 . 25mm Screws 8 9.45ST-832 833 Hexagon Nut 10 9.45ST-833 834 M6 . 70mm Bolts 3 9.45ST-834 838 M10 . 43mm Bolts 2 9.45ST-838 839 Cushion Pad 10 9.45ST-839 840 M10 . 40mm Screws 1 9.45ST-840 841 M6 . 10mm Screws 2 9.45ST-841 842 M10 . 30mm Allen Head Bolt 2 9.45ST-842 843 M8 . 15mm Allen Head Bolt 4 9.45ST-843 845 13 . 42mm Shaft 2 9.45ST-845 846 #8 . 23mm Washer 9.45ST-846 2 PARTS DIAGRAM MOST OF THE PARTS SHOWN HERE HAVE BEEN PRE-ASSEMBLED PARTS DIAGRAM MOST OF THE PARTS SHOWN HERE HAVE BEEN PRE-ASSEMBLED. PARTS DIAGRAM A MAJORITY OF THE PARTS SHOWN HERE HAVE BEEN PREASSEMBLED AT THE FACTORY. PARTS DIAGRAM MOST OF THE PARTS SHOWN HERE HAVE BEEN PRE-ASSEMBLED. PARTS DIAGRAM MOST OF THE PARTS SHOWN HERE HAVE BEEN PRE-ASSEMBLED. 516814820821508507509506830809515514519820501517819503824505504823502829510512809827825827828518513827515514513809806511819814816824819 514513819510512809827825827828518513827515809806511516506830821508507814820503824505504829823502820517819501515514809519819814816824509814842 PARTS DIAGRAM MOST OF THE PARTS SHOWN HERE HAVE BEEN PRE-ASSEMBLED. 605832601602602809604603822818 PARTS DIAGRAM MOST OF THE PARTS SHOWN HERE HAVE BEEN PRE-ASSEMBLED. 828709833828833828833702703840814704701834841413706707834814708838839828833828833828833704704704705 STEP 1: Unpacking and Inventory (A)Remove your treadmill from the carton and place it on the floor in an open area. (B)Remove the treadmill and all the components and hardware from the box. (C)Check the quantities of all components and hardware with the component and hardware lists on pages 5-6 (D) After verifying inventory if there are any missing parts please contact Smooth fitness at 1-888-800-1167. ASSEMBLY 310311312313314315BFEDCA305304303306 STEP 2:Assemble Upright Frame NOTE: Make sure all wires are recessed into the frame. DO NOT trap or pinch DO NOT tighten bolts until STEP9 (A) Connect the Lower and middle section wire as seen below (307 to 402)(308 to 403) (B) Insert any extra cable length into the Left Upright (301). (C)Insert the Left and Right Uprights (301) into the Base Frame (401). 403402307308 ASSEMBLY ASSEMBLY STEP 3: Assemble The Side Handlebars Make sure all wires recessed into the frame. DO NOT trap or pinch. Shown in the diagram below. (B) Insert the Left Handlebar (201) into the Upright Tube (301). Using one M8 x 15mm bolts (804) to secure the upper portion. Use two M8 x 50mm Bolts (805) to secure the lower portion to the base frame. Use two M8 x 50mm Bolts (805) to secure the middle portion to the base frame. (C) Repeat the above process for the Right side 804 X2 X8 NOTE: Side rails are interchangeable for use on both right and left sides. (A) Connect the Left Motion Control lower wire to the middle wire (207 to 309 ). As 805 207309 ASSEMBLY STEP 4: Assemble Front Handlebar (A) Place the front handlebar (203) on top of the left and right uprights (301) (B) Now secure the front handle bar with four M8 x 50mm bolts(805) (C) Tighten all handlebar hardw...