


Assessments - 3, GPA: 3.3
(


 )
)
|
Fotos e especificações Canon DC420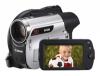 |


Facilidade de uso
FUNC. [ SINGLE] Desired option FUNC. CONTINUOUS SHOOTING/ HIGH-SPEED CONTINUOUS SHOOTING Press Start/Stop and hold it pressed down. Once the focus is automatically adjusted, will turn green and the still images will be recorded. AUTO EXPOSURE BRACKETING Press Start/Stop . Once the focus is automatically adjusted, will turn green and the still images will be recorded. NOTES • Continuous shooting speeds are approximate and vary depending on recording conditions and subjects. • Continuous shooting speeds will decrease when (camcorder shake warning) appears on the screen. Histogram Display When viewing still images you can display the histogram and the icons of all the functions used at the time of recording. Use the histogram as a reference to verify the correct exposure of the still image. ( 21) 56 • Photos The area to the right of the histogram 2 Press to protect the still image. represents highlights and the left side represents shadows. A still image whose histogram skews to the right is relatively bright; while one whose histogram peaks to the left, is relatively dark. Pixel Count Shadows Highlights NOTES • The histogram will appear also after recording a still image, unless you pressed DISP. while reviewing the still image immediately after recording it. • In mode, press repeatedly to turn the histogram and other onscreen displays on and off ( DISP. 43). Protecting Photos You can protect still images from accidental erasure. ( 21) FUNC. [ PROTECT] [ PROTECT]: The image selection screen appears. FROM THE IMAGE SELECTION SCREEN 1 Select ( ) the still image you want to protect. appears on the bottom bar and the image cannot be erased. Press again to remove the image protection. 3 Repeat steps 1-2 to protect additional images or press twice to close the menu. FUNC. IMPORTANT Initializing the memory card ( 57) will permanently erase all still images, including protected ones. Initializing the Memory Card Initialize memory cards when you use them with this camcorder for the first time, or to erase all the still images on them. Options [INITIALIZE] Clears the file allocation table but does not physically erase the stored data. [COMPL.INIT.] Erases all data completely. FUNC. ( 21) [ MENU] [ STILL IMG OPER.] [INITIALIZE CARD] Select the card initialization method [YES]* FUNC. Photos • 57 * Press to cancel the complete initialization while it is in progress. All the image files will be erased and the memory card can be used without any problem. IMPORTANT Initializing the memory card will permanently erase all still images, including protected ones. Lost original still images cannot be recovered. You can also use the following functions... The following functions and features of the camcorder can be used either for shooting video or for taking photos. The way to set and use them was already explained in detail, so we refer you to the relevant page in the “Video” section. • Zoom ( 30) • Quick Start ( 32) • Special Scene recording programs ( 36) • Flexible recording programs ( 38) • LCD video light ( 39) • Self timer ( 39) • Manual exposure adjustment ( 40) • Manual focus ( 40) • White balance ( 41) • Image effects ( 42) • Digital effects ( 42) Printing Photos Printing Photos from the Memory Card You can print still images recorded on the memory card by inserting it into the memory card slot of a printer compatible with DPOF* (Digital Print Order Format). You can mark in advance the still images you want to print and set the desired number of copies as a print order ( 61). * DPOF is a standard that allows you to specify the still images and information to be printed. Direct Print The camcorder can be connected to any PictBridge-compatible printer. You can set print orders ( 61) also when using Direct Print. Mark the still images in advance and print them after connecting the camcorder directly to a compatible printer. Canon printers: SELPHY printers of the CP, DS and ES series and PIXMA printers marked with the PictBridge logo. Connecting the Camcorder to the Printer ( 21) 1 Insert the memory card that contains the still images you want to print. 58 • Photos 2 Turn on the printer. 3 Connect the camcorder to the printer using the supplied USB cable. • Connection 2 . Refer to Connection Diagrams ( 64). • appears and changes to . IMPORTANT • If continues to flash (for more than 1 minute) or if does not appear, the camcorder is not correctly connected to the printer. In such case, disconnect the USB cable and turn off the camcorder and the printer. After a short while, turn them on again, set the camcorder to mode and restore the connection. • If the printer is connected to the camcorder while all still images or all print orders are being erased, the printer will not be recognized correctly. NOTES • will appear for images that cannot be printed. • We recommend powering the camcorder using the compact power adapter. • Refer also to the printer’s instruction manual. • Connection to a PictBridge-compatible printer will not...
Este manual também é adequado para os modelos :Câmaras de vídeo - DC410 (3.37 mb)