


Assessments - 3, GPA: 3.7
(

 )
)
|
Fotos e especificações Sony DCR-SR60E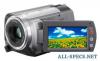 |


por este dispositivo também tem outras instruções :


Facilidade de uso
The yellow plug connection is not necessary. S VIDEO connection only will not output audio. • You cannot record images from a TV with no output jacks. • You cannot record TV programs which allow you to record once, or have copy control technology. • When you are connecting your camcorder to a monaural device, connect the yellow plug of the A/V connecting cable to the video output jack, and the red (right channel) or the white (left channel) plug to the audio output jack on the VCR or the TV. • Your camcorder can only record from a PAL source. For example, French video or TV programs (SECAM) cannot be recorded correctly. See page 114 for details on TV color systems. • If you use a 21-pin adaptor to input PAL source, you need a dual direction 21-pin adaptor (optional). Dubbing, Printing 1 Connect your camcorder to the TV or VCR/DVD device with the A/V connecting cable (supplied) 1 or the A/V connecting cable with S VIDEO (optional) 2. • Connect your camcorder to the output jacks of a TV or VCR/DVD device. 2 If you are recording from a VCR/ DVD device, insert the video tape or the DVD into the playback device. 3 Slide the POWER switch to light up the (PLAY/EDIT) lamp. 4 Touch t [REC CTRL]. If you connected your camcorder to the device which has the S VIDEO jack, touch [SET] t [VIDEO INPUT] t [S VIDEO] t . • Touch [SET] to change the recording mode or adjust the volume. • Touch [SET] t [ REMAIN] t [ON] to display the remaining hard disk free space indicator all the time. 5 Start playing the cassette or the DVD on the play back device, or select a TV program. The image played on the connected device appears on the LCD screen of your camcorder. 6 Touch [REC] at the point you want to start recording. 7 Touch at the point you want to stop recording. 8 Touch [END]. • There may be a time difference between the point where you press [REC] and the actual point that the recording starts/stops. • You cannot record an image as a still image even if you press PHOTO during recording. Printing recorded still images (PictBridge compliant printer) You can print out still images using a PictBridge compliant printer without connecting the camcorder to a computer. • To print still images after having copied themonto a computer, see page 90. Connect your camcorder to the printer 1 Turn on the printer. 2 Connect the Handycam Station to the wall socket using the supplied AC Adaptor. 3 Set the camcorder onto the Handycam Station securely, then slide the POWER switch to turn on. • When you set the camcorder onto the Handycam Station, connect securely onto the interface connector of the Handycam Station (p.73). • You can perform this operation, when whichever position of the (Movie) / (Still) / (PLAY/EDIT) is lit. 4 Connect the (USB) jack of the Handycam Station to the printer using the supplied USB cable. [USB SELECT] screen appears on the LCD screen. 5 Touch [PictBridge PRINT]. When connection is complete, (PictBridge connecting) appears on the screen. SET END EXEC 1/10 PictBridge PRINT 100-0002 The still image appears. • You can also display [USB SELECT] screen by touching t [SETUP] t PICT.APPLI. t [USB SELECT]. • We cannot guarantee the operation of models that are not PictBridge compatible. Printing Dubbing, Printing 1 Select the image to be printed with / . 2 Touch [SET] t [COPIES]. 3 Select the number of copies to be printed with / . You can set a maximum of 20 copies of one image to be printed. 4 Touch t [END]. To print the date on the image, touch [SET] t [DATE/TIME] t [DATE] or [DAY&TIME] t . 5 Touch [EXEC] t [YES]. When printing is finished, [Printing...] disappears and the image selection screen appears again. You can continue to print other images. 6 When printing is finished, touch [END] t [END]. • Refer also to the instruction manual for the printer to be used. • Do not attempt the following operations when is on the screen. The operations may not be performed properly. – Operating the POWER switch – Removing your camcorder from the Handycam Station – Removing the USB cable (supplied) from the printer – Removing the USB cable (supplied) from the Handycam Station • If the printer stops working, remove the USB cable (supplied), turn the printer off and on again and restart the operation from the beginning. • Depending on the type of printer you have, all four edges of an image may not be printed. Especially, the left and right ends of a 16:9 (wide) image may not be printed due to its aspect ratio. • Some printer models may not support the date printing function. Refer to your printer’s instruction manual for details. • Still images that have a file size of 2 MB or more or are larger than 2304 . 1728 pixels cannot be printed. • PictBridge is an industry standard established by the Camera & Imaging Products Association (CIPA). You can print still images without using a computer by connecting a printer directly to a digital video camera or digital still camera, regardless of model or manufacturer. To remove the USB cable 1 To...
Este manual também é adequado para os modelos :Câmaras de vídeo - DCR-SR30E (2.98 mb)
Câmaras de vídeo - DCR-SR40E (2.98 mb)
Câmaras de vídeo - DCR-SR50E (2.98 mb)
Câmaras de vídeo - DCR-SR70E (2.98 mb)