


Assessments - 3, GPA: 4.3
(

 )
)
|
Fotos e especificações Sony DCR-SR82E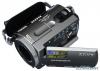 |


por este dispositivo também tem outras instruções :
Câmaras de vídeo - DCR-SR82E (722.89 kb)
Câmaras de vídeo - DCR-SR82E (5.67 mb)
Câmaras de vídeo - DCR-SR82E (5.76 mb)
Câmaras de vídeo - DCR-SR82E (5.57 mb)
Facilidade de uso
When you touch a movie marked with ► , you can play it back from the point you have stopped previously. 14 Parts and functions used for the camcorder DCR-SR32E/SR33E/SR42E/ SR52 E/SR62 E/SR72 E/SR82E a> DCR-SR190E/SR200E/ SR290E/SR300E a> DCR-SR32E/SR33E/SR42E/SR52E/ SR62E/SR72E/SR82E DCR-SR190E/SR200E/ SR290E/SR300E —m —№ HÜ f—H EÜh ft Handycam Station Recording 1 Power zoom lever To use zoom, move the power zoom lever. Move the power zoom lever slightly for a slower zoom. Move it further for a faster 2 NIGHTSHOT PLUS switch*1 To record in dark places, set the NIGHTSHOT PLUS switch to ON. ( © appears.) 6 Built-in microphone Records sound. Sound picked up by the built-in microphone is converted to 5.1ch surround sound and recorded.*2 zoom. 15 Recording/Playback 7 Remote sensor*3 Receive the signal from the Remote Commander. 8 Flash*2 Flashes when using the flash. 9 LCD screen To record in mirror mode, open the LCD screen 90 degrees to the camcorder (©), then rotate it 180 degrees to the lens side (©). Щ Zoom buttons Press for zooming in/out. S3 BACK LIGHT button*4 To adjust the exposure for backlit subjects, press BACK LIGHT to display .. To cancel the back light function, press BACK LIGHT again. SS DISP/BATT INFO button You can switch the screen display when you press while the power is set to on. When you press while the power is set to OFF (CHG), you can check the remaining battery. 0! EASY button See page 12. f (flash) button*2 You can select the settings for the flash. Sg Shoulder belt hook Attach the shoulder belt (optional). 01 NIGHTSHOT switch*2 To record in dark places, set the NIGHTSHOT switch to ON. (© appears.) 16 IH Tripod receptacle (Bottom surface) Attach the tripod (optional: the length of the screw must be less than 5.5 mm (7/32 in.)) to the tripod receptacle using a tripod screw. 09] RESET button To initialize the settings (Reset), press RESET to initialize all the settings, including settings for date and time. Playback 1 Power zoom lever IH Zoom buttons You can magnify still images from about 1.1 to 5 times the original size (Playback zoom). • When you touch the screen during playback zoom, the point you touched will be displayed in the center of the displayed frame. 01 EASY button See page 12. 07] Speaker Sound comes out from the speaker while playing back. Connecting to other devices 3 A/V OUT jack Connect with the A/V connecting cable. 4 REMOTE jack*3 Connect other optional accessories. 5 Active Interface Shoe MM Interface Shoe The Active Interface Shoe supplies power to optional accessories such as a video light, a flash, or a microphone. The accessory can be turned on or off as you operate the POWER switch on your camcorder. w; DC IN jack wa Interface connector ws DISC Create a DVD by connecting the camcorder to a computer. For details, see “Handycam Handbook” (PDF). wd (USB) jack*5 Connect with the USB cable. *' DCR-SR32E/SR33E/SR42E/SR52E/SR62E/ SR72E/SR82E *2 DCR-SR190E/SR200E/SR290E/SR300E *3 Except for DCR-SR32E/SR33E/SR42E *4 For DCR-SR32E/SR33E/SR42E, the position of the buttons differ from the illustration. 5 For DCR-SR32E/SR33E/S R5 2E/S R72E/ SR190E/SR290E: output only. 17 Recording/Playback 07226314 Indicators displayed during recording/playback Recording movies Recording still images Viewing movies 04] [3] 01 06] ClltlOnih •JE i 10w112 0:00:14» LkmJ L^hj .a 101-0001 [ ■ I l-«S)| I»- »1 l®Hl LSlJ 5§ № m 1 Recording mode (HQ / SP / LP) 2 HOME button 3 Remaining battery (approx.) 4 Recording status ([STBY] (standby) or [REC] (recording)) 5 Counter (hour/minute/second) 6 OPTION button 7 Dual Rec (DCR-SR190E/SR200E/ SR290E/SR300E) 8 VIEW IMAGES button 9 5.1ch surround recording (DCR-SR190E/SR200E/SR290E/SR300E) 03 Quality ([FINE] / [STD]) 0a Image size 021 Appears while a still image is being saved. Viewing still images 01Recording folder Displays only during the recording media of still images is a “Memory Stick Duo.” Return button Playback mode Current movie number/Number of total movies 07Previous/Next button 0kVideo operation buttons 09Data file name Current still image number/Number of recorded still images Wa Slide show button W2 Previous/Next button Data file name Wf VISUAL INDEX button 18 Indicators when you made changes Following indicators appear during recording/playback to indicate the settings of your camcorder. Upper left Upper right indicator Meaning a PictBridge connecting E © sj m Warning Bottom [ ó ]<=l60mln О s raflxni J>6.1di J*] ЙИ j a* WHfTE FADER 111 ‘feEET.ts j Bottom Center Upper left indicator Meaning Ji5.1ch 5.1ch surround recording/ playback*1 Û Self-timer recording i <§>i+ i® Flash b MICREF LEVEL low 16:9 WIDE SELECT*2 Í3 WIDE SELECT*3 Upper right indicator Meaning WHITE BLACK FADER FADER FADER :Qff LCD backlight off 'ë&F Drop sensor off Drop sensor activated Center indicator Meaning IEÍ,...
Este manual também é adequado para os modelos :Câmaras de vídeo - DCR-SR190E (2.06 mb)
Câmaras de vídeo - DCR-SR52E (2.06 mb)
Câmaras de vídeo - DCR-SR200E (2.06 mb)
Câmaras de vídeo - DCR-SR290E (2.06 mb)