


Assessments - 1, GPA: 5
(
 )
)
)
|
Fotos e especificações Pioneer DEH-P85BT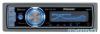 |


por este dispositivo também tem outras instruções :
Facilidade de uso
When reattaching the trim ring, push the trim ring onto the unit until it clicks. (If the trim ring is attached upside down, the trim ring will not fit properly.) • It becomes easy to remove the trim ring if the front panel is released. DIN Rear-mount Extend top and bottom of the trim ring outwards to remove the trim ring. When reattaching the trim ring, push the trim ring onto the unit until it clicks. (If the trim ring is attached upside down, the trim ring will not fit properly.) • It becomes easy to remove the trim ring if the front panel is released. 2. Insert the supplied extraction keys into both sides of the unit until they click into place. 3. Pull the unit out of the dashboard. 2. Determine the appropriate position where the holes on the bracket and the side of the unit match. 3. Tighten two screws on each side. • Use either truss screws (5 mm x 8 mm) or flush surface screws (5 mm x 9 mm), depending on the shape of screw holes in the bracket. Screw Factory radio mounting bracket English Installation Fastening the front panel Installing the microphone If you do not plan to detach the front panel, the front panel can be fastened with supplied screw. Installation notes Install the microphone in a position and ori/ill enable it to pick up the rson operating the system. y dangerous to allow the microphone lead to become wound Be sure to install the unit in such a way that it will not obstruct driving. When installing the microphone on the sun visor 1. Install the microphone on the microphone clip. Screw around the steering column or gearstick. Microphone Microphone clip Install the microphone clip on the sun visor. With the sun visor up, install the microphone clip. (Lowering the sun visor reduces the recognition rate for voice operations.) When installing the microphone on the steering column 1. Install the microphone on the microphone clip. Microphone „ Microphone clip Fit the microphone lead into the groove. Install the microphone clip on the steering column. of the steering column. Clamps Use clamps to secure the lead where necessary inside the vehicle. Adjusting the microphone angle The microphone angle can be adjusted by moving forward or backward the microphone clip angle. English Contenido Conexión de las unidades Conexión de las unidades........................1 Conexión del cable de alimentación..................3 Conexión al amplificador de potencia vendido separadamente............................................5 Instalación..................................................7 Montaje delantero/trasero DIN..........................7 Montaje delantero DIN......................................7 Montaje trasero DIN..........................................8 Fijación del panel delantero ..............................9 Instalación del micrófono..................................9 Ajuste del ángulo del micrófono ....................10 Nota: • Cuando se instale esta unidad en un vehículo sin la posición ACC (accesorio) en el interruptor de encendido, se debe conectar el cable rojo al terminal que puede detectar la operación de la llave de encendido. De lo contrario, la batería puede descargarse. Posición ACC Sin posición ACC • El uso de esta unidad en condiciones diferentes de las siguientes podría causar un fuego o fallo de funcionamiento. — Vehículos con una batería de 12 voltios y puesta a tierra negativa. — Altavoz con 50 W (valor de salida) y de 4 a 8 ohmios (valor de impedancia). • Para prevenir cortocircuitos, sobrecalentamiento o fallo de funcionamiento, asegúrese de seguir las instrucciones a continuación. — Desenchufe el terminal negativo de la batería antes de la instalación. — Fije el cableado con abrazaderas de cable o con cinta adhesiva. Para proteger el cableado, envuélvalo con cinta adhesiva donde el cableado se apoya sobre piezas metálicas. — Posicione todos los cables alejados de las piezas móviles, como el cambio de marchas y rieles de los asientos. — Posicione todos los cables alejados de lugares calientes como cerca de la salida del calentador. — No pase el cable amarillo a través de un agujero en el compartimiento del motor para conectar la batería. — Cubra cualquier conector de cable desconectado con cinta de aislamiento. — No extraiga las tapas RCA si no se utilizan los cables RCA. — No acorte ningún cable. — No corte nunca el aislamiento del cable de alimentación de esta unidad para compartir la energía con otro equipo. La capacidad de corriente del cable es limitada. — Utilice un fusible con la capacidad especificada. — No conecte nunca el cable negativo de altavoz directamente a la puesta a tierra. — No junte nunca múltiples cables negativos de altavoz. • La señal de control se emite a través del cable azul/blanco cuando se enciende esta unidad. Conéctelo a un terminal de control de sistema de amplificador de potencia externo o al terminal de control de relé de antena automática del vehículo (máx. 30...