


Assessments - 3, GPA: 4
(

 )
)
|
Fotos e especificações Sony NEX-7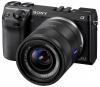 |


por este dispositivo também tem outras instruções :


Facilidade de uso
1 MENU t [Setup] t [HDMI Resolution] t desired setting. Auto The camera automatically recognizes an HD TV and sets the output resolution. 1080p Outputs signals in HD picture quality (1080p). 1080i Outputs signals in HD picture quality (1080i). Note • If you cannot display the screen properly with the [Auto] setting, select either [1080i] or [1080p] depending on the TV to be connected. 159GB contents Sample photo Menu Index CTRL FOR HDMI When connecting the camera to a “BRAVIA” Sync compatible TV with an HDMI cable (sold separately), you can play back images on your camera by the TV’s remote control aiming at the TV. See page 175 on “BRAVIA” Sync. 1 MENU t [Setup] t [CTRL FOR HDMI] t desired setting. On Operates the camera with the TV remote control. Off Does not operate the camera with the TV remote control. Note • You can perform the operation of the camera with the remote control of your TV by connecting your camera to a “BRAVIA” Sync compatible TV. 160GB USB Connection USB Connection 1 MENU t [Setup] t [USB Connection] t desired setting. Table of contents Sample photo Menu Index Auto Establishes a Mass Storage or MTP connection automatically, in accordance with a computer or other USB devices to be connected. Windows 7 computers are connected in MTP, and its unique functions are enabled to use. Mass Storage Establishes a Mass Storage connection between the camera, a computer, and other USB devices. Standard mode. MTP Establishes an MTP connection between the camera, a computer, and other USB devices. Windows 7 computers are connected in MTP, and its unique functions are enabled to use. In the case of other computers (Windows Vista/XP, Mac OS X), the AutoPlay Wizard appears, and the still images in the recording folder on the camera are imported to the computer. Note • The connection may take a long time when [Auto] is selected. 161GB contents Sample photo Menu Index Cleaning Mode Allows you to clean the image sensor. • Cleaning can be performed only when the battery level is (3 remaining battery icons) or more. The use of an AC-PW20 AC Adaptor (sold separately) is recommended. • Do not use a spray blower because it may scatter water droplets inside the camera body. • Do not put the tip of a blower into the cavity beyond the mount, so that the tip of the blower does not touch the image sensor. • Hold the camera’s face downward to prevent the dust from resettling in the camera. 1MENU t [Setup] t [Cleaning Mode] t OK. The message “After cleaning, turn camera off. Continue?” appears. 2Select OK. The anti-dust is activated automatically. 3Turn the camera off. 4Detach the lens. 5Use the blower to clean the image sensor surface and the surrounding area. 6Attach the lens. Notes • Do not apply a mechanical shock to the camera during cleaning. • When cleaning the image sensor with a blower, do not blow too hard. 162GB Note Note Table of contents Sample photo Menu Index Version Displays the version of your camera and lens. Confirm the version when a firmware update is released. 1MENU t [Setup] t [Version]. • An update can be performed only when the battery level is (3 remaining battery icons) or more. We recommend that you use a sufficient battery or the AC-PW20 AC Adaptor (sold separately). 163GB contents Sample photo Menu Index Demo Mode The [Demo Mode] function displays the movies recorded on the memory card automatically (demonstration), when the camera has not been operated for a certain time. Normally select [Off]. 1 MENU t [Setup] t [Demo Mode] t desired setting. On The demonstration begins automatically when the camera is not operated for about 1 minute. Off Does not show the demonstration. Notes • You can set this item only when the camera is powered by the AC-PW20 AC Adaptor (sold separately). • Even if [On] is selected, the camera does not start a demonstration when there is no movie recorded on the memory card. • When [On] is selected, the camera does not switch to power save mode. 164GB contents Sample photo Menu Index Reset Default Initializes the setting to the default setting. Even if you activate [Reset Default], the images are retained. 1 MENU t [Setup] t [Reset Default] t OK. Notes • Be sure not to turn off the camera while resetting. • Following settings are not reset: – [Date/Time Setup] – [Area Setting] – Faces registered with [Face Registration] – [AF Micro Adj.] 165GB contents Sample photo Menu Index Format Formats the memory card. When you use a memory card with this camera for the first time, it is recommended that you format the card using the camera for stable performance of the memory card before shooting. Note that formatting permanently erases all data on the memory card, and is unrecoverable. Save precious data on a computer, etc. 1 MENU t [Setup] t [Format] t OK. Notes • Formatting permanently erases all data including even protected images. • During the format, the access lamp lights up. Do not eject the memory card while the lamp is lit. • Format the memory card using the camera. ...
Este manual também é adequado para os modelos :Câmaras - NEX-7K (3.43 mb)