


Assessments - 2, GPA: 4.5
(

 )
)
|
Fotos e especificações Brother DCP-340CW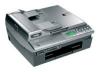 |


por este dispositivo também tem outras instruções :
Facilidade de uso
If your digital camera supports DPOF printing, see DPOF printing on page 3-8. 3 Print the index that shows thumbnail views of the photos stored on your media card. Your machine will assign an image number to each thumbnail. Press or to select Print Index and then press Set. Press Colour Start to start printing index sheet. (See Printing the Index (Thumbnails) on page 3-5.) 4 To print the images, press or to select Print Images and then press Set. Enter image number and press Set. Press Colour Start to start printing. (See Printing images on page 3-6.) You can change the settings for printing images, such as the Paper Type & Paper Size, Print Size and Number of Copies. (See Printing images on page 3-6.) 3 - 4 WALK-UP PHOTOCAPTURE CENTER™ Printing the Index (Thumbnails) Printing the Index (Thumbnails) ™ assigns numbers for images (such as No.1, No.2, No.3, and so on). It does not recognize any other numbers or file names that your digital camera or PC have used to identify the pictures. You can print a thumbnail page (Index page with 6 or 5 images per line). This will show all the pictures on the media card. 1 Make sure you have inserted the media card. Press (PhotoCapture). (See page 3-3.) 2 Press or to select Print Index Print Index. Press Set. 3 Press or to select 6 Images/Line 6 Images/Line or 5 Images/Line. Press Set. Index Index 5 Images/Line 6 Images/Line 4 Press Colour Start to start printing. Print time for 5 Images/Line will be slower than 6 Images/Line, but the quality is better. To print an image, see Printing images on page 3-6. WALK-UP PHOTOCAPTURE CENTER™ 3 - 5 Printing images Printing images 1 Print the Index first. (See Printing the Index (Thumbnails) on page 3-5.) 2 Make sure you have inserted the media card. Press (PhotoCapture). (See page 3-3.) 3 Press or to select Print Images Print Images. Press Set. If your media card contains valid DPOF information, the LCD shows DPOF Print:Yes, please go to DPOF printing on page 3-8. 4 Press repeatedly to enter the image number that you want to print from the Index page (Thumbnails). No.:1,3,6 Press Set. Repeat this step until you have entered all the image numbers that you want to print. ¦ Press to decrease the image number. ¦ You can enter all the numbers at one time by using the Copy Options key for hyphen. (For example, Enter 1, Copy Options, 5 to print images No.1 to No.5). 5 After you have selected all the image numbers, press Set again, and go to Step 6. —OR— If you have finished choosing settings, press Colour Start. 3 - 6 WALK-UP PHOTOCAPTURE CENTER™ Paper Type & Paper Size Paper Type & Paper Size or to select the type of paper you are using (Letter Glossy, 10x15cm Glossy, 13x18cm Glossy, A4 Glossy, Letter Plain, A4 Plain, Letter Inkjet, A4 Inkjet or 10x15cm Inkjet). Press Set. If you selected A4 or Letter, go to Step 7. If you selected another size, go to Step 8. —OR— If you have finished choosing settings, press Colour Start. Print Size 7 If you selected A4or Letter, press or to select the print size (10x8cm, 13x9cm, 15x10cm, 18x13cm, 20x15cmor Max. Size). Press Set, and go to Step 8. —OR— If you have finished choosing settings, press Colour Start. Printed Position for A4 1 2 3 4 5 6 10 x 8cm 13 x 9cm 15 x 10cm 18 x 13cm 20 x 15cm Max. Size Number of Copies 8 Press to enter the number of copies you want. Press Set. Press to decrease the number of copies. 9 Press Colour Start to print. Your temporary settings will be kept until you take out the media card from the drive (slot), print images or press Stop/Exit. WALK-UP PHOTOCAPTURE CENTER™ 3 - 7 DPOF printing C.Flash Active DPOF printing C.Flash Active DPOF stands for Digital Print Order Format. Major Digital Camera manufacturers (Canon Inc., Eastman Kodak Company, Fuji Photo Film Co. Ltd., Matsushita Electric Industrial Co. Ltd. and Sony Corporation.) created this standard to make it easier to print images from a digital camera. If your digital camera supports DPOF printing, you will be able to select on the Digital Camera display the images and number of copies you want to print. When the memory card (CompactFlash®, SmartMedia®, Memory Stick®, Memory Stick Pro™, SecureDigital™, MultiMediaCard™ and xD-Picture Card™) containing DPOF information is put into your machine, you can print the selected image easily. 1 Insert your media card into the proper drive (slot). The media active message will be shown for 60 seconds and then disappear. Even in that case, you can enter the PhotoCapture mode by pressing PhotoCapture. 2 Press (PhotoCapture). 3 Press or to select Print Images. Press Set. 4 If there is a DPOF file on the card, DPOF Print:Yes the LCD shows: 5 Press or to select DPOF Print:Yes. Press Set. 6 Press or to select Letter Glossy, 10x15cm Glossy, 13x18cm Glossy, A4 Glossy, Letter Plain, A4 Plain, Letter Inkjet, A4 Inkjet or 10x15cm Inkjet. Press Set. If you selected Letter or A4, press or to select the print size (10x8cm, 13x9cm, 15x10cm, 18x13cm, 20x15cmor Max. Size). Press Set. 7 Press ...
Este manual também é adequado para os modelos :Impressoras - DCP-115C (1.43 mb)