


Assessments - 4, GPA: 3.3
(


 )
)
|
Fotos e especificações Cambridge Audio SONATA DR30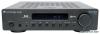 |


Facilidade de uso
Refer to the 'Tuning and listening' section of this manual. Sonata DR30 – In FM manual mode, press and hold to scan to previous or next available stations. Short press once to fine-tune frequency. Refer to the 'Tuning and listening' section of this manual. – In DAB manual mode, you can step through the stations stored alphabetically in the DAB database. Press the • button to step through to previous stations or • to step through to the next stations. If you wish to perform a complete scan of all available stations, press and hold down the • button. Refer to the 'Tuning and listening' section of this manual. Note: When MP3 input is selected, and an iPod (depending on the model and generation) is inserted into the attached DD30 dock, the • buttons will skip through the track lists. Press and hold the buttons, will scan through the current track. ENGLISH Alarm/Clock Press once to enter the Alarm menu. Press and hold to enter the Sleep menu. Refer to the 'Operation instructions' section of this manual. Info Changes the display mode to allow the user to view different information. Tuner data varies depending on the type of broadcast, and signal quality. When in a non-tuner mode, pressing the i button will briefly display the clock time, before returning to show the current source. Brightness Switches the display brightness between bright and dim. Source buttons (CD, DVD, Aux, Tuner, MP3) Press the relevant source button to select desired input source. Menu Press and hold to enter the audio setup menu. It is also used to cycle through the menu items in audio setup and advanced setup menus. Also used in iPod mode, see next section. AR30 DR30 iPod compatibility The supplied remote can also control the basic functions of an iPod when mounted in the DD30 docking station. Refer to 'Using the supplied DD30 docking station for iPod' on how to connect your DD30 docking station. iPod compatibility The DD30 is able to communicate with and control the following iPod models: iPod nano (1st, 2nd, 3rd and 4th generation) iPod (4th generation, photo and 5th generation) iPod classic iPod touch (1st and 2nd generation) iPod mini To use the remote to control a docked iPod, press the MP3 source button then one of the following buttons: Play/Pause Press to begin playback and press again to pause playback. Skip/Scan Press the • button to skip to previous track or press the • button to skip to the next track. Press and hold either buttons, will scan through the current track. Select Press to accept the item/function highlighted on the display menu on your iPod. Pressing the button continuously during playback will cycle the progress bar to track time, scrubber and track ratings on the iPod’s display. Depending on the iPod generation, additional functions will be available on the progress bar. Menu Press once to step back one menu on your iPod. Refer to the 'Operation instruction' section of this manual. Shuffle Press to switch your iPod’s shuffle function on and off. 13 Connections Loudspeakers Note: Do not plug in the mains power lead or turn on the unit until all connections have been made. Y SW L R Digital Outputs 2.1 Channel Audio Out Trigger In 12V @ 30mA Tip +ve On Off Loudspeaker Terminals Right Left AM Loop 300. DD30 Dock FM 75. CD D Aux CD DVD AUX In Out Tun e r Trigger Out Power AC Power Rec Out Sub Audio In R L R L Tr i g ge r I n 12V @ 30mA Tip +ve Audio Out RR LL DD30 dock * PoweredSonata CD30 1 4 5 Loudspeakers 1 Check the impedance of your speakers. Speakers with an impedance of between 4 and 8 Ohms are recommended. The red coloured speaker terminals are positive (+) and the black speaker terminals are negative (-). Make sure correct polarity is maintained at each speaker connector or the sound can become weak and “phasey” with little bass. Prepare the speaker cords for connection by stripping off approximately 10mm (3/8”) or less of the outer insulation. More than 10mm could cause a short circuit. Twist the wires tightly together so there are no loose ends. Unscrew the speaker terminal knob, insert the speaker cable, tighten the knob and secure the cable. 2 Note: All connections are made using standard loudspeaker cable. If an active subwoofer is used, connect via a standard single RCA/phono cable (often referred to as a 'Sub-Link'). 2 DD30 docking station Connect the supplied DD30 docking station to the connector located at the rear. Active subwoofer In/Out 3 Connect the output to an active subwoofer using a standard RCA/phono cable (if required). The input allows the Sonata AR30/DR30 to pass through the subwoofer subwoofer Sonata DV30 output (LFE) of an attached Sonata DV30 DVD player. (optional) * iPod not included 3 AR30 DR30 Aerials Note: Sonata AR30 and DR30 are supplied with a temporary aerial for initial use. For permanent use, outdoor aerials are highly recommended. AM loop aerial Connect each end of the single length antenna to the antenna terminals. Place the antenna as far from the main system as possibl...
Este manual também é adequado para os modelos :receptor e amplificador - SONATA AR30 (982.62 kb)