


Assessments - 0, GPA: 0
(
 )
)
|
Fotos e especificações Yamaha YDP-V240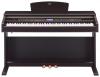 |


por este dispositivo também tem outras instruções :
Facilidade de uso
Owner’s Manual 57 Change a Song’s Style Try Out the Easy Song Arranger Change a Song’s Style Try Out the Easy Song Arranger You can try out the Easy Song Arranger feature using the internal Hallelujah Chorus song. Press the [SONG] button and use the dial to select “009 Hallelujah Chorus.” Press the [START/STOP] button begin playback of the song. An explanation of the Easy Song Arranger feature will appear on the display. As the song progresses the styles will change, changing the o verall image of the song. Keep in mind that you can enjoy using Easy Song Arranger with other songs as well—any songs that include chord data. • The score for Hallelujah Chorus is provided on page 120. NOTE Using the Easy Song Arranger 1 1 Press the [EASY SONG ARRANGER] button. The Song Select display will appear. The currently selected song name and number will be highlighted. The currently selected song number and name are dis- played here. 2 2 Select a Song. Use the dial to select the song you want to arrange. 58 Owner’s Manual Change a Song’s Style 3 Change a Song’s Style Listen to the song. Press the [START/STOP] button to begin playback of the song. Move NOTE • When playing song numbers on to the next step while the song is playing. 010, 011, and 020 to 030 while using the Easy Song Arranger, melody tracks will be automatically muted and no melody will sound. In order to hear the melody tracks you will need to press Song start! the SONG MEMORY buttons [3] to [5]. 4 4 Press the [EASY SONG ARRANGER] button. The Style Select display will appear. The currently selected style name and number will be highlighted. The currently selected style number and name are dis- played here. 5 5 Select a style. Rotate the dial and listen to how the song sounds with different styles. As you select different styles the song will remain the same while only the styles change. 6 6 Select a voice part. If you press and hold the [VOICE] button for longer than a second a voice list will appear. The Melody R and Melody L displays will be selected alternately each time you press the [VOICE] button. NOTE • Because the Easy Song Arranger uses song data you can’t specify chords by playing in the accompaniment range of the keyboard. The [ACMP ON/ OFF] button will not function. • If the time signature of the song and style are different, the time signature of the song will be used. The Melody R and Melody L displays will be selected alternately each time you press the [VOICE] button. The currently selected mel- ody voice will be displayed. Hold for longer than a second 7 7 Select a voice you want to play as a song melody. Use the dial to change the melody voice. As you select different melody • If you press the [INTRO/ENDING/ rit.] button during style playback, the style will stop but the voices the song will remain the same while only the melody voice changes. song will continue playing. Use the [START/STOP] button to stop playback completely. NOTE Owner’s Manual 59 Record Your Own Performance You can record up to 5 of your own performances and save them as Record Your Own Performance You can record up to 5 of your own performances and save them as described on page 99. ¦ Recordable Data 5 melody tracks and 1 Style (chord) track can be recorded. To record your own performance, first use the SONG MEMORY [1]–[5] and [A] buttons to specify the track(s) you want to record on. . SONG MEMORY (Track) [1]–[5] Record the melody par ts. . SONG MEMORY (Track) [A] Records the style pattern and chord par ts. Melody Chords Specify track(s) and record Track 1 Track 2 Track 3 Track 4 Track 5 Track A ¦ Track Mute This instrument allows you to choose whether recorded tracks will play back while you are recording or playing back other tracks (page 89). NOTE • Up to approximately 30,000 notes can be recorded for the five user songs if you record only to the melody tracks. • User songs are saved as SMF (Standard MIDI File) format 0 files. Refer to page 107 for information on SMF files. 60 Owner’s Manual Record Your Own Performance Recording Procedure Record Your Own Performance Recording Procedure 1 1 From the MAIN display press the [SONG] button, then use the dial to select the user song number (031–035) you want to record to. Rotate the dial to select a song number between 031 and 035. CAUTION • If you record to track that contains previously-recorded data the previous data will be overwritten and lost. NOTE • Style accompaniment is automatically turned on when you select the style track [A] for recording. • Style accompaniment cannot turned on or off while recording is in progress. 2 2 Select the track(s) you want to record to and confirm your selection on the display. . Record a Melody Track and the Accompaniment Track Together Press the melody track button [1]–[5] you want to record to while holding the [REC] button. Next, press the [A] button while holding the [REC] button. The selected tracks will be highlighted in the display. Press and hold . Record a Melody track Pre...