


Assessments - 3, GPA: 3.7
(

 )
)
|
Fotos e especificações Stihl BR 500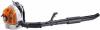 |


Facilidade de uso
For more information see the "Working conditions" section of these Safety Precautions. THE POWER TOOL For illustrations and definitions of the power tool parts see the chapter on "Parts and Controls." Warning! Never modify this power tool in any way. Only attachments supplied by STIHL or expressly approved by STIHL for use with the specific STIHL model are authorized. Although certain unauthorized attachments are useable with STIHL power tools, their use may, in fact, be extremely dangerous. If this tool is subjected to unusually high loads for which it was not designed (e.g. heavy impact or a fall), always check that it is in good condition before continuing work. Check in particular that the fuel system is tight (no leaks) and that the controls and safety devices are working properly. Do not continue operating this machine if it is damaged. In case of doubt, have it checked by your STIHL servicing dealer. Warning! Small particles (e.g. dust) blown through the blower tubes and nozzle can cause a static charging of the blower tubes. This is especially true in low humidity and high dust conditions. In order to reduce the risk of shock from static charging and subsequent injury from loss of control, your blower has features designed to help reduce the build up of static electricity in the blower tubes and equalize the charge with the engine and/or operator: The control handle is designed to conduct static electricity through the throttle cable to the engine and from the handle through the operator to the ground. STIHL offers an optional kit for use in especially dry and dusty conditions. The kit contains: (1) blower tubes made with graphite to help conduct the charge back to the control handle, and (2) a metal ring with "wire" for insertion in the end tube that helps reduce the buildup of static electricity. If your blower is properly assembled and you are still experiencing static shocks, make sure that your foot ware has conductive soles and try operating your unit without gloves, which may be interfering with the conduction of the charge. BR 500, BR 550, BR 600 English THE USE OF THE POWER TOOL Transporting the Power Tool Warning! Always switch off the engine before taking the machine off your back and putting it down. When transporting it in a vehicle, properly secure it to prevent turnover, fuel spillage and damage to the unit. Fuel Your STIHL power tool uses an oil- gasoline mixture for fuel (see the chapter on "Fuel” of your instruction manual). Warning! Gasoline is an extremely flammable fuel. If spilled and ignited by a spark or other ignition source, it can cause fire and serious burn injury or rning! or the power tool. Note that ustible fuel vapor may escape from the fuel system. g Instructions p operty damage. Use extreme caution F wnthco ndling gasoline or fuel mix. Do or bring any fire or flame near To reduce the risk of serious injury from burns, never attempt to refuel the unit until it has been completely removed from the operator. Warning! Fuel your power tool in well-ventilated areas, outdoors. Always shut off the engine and allow it to cool before refueling. Gasoline vapor pressure may build up inside the fuel tank depending on the fuel used, the weather conditions and the tank venting system. In order to reduce the risk of burns and other personal injury from escaping gas vapor and fumes, remove the fuel filler cap on your power tool carefully so as to allow any pressure build-up in the tank to release slowly. Never remove the fuel filler cap while the engine is running. Select bare ground for fueling and move at least 10 feet (3 m) from the fueling spot before starting the engine. Wipe off any spilled fuel before starting your machine. Warning! Check for fuel leakage while refueling and dur ing operation. If fuel leakage is found, do not start or run the engine this happens, change your clothing immediately. care not to get fuel on your cloth- until the leak is fixed and any spilled fuel has been wiped away. Taing Warning! In order to reduce the risk of fuel spillage and fire from an improperly tightened fuel cap, correctly position and tighten the fuel cap in the fuel tank opening. 452BA116 KN To do this with this STIHL cap, raise the grip on the top of the cap until it is upright at a 90° angle. Insert the cap in the fuel tank opening with the raised positioning marks on the grip of the cap and on the fuel tank opening lining up (see illustration). Using the grip, press the cap down firmly while turning it clockwise as far as it will go (approx. a quarter turn). Fold the grip flush with the top of the cap. Grip the cap and check for tightness. If the grip does not lie completely flush with the cap and the detent on the grip does not fit in the corresponding recess in the filler opening, or if the cap is loose in the filler opening, the cap is not properly seated and tightened and you must repeat the above steps. Misaligned, damaged or broken cap N If the cap does not drop fully into th...
Este manual também é adequado para os modelos :Sistemas de ventilação - BR 550 (1.96 mb)
Sistemas de ventilação - BR 600 (1.96 mb)