


Assessments - 2, GPA: 4.5
(

 )
)
|
Fotos e especificações Samsung PS-50C7HR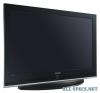 |


Facilidade de uso
The interlace mode is not supported. . The television might operate abnormally if a non-standard video format is selected. . 480i/p, 576i/p, 720p, or 1080i is not available in PC mode. . The PC text quality is optimum in WVGA mode (848 x 480@60Hz). (PS-42C7S) . The PC text quality is optimum in XGA mode (1024 x 768@60Hz). (PS-42C7H/PS-42Q7H) . The PC text quality is optimum in WXGA mode (1360 x 768@60Hz). (PS-50C7H/PS-50Q7H) English - 24 Setting the PC . Preset to the PC mode by pressing the SOURCE ( ) button. 1 Press the MENU ( 2 Press the … or † button to select Setup, then press the ( ) button. 3 Press the … or † button to select PC, then press the ENTER ( ) button. 4 Select the required option by pressing the … or † button, then press the ENTER ( ) button. Available options: Image Lock, Position, Auto Adjustment, Image Reset 5 When you are satisfied with your setting, press the ENTER ( ) button. 6 Press the EXIT button to exit. . Image Lock: Coarse/Fine The purpose of picture quality adjustment is to remove or reduce picture noise. If the noise is not removed by Fine-tuning alone, then adjust the frequency as best as possible (coarse) and Fine-tune again. After the noise has been reduced, re-adjust the picture so that it is aligned on the center of screen. 1 Press the … or † button to select Coarse or Fine, then press the ENTER ( ) button. 2 Press the oe or v button to adjust the screen quality, vertical stripes may appear or the picture may be blurry. Press the ENTER ( ) button. . Position: Adjust the PC’s screen positioning if it does not fit the TV screen. 1 Adjust the position by pressing the …/†/oe/v button. 2 Press the ENTER ( ) button. . Auto Adjustment: Auto adjustment allows the PC screen of set to self-adjust to the incoming PC video signal. The values of fine, coarse and position are adjusted automatically. . Image Reset: You can replace all image settings with the factory default values. . You can select these options simply by pressing the PC button on the remote control. Setup Move Enter Return Plug & Play Language : English Time Game Mode : Off Blue Screen : Off Melody : Off More TV PC Move Enter Return Position Auto Adjustment Image Reset TV Image Lock Move Enter Return 50 Fine 0 TV Position Move Enter Return TV Image Reset has completed. Return Auto Adjustment in progress Please wait English - 25 . .. . .. ” ”” ’ ’’ Exit from the teletext display (depending on the model) . You can change teletext pages by pressing the numeric buttons on the remote control. continued... English - 26 Teletext Feature (depending on the model) The teletext pages are organized according to six categories: Part Contents A Selected page number. B Broadcasting channel identity. C Current page number or search indications. D Date and time. E Text. F Status information. FASTEXT information. . Teletext information is often divided between several pages displayed in sequence, which can be accessed by: . Entering the page number . Selecting a title in a list . Selecting a coloured heading (FASTEXT system) . Press the TV button to exit from the teletext display. English - 27 English - 28 How to Install the Wall Mount Bracket . This installation guide may be different from the PDP User’s manual. Please refer to the proper installation guide for your product. Installation Notes . Contact a technician for installing the wall bracket. . Samsung Electronics is not responsible for any damages to the product or harm to customers when the installation is done by the customer. . This product is for installing on cement walls. The product may not stay in place when installed on plaster or wood. . The package contents and parts supplied for the wall mount are subject to change without prior notice. Mounting Kits . Please use only the parts and components provided for wall mount installation. How to assemble the Wall Mount Bracket Wall Mount Bracket Plastic Hanger : 4 EA SCREW : 4 EA ASSY-HINGE Screws 1EA LEFT :1EA RIGHT :1EA Captive Screws Wall Mount Bracket ASSY-HINGE (RIGHT) Separate ASSY-HINGE into Left and Right. ASSY-HINGE (LEFT) 1 The wall mount bracket is delivered separately. Please tighten the captive screw in the direction of the arrow after assembling the bracket. Install the Wall Mount Bracket after the screws are securely inserted into the wall. Instructions on Securing the SET to the Wall Mount Bracket . The exterior of the SET may be different than the picture. (Assembly and installation of the plastic hanger is the same.) 1 Remove the screws from the back of the PDP. 2 Use the screw and assemble the plastic hanger. (Please refer to the following picture.) . 1 Please ask the installers to install the wall mount bracket. 2 Please be sure to check if the plastic hanger is completely secured on both the left and right side after hanging the SET on the wall mount bracket. 3 Please avoid catching your fingers while installing and adjusting the angle. 4 Please tightly secure the wall mount bracket to the wall to avoid ...
Este manual também é adequado para os modelos :TV - PS-42C7HR (1.39 mb)
TV - PS-42C7SR (1.39 mb)
TV - PS-42Q7HR (1.39 mb)
TV - PS-50Q7HR (1.39 mb)