


Assessments - 0, GPA: 0
(
 )
)
|
Fotos e especificações Brother PT-1010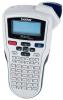 |


Facilidade de uso
AC Adapter AD-24 Cutter Unit TC-5 (replacement) Switching Upper Case/Lower Case Making Two Line Text Move the cursor to where the second line starts and press . Use either 3/8" (9 mm) or 1/2" (12 mm) wide tape for two line text. Entering Symbols > • To go to the next group, press . • To cancel operations, press . Entering Accented Characters > > / > • To cancel operations, press . • The order of accented characters differ by the selected LCD language. To Clear By pressing the Backspace Key, the letters will be deleted one by one. All text and settings will be cleared. > [Txt&Format] . Only text will be cleared. > [Text Only] . Group Symbols Group Symbols 1 8 2 9 3 10 4 11 5 12 6 13 7 Accented Characters Accented Characters A a C c D d E e G g I i K k L l N n O o R r S s T t U u Y y Z z Upper case ( ON) Lower case ( OFF) Display Label image [Size] > [Size] > [Large] Automatically adjusts the text size according to the tape width. [Width] > [Width] > [.2] [Style] (Vertical) > [Style] > [Vertical] [Underline/Frame] > [Undl/Frm] > [Undl] Frames can not be printed on 9/64" (3.5mm) tape. [Tab] You can make aligned texts by setting tabs. Example: To set a tab between "ABC" and "D" The cursor should be positioned where you set a tab. > > [Tab] [Tab Length](Auto / 0.0" - 4.0" (0-100mm)) > [Tab Length] > • You can also select the length by entering the length with Number keys. • To return to [Auto], press . [Label Length](Auto / 1.2" - 12.0" (30-300mm)) > [Length] > • You can also select the length by entering the length with Number keys. • To return to [Auto], press . [Auto Format] You can choose label length from six formats to create labels for various applications. > [A/F] > [VCR VHS] Text Preview You can preview the text before printing. > [Preview] • The LCD shows the whole text and the label length (inch/mm), then returns to the original text. • Only the text can be previewed, not the font, style, size, underline/frame or any additional features. Feeding (Tape Feed) > [Feed] Printing • To cut off the label, push in the tape cutter lever on the upper-right corner of the machine. • To prevent damage to the tape, do not try to cut while the message "Print" or "Feed" is displayed. • When Chain Print is set, "OK to Feed?" will appear. (See the Note of [Chain Prt] in [Margin] (Tape Margin). ) [Margin] (Tape Margin) > [Margin] > [Full] [Full]/[Half]/[Narrow] is for leaving equal margins on both sides of the text. NOTE: Cut along the printed dots (:) with scissors so the text is centered in the label. [Chain Prt] (Chain Print) is for printing more than 1 copy of a label with minimum margin