


Assessments - 3, GPA: 4.7
(
 )
)
)
|
Fotos e especificações Sony HDR-XR100E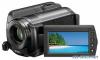 |


por este dispositivo também tem outras instruções :

Câmaras de vídeo - HDR-XR100E (35.58 mb)
Câmaras de vídeo - HDR-XR100E (34.7 mb)
Câmaras de vídeo - HDR-XR100E (35.44 mb)


Facilidade de uso
Starting PMB (Picture Motion Browser) Double-click the “PMB” short-cut icon on the computer screen. If the icon is not displayed on the computer screen, click [Start] . [All Programs] . [Sony Picture Utility] . [PMB] to start “PMB.” You can view, edit, or create discs of movies and photos using “PMB.” Reading “PMB Guide” Refer to the PMB Guide for details of the “PMB.” Double-click the PMB Guide short- cut icon on the computer screen to open the PMB Guide. If the icon is not displayed on the computer screen, click [Start] . [All Programs] . [Sony Picture Utility] . [Help] . [PMB Guide]. You can also open the PMB Guide from [Help] of “PMB.” Creating a high definition image quality (HD) disc You can create a high definition image quality (HD) disc by putting together high definition image quality (HD) movies previously imported to your computer (p. 30). In this section, the procedure for recording a high definition image quality (HD) movie on a DVD disc (p. 27) is explained. You can play a high definition image quality (HD) disc on AVCHD format playback devices, such as a Sony Blu-ray disc player and a PLAYSTATION.3. You cannot play the disc on ordinary DVD players (p. 27). 1 Turn on your computer, and place an empty disc on the DVD drive. See page 28 for the type of discs you can use. If any software starts automatically, shut it down. 2 Double-click the “PMB” short-cut icon on the computer screen to start “PMB.” You may start “PMB” also by clicking [Start] . [All Programs] . [Sony Picture Utility] . [PMB]. 3 Click [Folders] or [Calendar] on the left side in the window, and select the folder or date, then select the high definition image quality (HD) movies. High definition image quality (HD) movies are marked with . You cannot save photos on a disc. To select plural movies, hold the Ctrl key down and click thumbnails. 4 At the top of the window, click [Manipulate] . [AVCHD (HD) Creation]. The window used to select movies appears. To add movies to the previously selected ones, select the movies in the main window and drag and drop onto the window for selecting movies. 5 Follow the instructions on the screen to create a disc. It may take a long time to create a disc. Playing a high definition image quality (HD) disc on a computer You can play back high definition image quality (HD) discs using “Player for AVCHD” that is installed together with “PMB.” To start “Player for AVCHD,” Click [Start] . [All Programs] . [Sony Picture Utility] . [Player for AVCHD]. See the “Player for AVCHD” help on the operation. Movies may not be played smoothly depending on the computer environment. Creating a Blu-ray disc You can create a Blu-ray disc with a high definition image quality (HD) movie previously imported to a computer (p. 30). To create a Blu-ray disc, the BD Add-on Software for “PMB” must be installed. Click [BD Add-on Software] on the installation screen of “PMB,” and install this plug-in according to the on-screen instructions. Connect your computer to the internet when you install [BD Add-on Software]. Place an empty Blu-ray disc in the disc drive, and click [Manipulate] . [Blu- ray Disc (HD) Creation] in step 4 of “Creating a high definition image quality (HD) disc” (p. 31). Other procedures are the same as that for creating a high definition image quality (HD) disc. Your computer must support the creation of Blu-ray discs. BD-R (unrewritable) and BD-RE (rewritable) media are available for creating Blu-ray discs. You cannot add contents to either type of disc after creating the disc. Creating a standard definition image quality (SD) disc that can be played on ordinary DVD players You can create a standard definition image quality (SD) disc by selecting movies and photos previously imported to your computer (p. 30). You may select high definition image quality (HD) movies as sources. However, image quality is converted from high definition (HD) to standard definition (SD). It will take a longer time for converting the image quality of the movies than it took to actually record the movies. 1 Turn on your computer, and place an empty disc on the DVD drive. See page 28 for the type of discs you can use. If any software starts automatically, shut it down. 2 Double-click the “PMB” short-cut icon on the computer screen to start “PMB.” You may start “PMB” also by clicking [Start] . [All Programs] . [Sony Picture Utility] . [PMB]. 3 Click [Folders] or [Calendar] on the left side in the window, and select the folder or date, then select the movies and photos. High definition image quality (HD) movies are marked with . To select plural movies and photos, hold the Ctrl key down and click thumbnails. 4 At the top of the window, click [Manipulate] . [DVD-Video (SD) Creation]. The window used to select movies and photos appears. To add movies and photos to the previously selected ones, select the movies and photos in the main window and drag and drop onto the window for selecting movies and photos. 5 Follow the instructions on ...
Este manual também é adequado para os modelos :Câmaras de vídeo - HDR-XR105E (15.23 mb)
Câmaras de vídeo - HDR-XR106E (15.23 mb)
Câmaras de vídeo - HDR-XR200E (15.23 mb)
Câmaras de vídeo - HDR-XR200VE (15.23 mb)