


Assessments - 3, GPA: 4
(

 )
)
|
Fotos e especificações Sony HDR-XR105E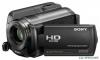 |


por este dispositivo também tem outras instruções :
Câmaras de vídeo - HDR-XR105E (1.23 mb)
Câmaras de vídeo - HDR-XR105E (35.58 mb)
Câmaras de vídeo - HDR-XR105E (34.7 mb)
Câmaras de vídeo - HDR-XR105E (35.44 mb)
Facilidade de uso
Slide the BATT (battery) release lever . and remove the battery pack .. To use a wall outlet (wall socket) as a power source Make the same connections as “Step 1: Charging the battery pack.” Notes on the battery pack and the AC Adaptor When you remove the battery pack or disconnect the AC Adaptor, close the LCD screen and make sure that the (Movie) lamp/ (Photo) lamp (p. 12)/ACCESS lamps (p. 10)/access lamp(p. 41) are turned off. Do not short-circuit the DC plug of the AC Adaptor or battery terminal with any metallic objects. This may cause a malfunction. In the default setting, the power turns off automatically if you leave your camcorder without any operation for approximately 5 minutes, to save battery power ([A.SHUT OFF]). Charging the battery pack abroad You can charge the battery pack in any countries/regions using the AC Adaptor supplied with your camcorder within the AC 100 V - 240 V, 50 Hz/60 Hz range. Do not use an electronic voltage transformer. 11 (Movie): To record movies (Photo): To record photos Step 2: Turning the power on, and setting the date and time 1 Open the LCD screen of your camcorder. Your camcorder is turned on. To turn on your camcorder when the LCD screen is open, press POWER. POWER 2 Select the desired geographical area with /, then touch [NEXT]. To set the date and time again, touch (HOME) . (SETTINGS) . [CLOCK/LANG] . [CLOCK SET]. When an item is not on the screen, touch / until the item appears. 3 Set [SUMMERTIME], date and time, then touch . The clock starts. If you set [SUMMERTIME] to [ON], the clock advances 1 hour. The date and time does not appear during recording, but they are automatically recorded on the recording media, and can be displayed during playback. To display the date and time, touch (HOME) . (SETTINGS) . [VIEW IMAGES SET] . [DATA CODE] . [DATE/TIME] . . . . You can turn off the operation beeps by touching (HOME) . (SETTINGS) . [SOUND/DISP SET] . [BEEP] . [OFF] . . . . Touch the button on the LCD screen. 12 To turn off the power Close the LCD screen. The (Movie) lamp flashes several seconds, then the camcorder is turned off. POWER You can turn off your camcorder also by pressing POWER. When [POWER ON BY LCD] (p. 46) is set to [OFF], turn off your camcorder by pressing POWER. Changing the language setting You can change the on-screen displays to show messages in a specified language. Touch (HOME) . (SETTINGS) . [CLOCK/LANG] . [LANGUAGE SET] . the desired language . . . . Recording Recording Recording movies In the default setting, movies are recorded with high definition image quality (HD) on the hard disk (p. 40, 45). . Fasten the grip belt. . Open the LCD screen of your camcorder. Your camcorder is turned on. To turn on your camcorder when the LCD screen is already open, press POWER. For HDR-XR100E/XR105E/XR106E Open the lens cover. 14 Zoom lever Wide Telephoto [STBY] . [REC] . 90 degrees (max.) . 90 degrees to the camcorder . 180 degrees (max.) Recording . Press START/STOP to start recording. To stop recording, press START/STOP again. Move the power zoom lever slightly for a slower zoom. Move it further for a faster zoom. If you close the LCD screen during recording, the camcorder stops recording. See page 56 on the recordable time of movies. The maximum continuous recordable time of movies is about 13 hours. When a movie file exceeds 2 GB, the next movie file is created automatically. You can change the recording media and image quality (p. 40, 45). You can change the recording mode of movies (p. 45). [STEADYSHOT] is set as follows in the default setting. HDR-XR100E/XR105E/XR106E: [ON] HDR-XR200E/XR200VE: [ACTIVE] To adjust the angle of the LCD panel, first open the LCD panel 90 degrees to the camcorder (.), and then adjust the angle (.). If you rotate the LCD panel 180 degrees to the lens side (.), you can record movies/photos in mirror mode. In the default setting, a photo is recorded automatically when the camcorder detects the smile of a person during movie recording ([SMILE SHUTTER]). An orange frame appears around a face targeted for possible smile detection shot. You can change the setting in the menu. You can increase the zooming level by using the digital zoom. Set the zooming level by touching (HOME) . (SETTINGS) . [MOVIE SETTINGS] . [DIGITAL ZOOM] . the desired setting . . . . When viewing movies on an x.v.Color-compliant TV, record movies with the x.v.Color function. Touch (HOME) . (SETTINGS) . [MOVIE SETTINGS] . [X.V.COLOR] . [ON] . . . . Some settings may be required on a TV to view the movies. Refer to the instruction manuals of the TV. 15 Shooting photos In the default setting, photos are recorded on the hard disk (p. 40). . Open the LCD screen of your camcorder. Your camcorder is turned on. To turn on your camcorder when the LCD screen is already open, press POWER. For HDR-XR100E/XR105E/XR106E Open the lens cover. . Press MODE to turn on the (Photo) lamp. The aspect ratio of the screen becomes 4:3. 16 Flashes . Lights up Zoom lever Wide T...
Este manual também é adequado para os modelos :Câmaras de vídeo - HDR-XR100E (15.23 mb)
Câmaras de vídeo - HDR-XR106E (15.23 mb)
Câmaras de vídeo - HDR-XR200E (15.23 mb)
Câmaras de vídeo - HDR-XR200VE (15.23 mb)