


Assessments - 5, GPA: 3.8
(

 )
)
|
Fotos e especificações Sony ICD-UX70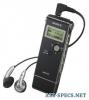 |


por este dispositivo também tem outras instruções :
Facilidade de uso
It varies depending on the remaining power and the condition of the battery. It also takes more time if the temperature of the battery is low, or if the battery is charged while you are transferring data to the IC recorder. If the IC recorder cannot be connected to your computer directly, use the supplied USB connection support cable. .Tip You can charge the rechargeable battery by connecting the IC recorder to an AC outlet using a USB AC adaptor (not supplied) (page 60). .Notes . While “ ” or “ ” is flashing instead of the remaining battery/charging indicator, you cannot charge the battery. Charge the battery in an environment with a temperature of 5 °C - 35 °C. . If “USB CHARGE” in the “DETAIL MENU” menu is set to “OFF,” you cannot charge the battery using your computer. Set “USB CHARGE” to “ON” (page 43). . Do not use manganese battery for this IC recorder. . During playback using the built-in speaker, you cannot charge the battery. . When you use the IC recorder with a rechargeable battery, the remaining battery/ charging indicator may not light fully. Clock setting display appears and the year section flashes when you insert battery for the first time, or when you insert battery after the IC recorder has been without battery for a certain period of time. Please refer to step 3 in “Step 2: Setting the Clock” on page 16 to set the date and time. 1 1 GB When replacing/charging the battery The remaining battery/charging indicator on the display shows the battery condition. Battery remain indication : Replace the old battery with a new one or charge the rechargeable battery. . : “LOW BATTERY“ appears and the IC recorder will stop operation. Battery life*1 When using Sony LR03 (SG) (size AAA) alkaline battery Recording ST*3 STSP*4 mode Recording Approx. 9 hr. Approx. 9 hr. 30 min. 30 min. Playback*2 Approx. 14 hr. Approx. 14 hr. through speaker Playback Approx. 30 hr. Approx. 30 hr. using the headphones Recording STLP*5 SP*6 mode Recording Approx. 11 hr. Approx. 10 hr. Playback*2 Approx. 14 hr. Approx. 14 hr. through 30 min. 30 min. speaker Playback Approx. 32 hr. Approx. 32 hr. using the headphones Recording LP*7 Music file mode (128 kbps/ 44.1 kHz) Recording Approx. 12 hr. – Playback*2 Approx. 15 hr. Approx. 14 hr. through speaker Playback Approx. 34 hr. Approx. 30 hr. using the headphones Getting Started (hr. : hours/min. : minutes) 1 1 GB When using Sony NH-AAA rechargeable battery Recording ST*3 STSP*4 mode Recording Approx. 9 hr. Approx. 9 hr. Playback*2 Approx. 13 hr. Approx. 13 hr. through speaker Playback Approx. 28 hr. Approx. 28 hr. using the headphones Recording STLP*5 SP*6 mode Recording Approx. 10 hr. Approx. 9 hr. 30 min. Playback*2 Approx. 13 hr. Approx. 13 hr. through 30 min. 30 min. speaker Playback Approx. 30 hr. Approx. 30 hr. using the headphones Recording mode LP*7 Music file (128 kbps/ 44.1 kHz) Recording Approx. 11 hr. – Playback*2 Approx. 14 hr. Approx. 13 hr. through speaker Playback Approx. 31 hr. Approx. 28 hr. using the 30 min. headphones (hr. : hours/min. : minutes) *1 The battery life may shorten depending on how you operate the IC recorder. *2 When playing back music through the internal speaker with the volume level set to 22 *3 ST : Stereo high quality recording mode *4 STSP : Stereo standard recording mode *5 STLP : Stereo long play recording mode *6 SP : Monaural standard play recording mode *7 LP : Monaural long play recording mode 1 1 GB Note while accessing The IC recorder is accessing data when an updating animation appears in the display window or the operation indicator flashes in orange or is lit in red. While the IC recorder is accessing data, do not remove the battery or connect or disconnect the USB AC adaptor (not supplied). Doing so may damage the data. .Note If the IC recorder is required to process a large amount of data, an updating animation may be displayed for an extended period of time. This is not a malfunction of the IC recorder. Wait until the animation disappears before starting operation. Step 2: Setting the Clock . Control key (./.) ENT /MENU You need to set the clock to use the alarm function or record the date and time. Clock setting display appears when you insert battery for the first time, or when you insert a battery after the IC recorder has been without battery for a certain period of time. In this case, proceed from step 3. Getting Started 1 1 GB 1 Select “DATE & TIME” in the menu. 3 Press the control key toward .or . Press and hold /MENU for more . to set the year, month, day, hour, than one second. and minute in sequence, and then The menu mode will be displayed in press ENT. the display window. . Press the control key toward .or . to select “DETAIL MENU,” and then press ENT. . Press the control key toward .or . to select “DATE & TIME,” and then press ENT. 2 Press the control key toward .or . to select “07y1m1d,” and then press ENT. 4 Press . (stop) to return to the normal display. .Tip Press /MENU to return to the previous operation. . ...
Este manual também é adequado para os modelos :Ditado - ICD-UX60 (1.69 mb)
Ditado - ICD-UX80 (1.69 mb)